There are a number of ways you can calculate grades within Blackboard Ultra to display them to your students. For example, you may want to show students their current grade in the course (Overall grade OR Total Calculation) or create a column that totals a portion of their grades such as all lab content (Calculation OR Total Calculation),
-
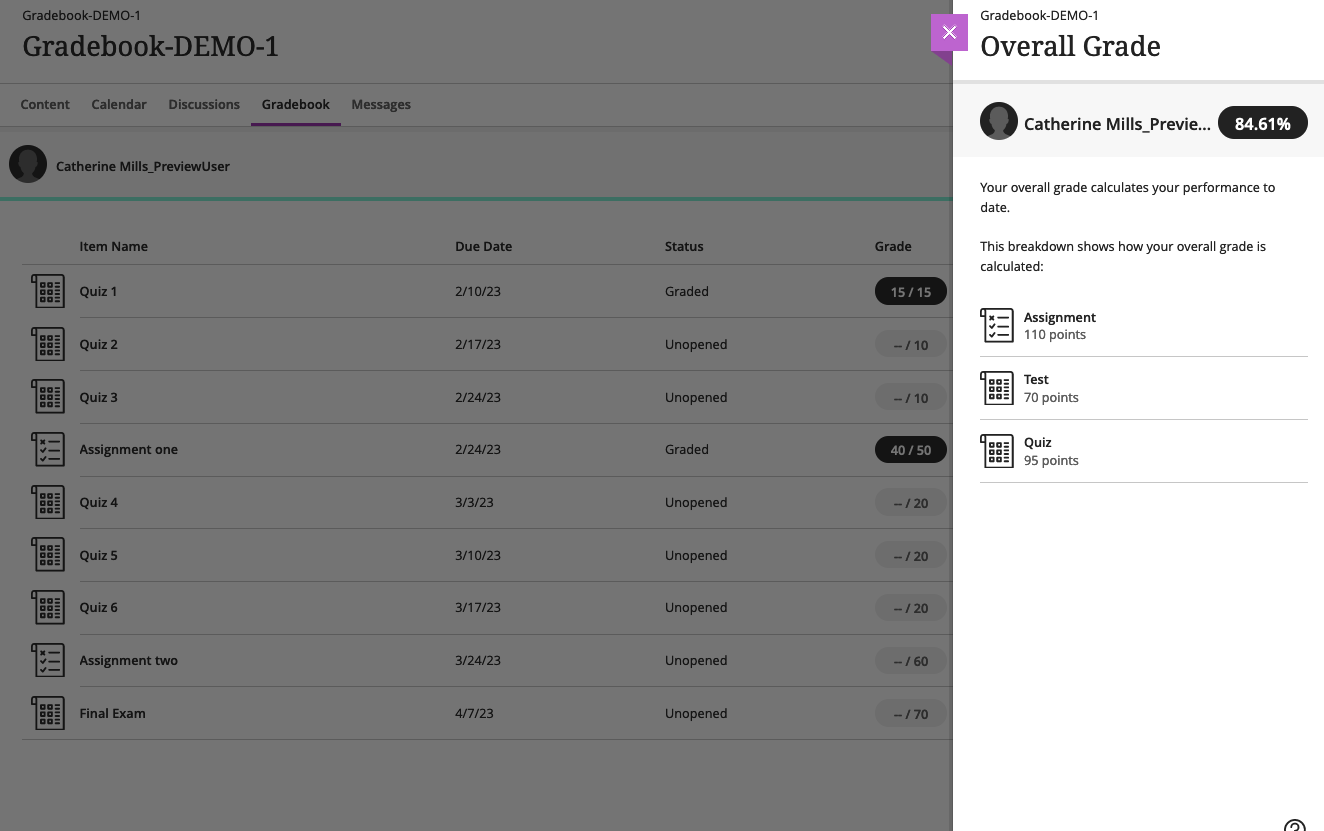
Overall Grade: You choose which items will be included in the calculation and the grade is displayed in the grade schema of your choice. Items can be grouped within categories OR independently. The overall grade will display to students in the top right corner of their gradebook (e.g. Current grade: A+).
-
Total Calculation: Similar to an overall grade, you choose what to include within the total calculation. You can give the total calculation a name, which is them displayed in the student gradebook.
-
Calculation: Use ‘Add calculation’ when computing a formula-based calculation (e.g., sum of all tests) based on other graded items. As above, you can give the calculation a name, which will appear as a row in the student gradebook.
Overall Grade
Navigate to the Gradebook tab on the top navigation and click the gear icon for the Gradebook Settings. Click Set up overall grade.

There are three ways to set up the Overall Grade:
-
Weighted Total - A weighted calculation generates a grade based on the result of selected graded items, categories, other calculations, and the respective percentages you have assigned them.
-
Points - The score shows points earned, related to the points allowed (e.g., an exam score of 45/65 - the student accumulates 45 points). When creating an overall grade or calculated column using points, the column generates a grade based on the cumulative points earned, related to the points allowed.
-
Advanced - Create a total using a custom calculation.
Hide Gradebook items
If you have assessment items appearing in your Gradebook that you wish to hide, navigate to the Gradebook settings (gear icon)> Item Management > Manage gradebook items. Turn off the visibility for the items you wish to hide.
Setting up a weighted overall grade
The weighted overall grade is the most commonly used type as assessments can have any point value and you will not need to build out any calculations.
When you select Weighted from the list, by default:
-
Assessments will appear in the category you have assigned or they have been defaulted to.
-
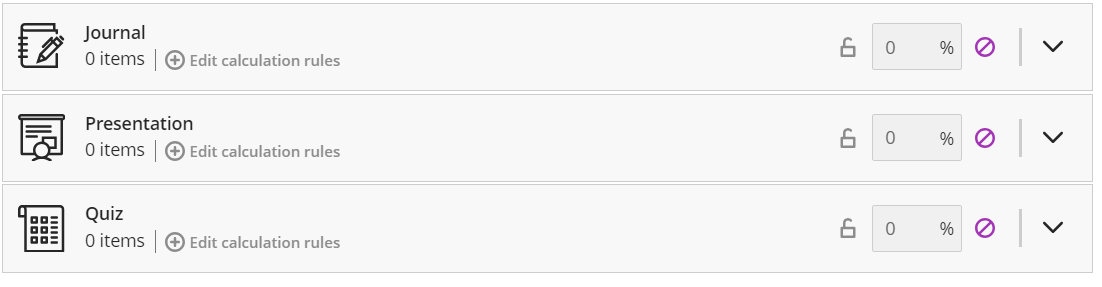
Every category (even those that have no items) will be assigned an equal percentage of the overall course.
For each gradable item in your course, you will choose if you want to calculate it within a category (groups of assessments) or as an individual (stand-alone) items. You may also use a combination of categories and stand-alone items.
Review these steps when creating your Overall Grade:
1. Exclude items
-
By default, all categories will be given equal weighting in your overall grade. Click on the Exclude icon (circle with a line) to remove items and categories from the overall grade calculation.
-
If a category has zero items in it, it can be excluded. If an assessment is in the wrong category, you can change it by editing the category in the specific assessment. Excluded items will have a purple exclude icon next to them. Click on the icon again to undo. You cannot delete unused categories.
When should I use Categories vs when do I unlink items?
You might want to use Categories if:
-
The items are worth similar percentages or points
-
The assessments have a similar purpose or topic (such as weekly quizzes, labs, or discussions)
-
You are not sure how many of one type of assessment you will assign during the semester.
-
For example, you have short quizzes in every class, but only if there is time. You can create quizzes any time during the semester and assign them to a quiz category. With every additional quiz you assign to the category, the weight of each item auto-adjusts.
-
Unlink items from Categories if:
-
You would like students to see a detailed breakdown of items when they view their overall grade.
-
The items in the category are not like items.
-
Items in the category are worth different percentages AND and are not weighted based on their points.
-
You have a mix of weighted categories. You will need to decide if you want to unlink the items weighted proportionally or equally and have them as stand-alone items.
2. Unlink items
-
Open the category by clicking the down arrow (click the arrow again to collapse the category).
-
Click on the link symbol to remove the item from the category (click the link again to put the item back in the category). If the category is empty, you can exclude it.
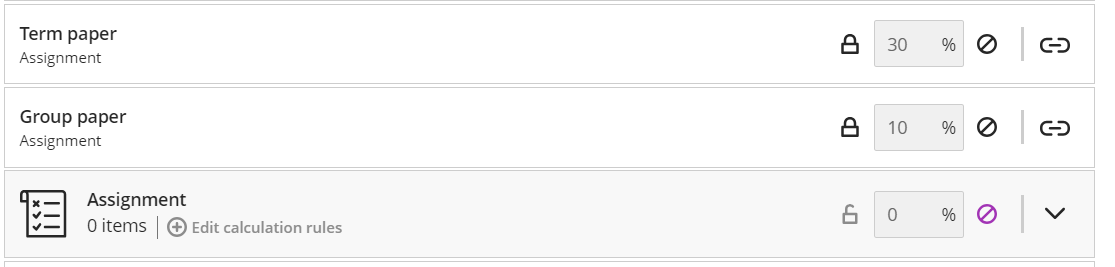
If you assign any Gradebook items as No Category, you will find them in a folder named Additional Items. If you would like No Category items to be stand alone, you would have to unlink them from Additional Items.
3. Weigh items in Categories
-
You have the option to weigh items in categories proportionally or equally. The weighting style you choose will be applied to all categories in your gradebook.
Proportionally: When weighing proportionally, items within a category are weighed based on their points. For example, an item that has 20 points will be worth twice as much as an item that has 10 points.
Equally: When weighing equally, all items will be worth the same percentage regardless of the number of points they have.
-
If you add additional gradable items to a category, the percentage of each item will recalculate.
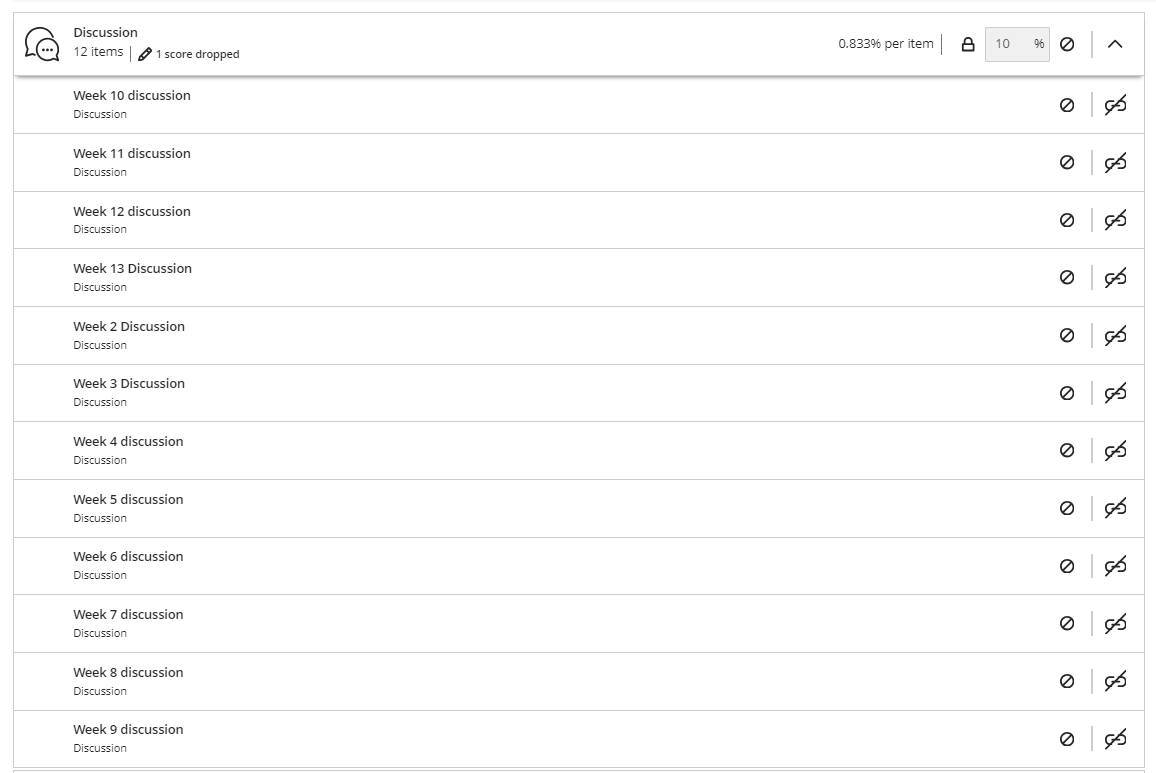
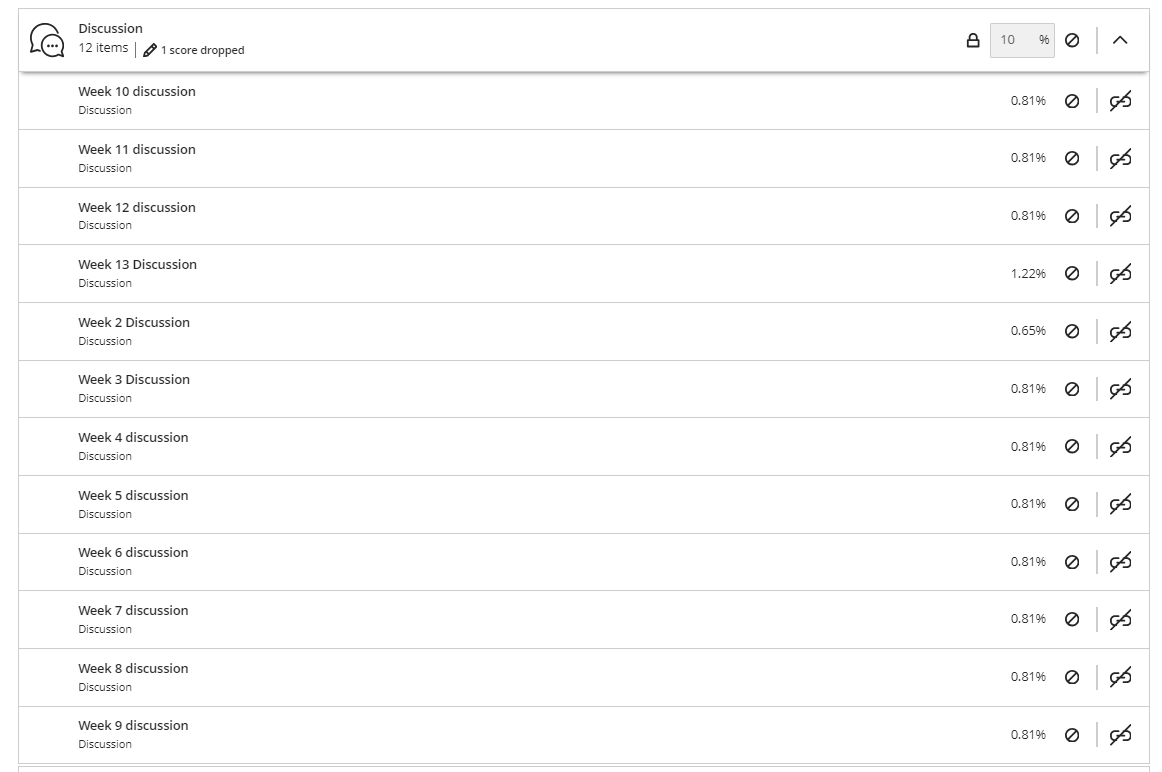
-
To drop scores or use only a specific score in a category, click Edit calculation rules, toggle Enable, and choose either Drop Scores or Use Only. Edit settings as necessary.
3a. Drop highest/lowest score score
You can drop the lowest score in a Gradebook category in the Overall Grade. Multiple scores (lowest or highest) can be dropped from a category. Choose this method if all the assessments within the grade category have the same point value.
-
In the Overall Grade, navigate to the category that has items you want to drop and click Edit Calculation Rules.
-
Toggle the Enable button on.
-
Enter the number of items you would like to drop. This can be the lowest scores, highest, or both. You also have the option to use only the lowest or highest score.
3b. Change a category:
-
Navigate to Gradebook > Settings (gear icon) > Manage Gradebook Items (Item Management).
-
For bulk category change: Select items on the left and click Edit Category and select the new category in the drop down menu.
-
Changing a single item: Select the three dots for the item you want to edit and choose the new category in the drop down menu.
-
3c. Create a new category
If you want to create a customized category, go to Gradebook > Gradebook settings (gear icon) > Grade Categories > Add New Category. Give the category a name.
4. Assign percentages and lock items
-
Assign percentages to grading categories and items. The total percentage must equal 100%.
-
Lock items so that the percentage you set does not recalculate when you assign other percentages. Unlock items to assign a new percentage.
Overall grade settings
Check the following settings before saving your Overall Grade:
-
Total type: The default total is Running Total. Uncheck the box to have a Cumulative Total.
-
Grade display: Select how the overall grade is displayed. Choose between Points (if you have a Points overall grade), Percentage, Complete/Incomplete, Letter Grade, or Complete/Incomplete.
-
Select/deselect Show to Students.
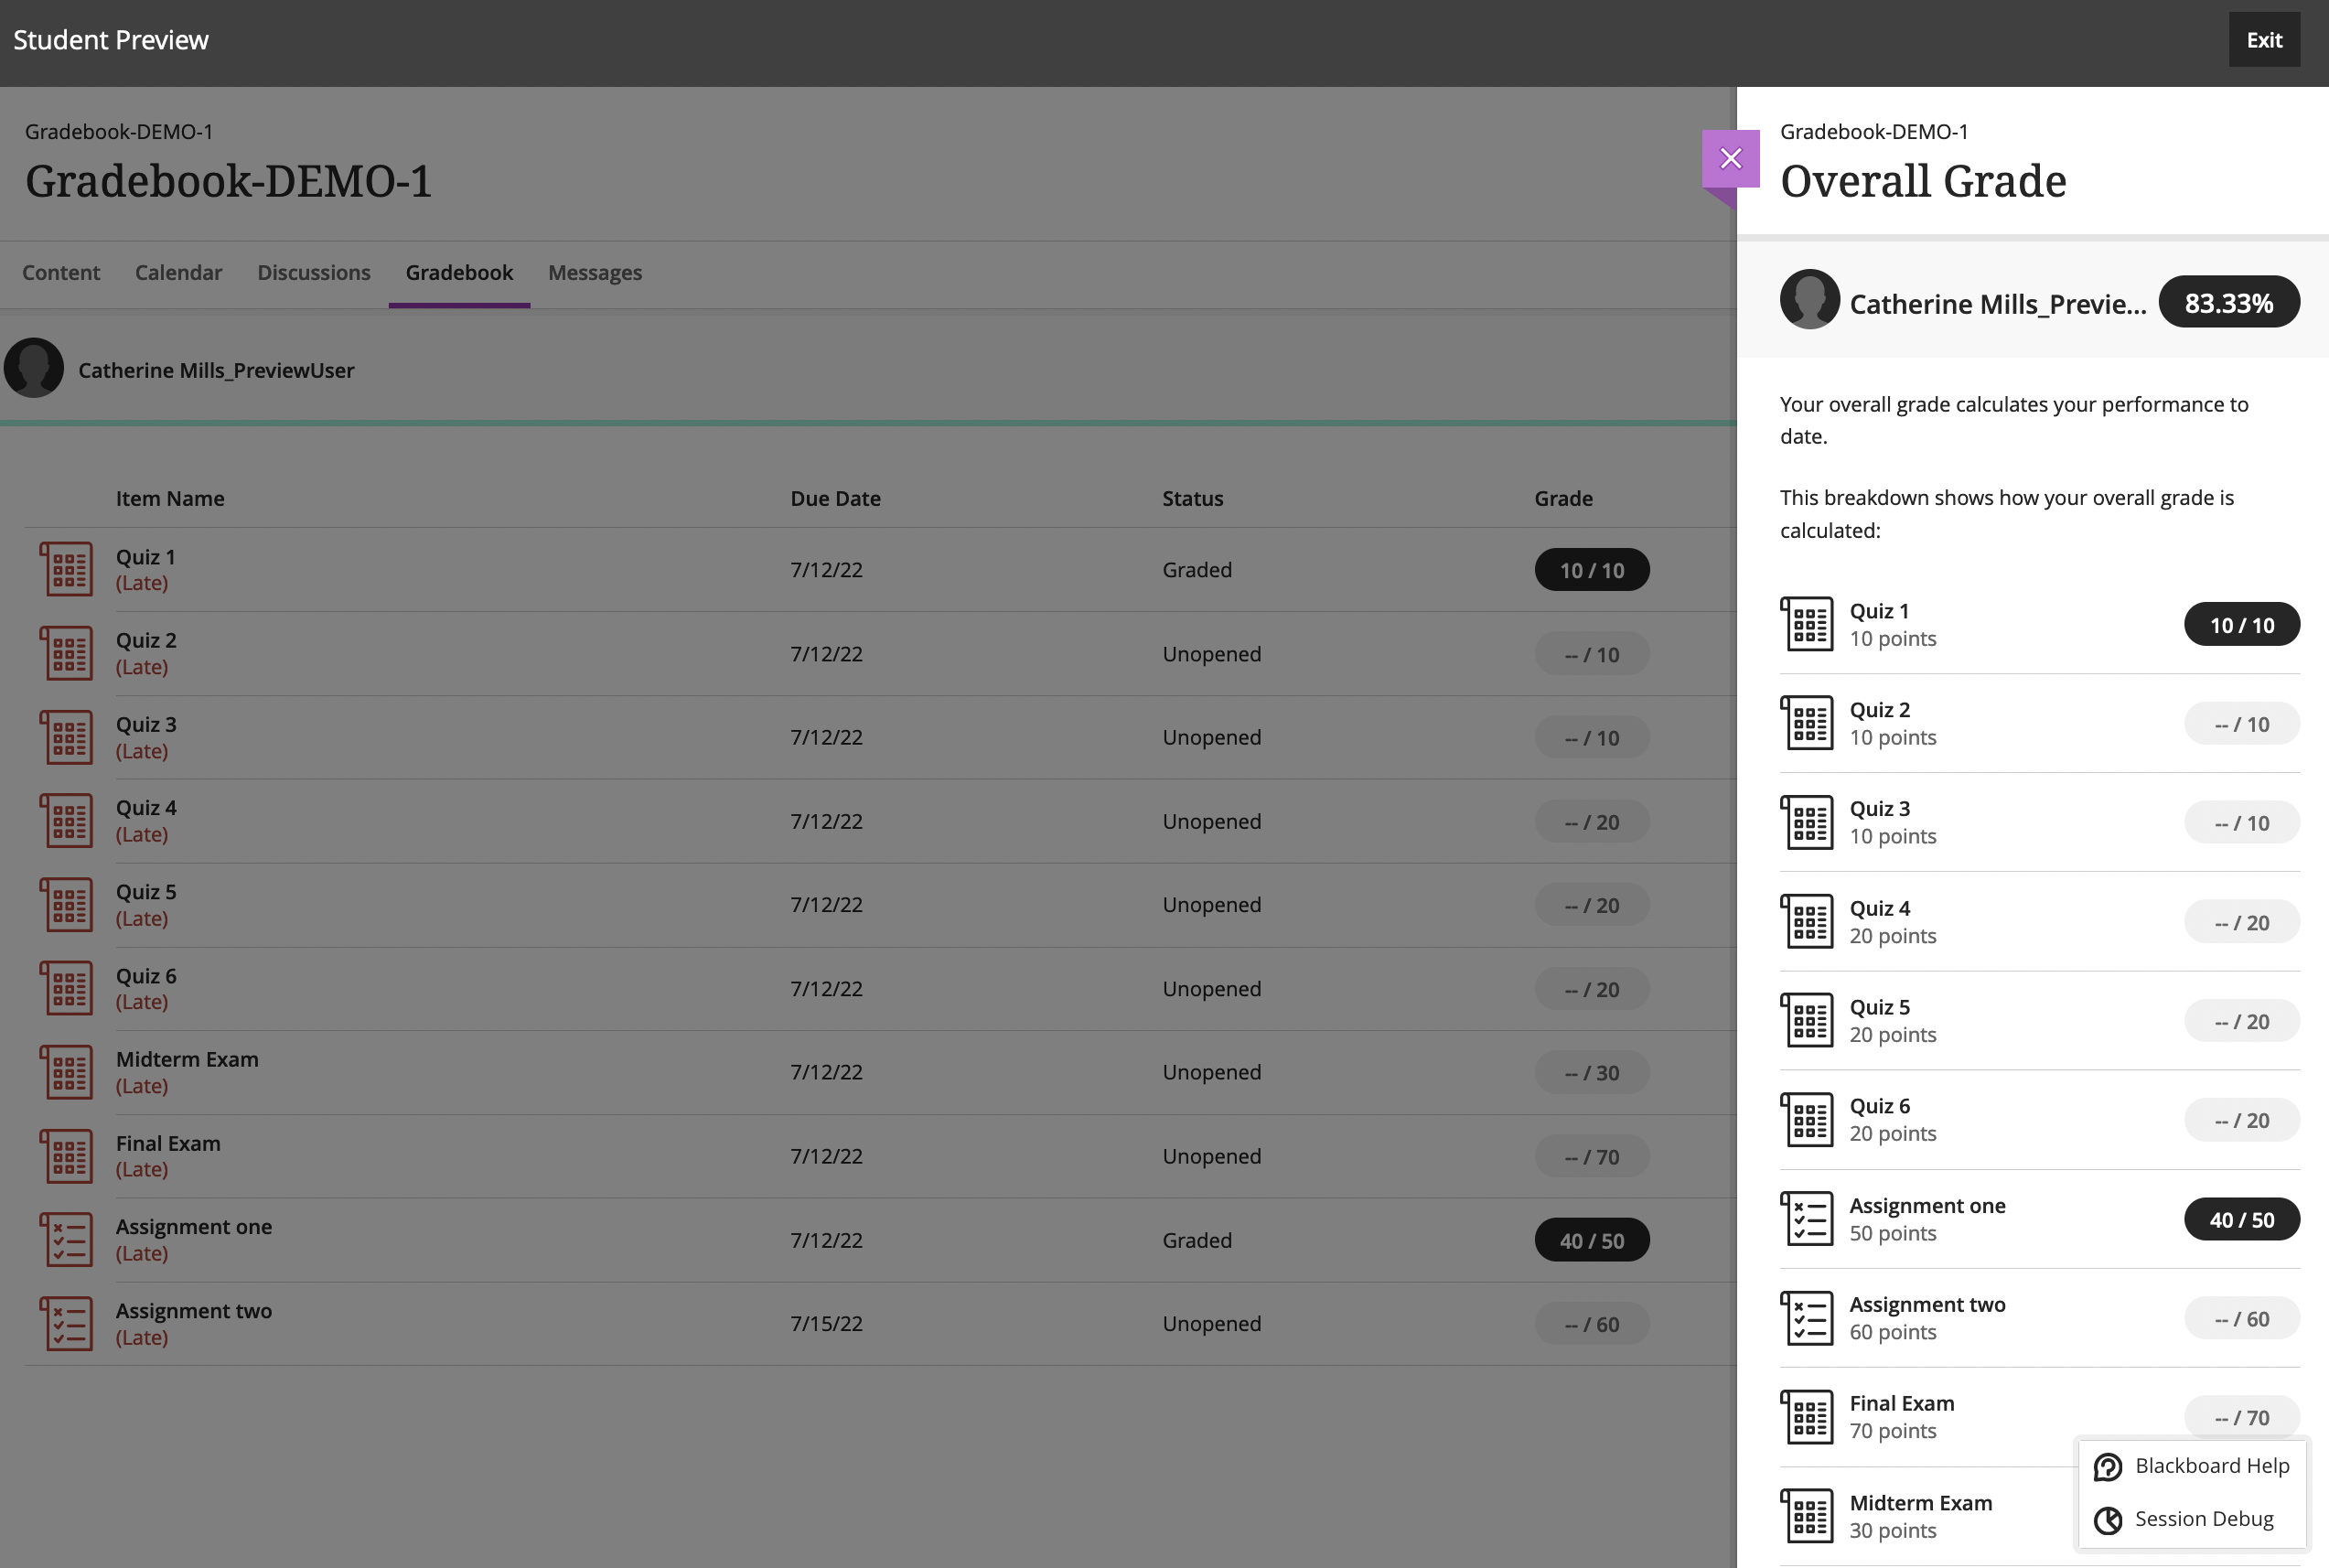
How students see their Overall Grade
Students can see their Overall Grade breakdown by clicking on it in the Gradebook. When items are in categories, they do not see their scores for individual items.
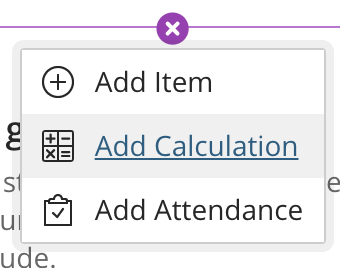
Add an additional calculation
Add a Total Calculation
With a Total Calculation, just like an Overall Grade, you are able to link/unlink items, exclude categories, edit calculations, and select a grade schema. You also have the option to include all items in the grade calculation with zeros for items with no marks. A total calculation can be used to show a group of assessments, such lab activities.
-
To add a Calculation, hover between the columns (in grid view) or rows (list view) and click the purple + symbol.
-
You will be prompted to add a title to the Total Calculation (i.e., Overall grade for lab activities). To change your title, hover over the title and click to edit.
-
There is an option to add a description in the Settings. However, this description is only visible to instructors.
Add a Calculation
-
Navigate to the Gradebook tab and select either the Gradable items or Grades view.
-
Click the plus sign
and select Add Calculation.
-
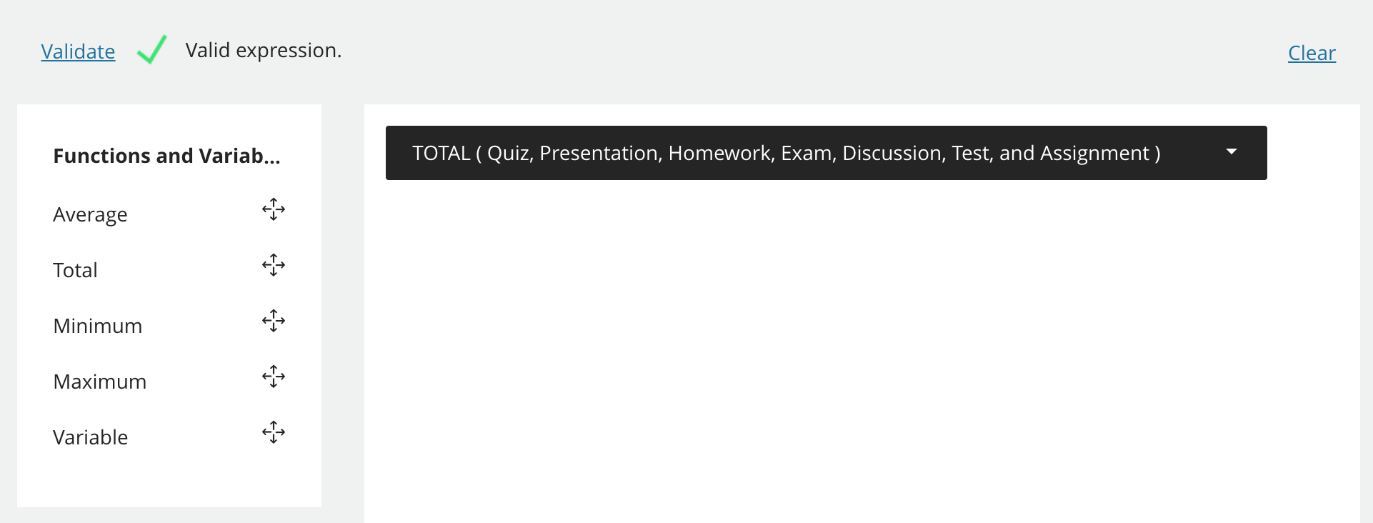
Name the calculated column and include a description.
-
Change the visibility on the top right when necessary.
-
Select the Functions and Variables and use the Operators to create a custom calculation.
-
Click the Validate link above the Functions & Variables column to test your calculation. If it is configured properly, you will see a green check mark.
-
Click the purple X in the top left corner of the panel to close. Students will see the calculation in their list of gradable items.
You can mix categories and assignments in a Calculation. Anything earned by the student in these categories or assignments will feed into this calculated total.