Managing Rubrics
You can create rubrics within your course to use for your assessments (Assignments, discussions, & journals). Currently, you cannot add a rubric to a test with questions (or a rubric for a specific question on a test).
Rubrics can be created from a blank template, editing existing rubrics, or by importing/copying rubrics from previous courses.
There are five different types of rubrics: percentage, percentage range, points, points range, and no points.
Criteria are listed on the far left column and level of achievement are on the top row.
New rubrics have four rows and columns by default. You can add up to 15 rows and columns and delete all but one row and column.
Note: the video at the bottom of this page shows what rubrics will look like to instructors & students!
Finding your rubrics
All rubrics in your course can be found in the Gradebook settings. They can also be accessed through the settings panel of assessments.
On the top right corner of your Gradebook, select the settings gear icon > Scroll to Course rubrics.
Click on Create to make a new rubric
Click on title of the rubric to edit an existing rubric
Click on '…' to delete or duplicate a rubric (you can edit the duplicated rubric)
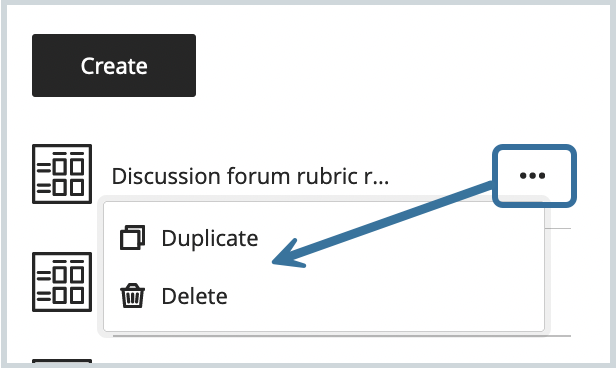
Setting up and editing rubrics
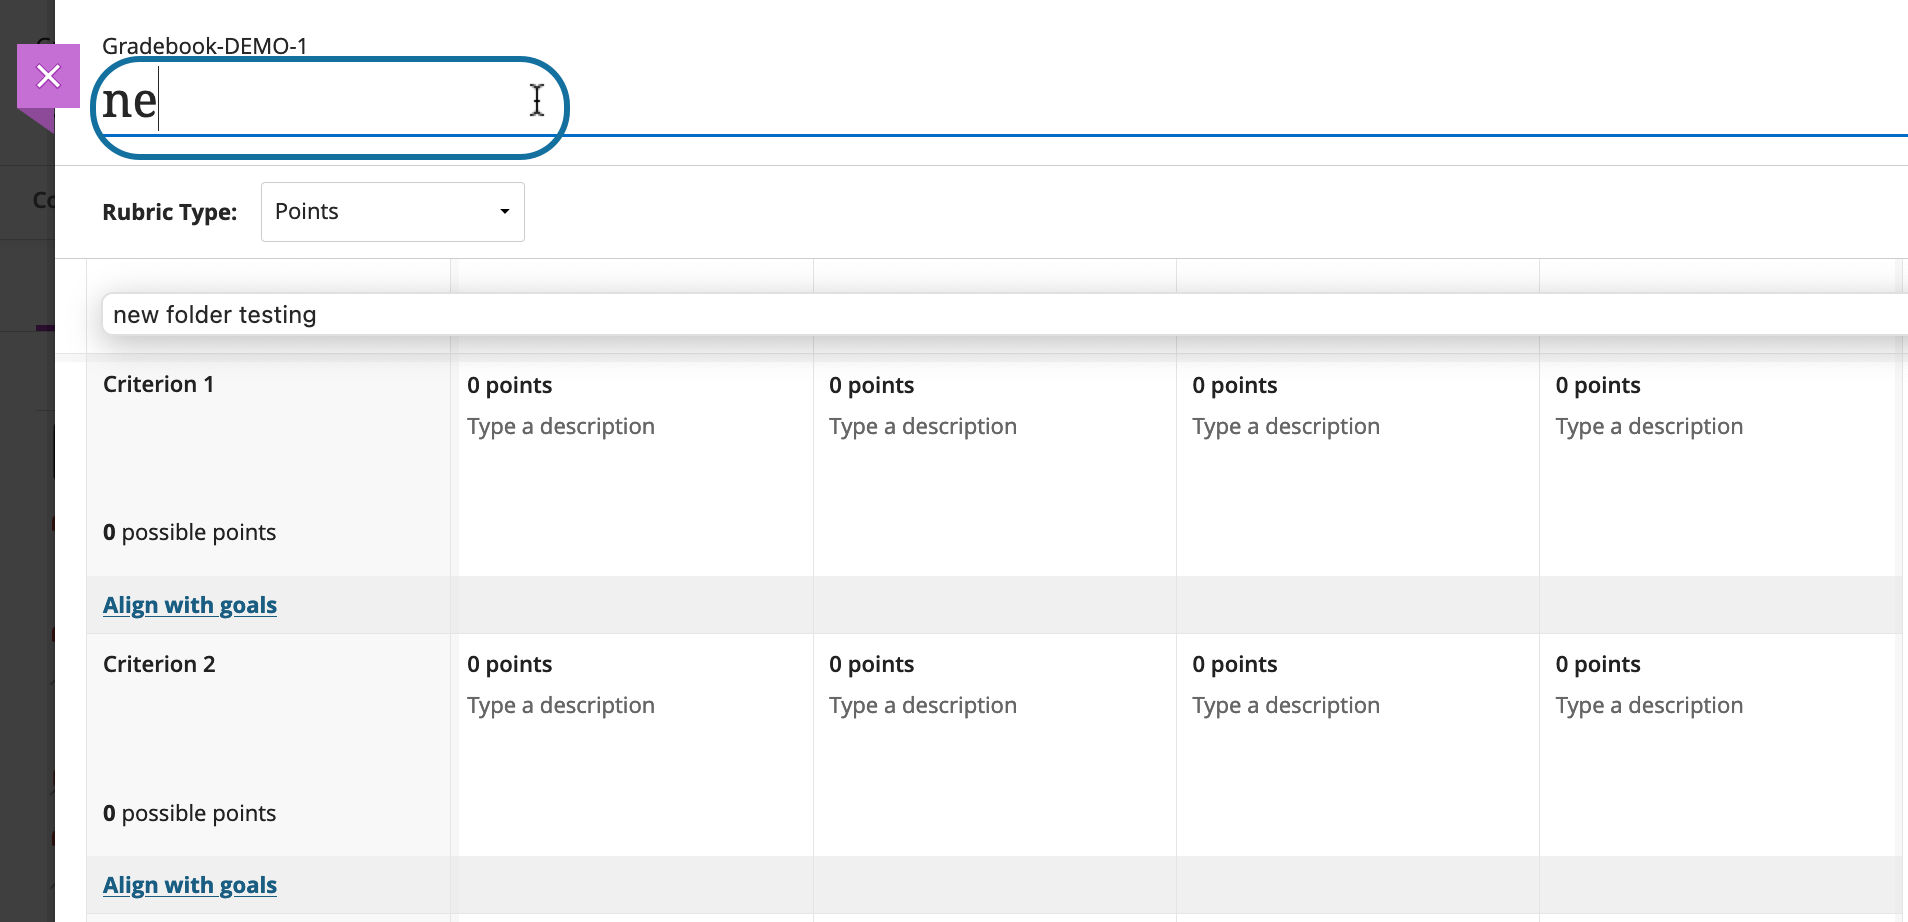
Click on the default title ‘New Rubric M/DD/YY to title your rubric
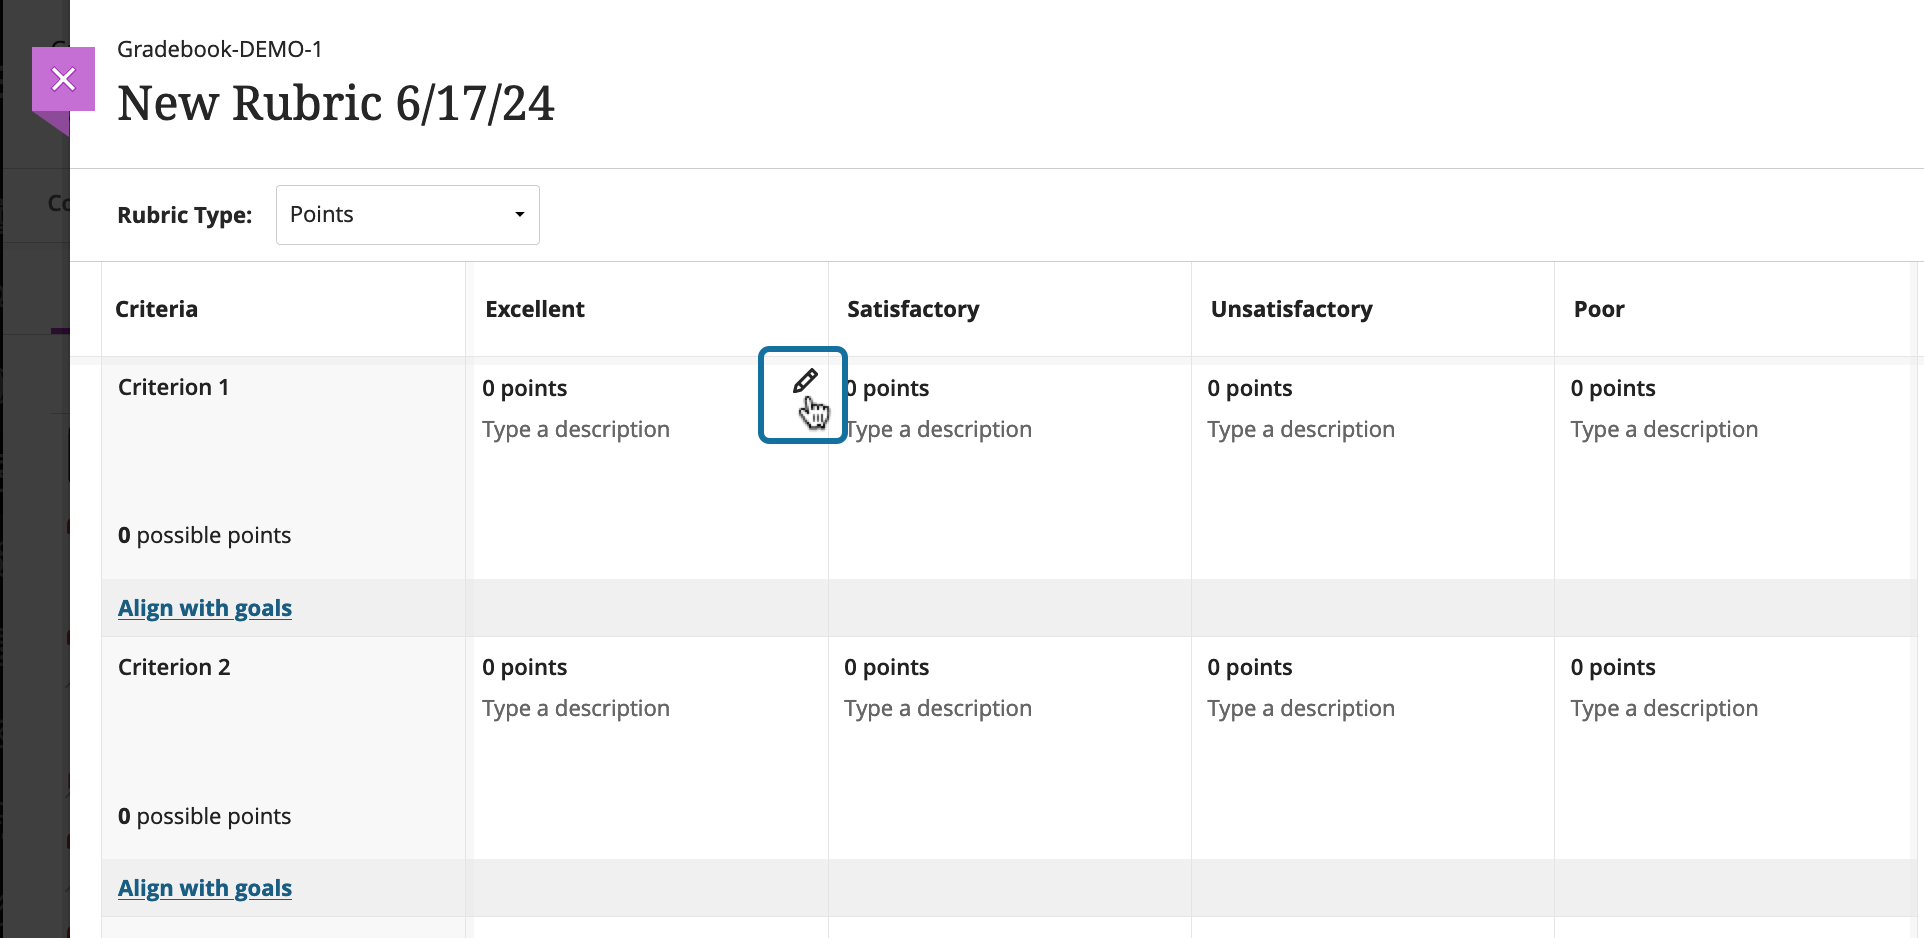
Hover over a cell to access the edit and delete icons.
You can add or edit the description and change the percentage or points.
You can add achievement titles of up to 40 characters. Criteria and description cells have a 1,000 character limit. You can't add HTML code to titles and cells. You can paste text from another document, but the formatting doesn't carry over.
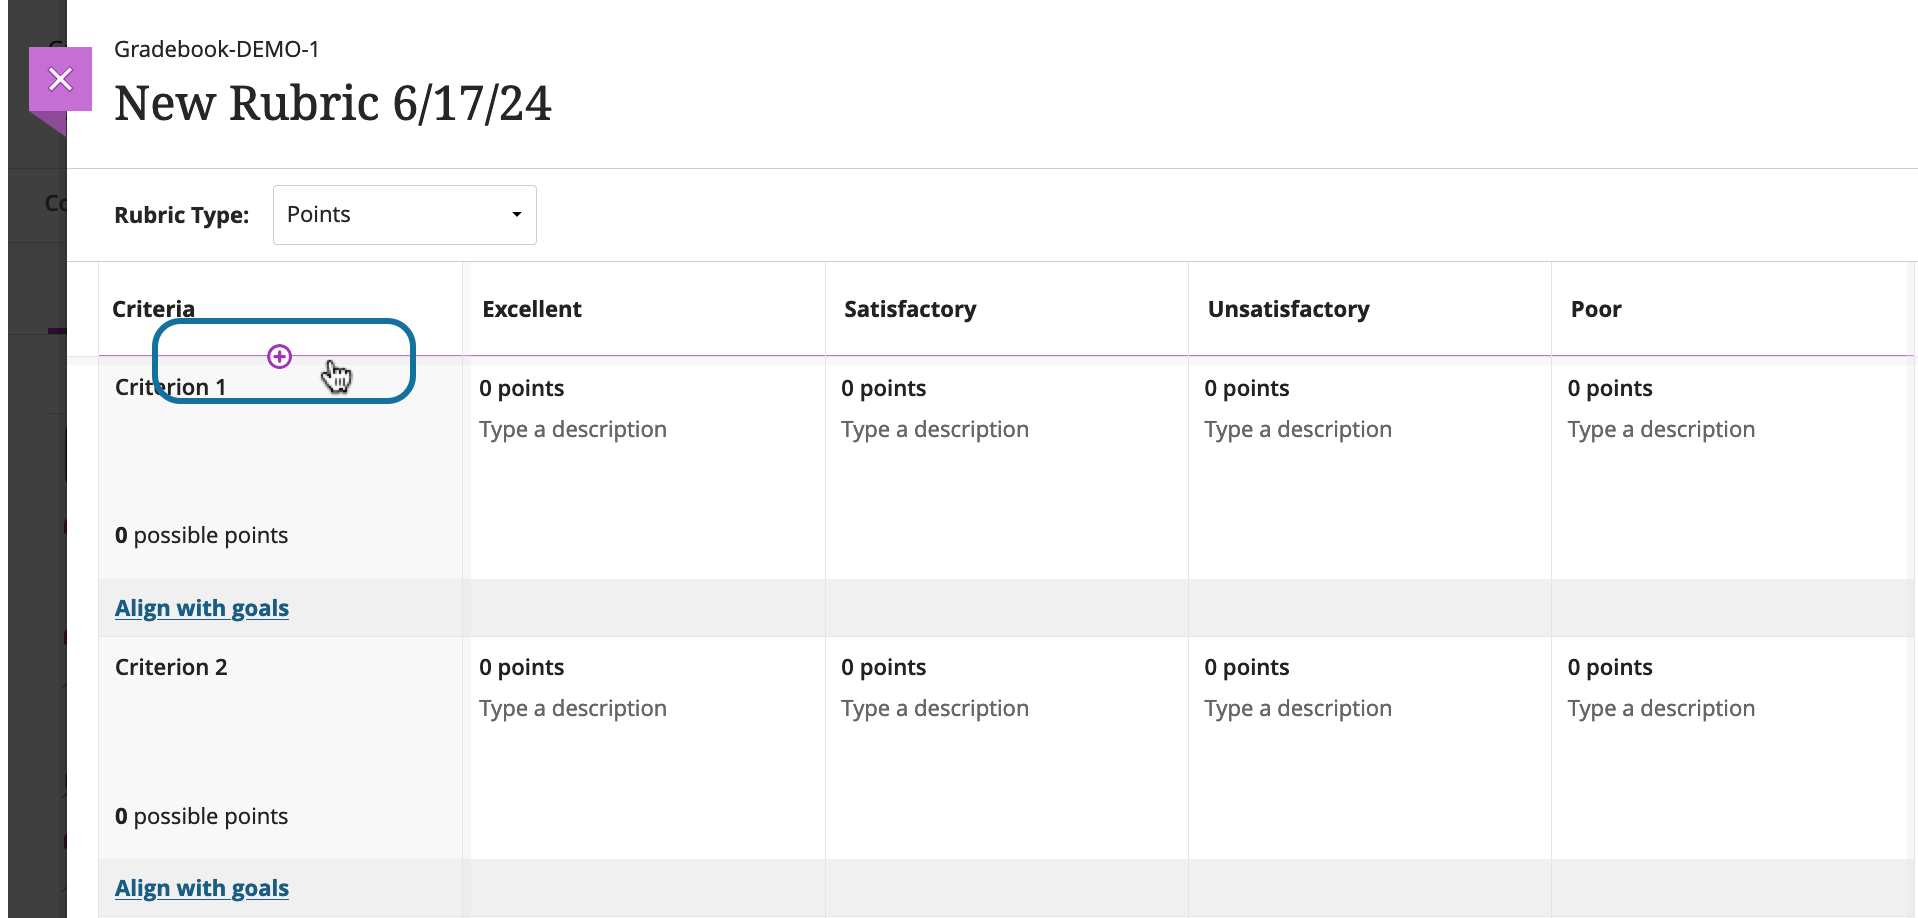
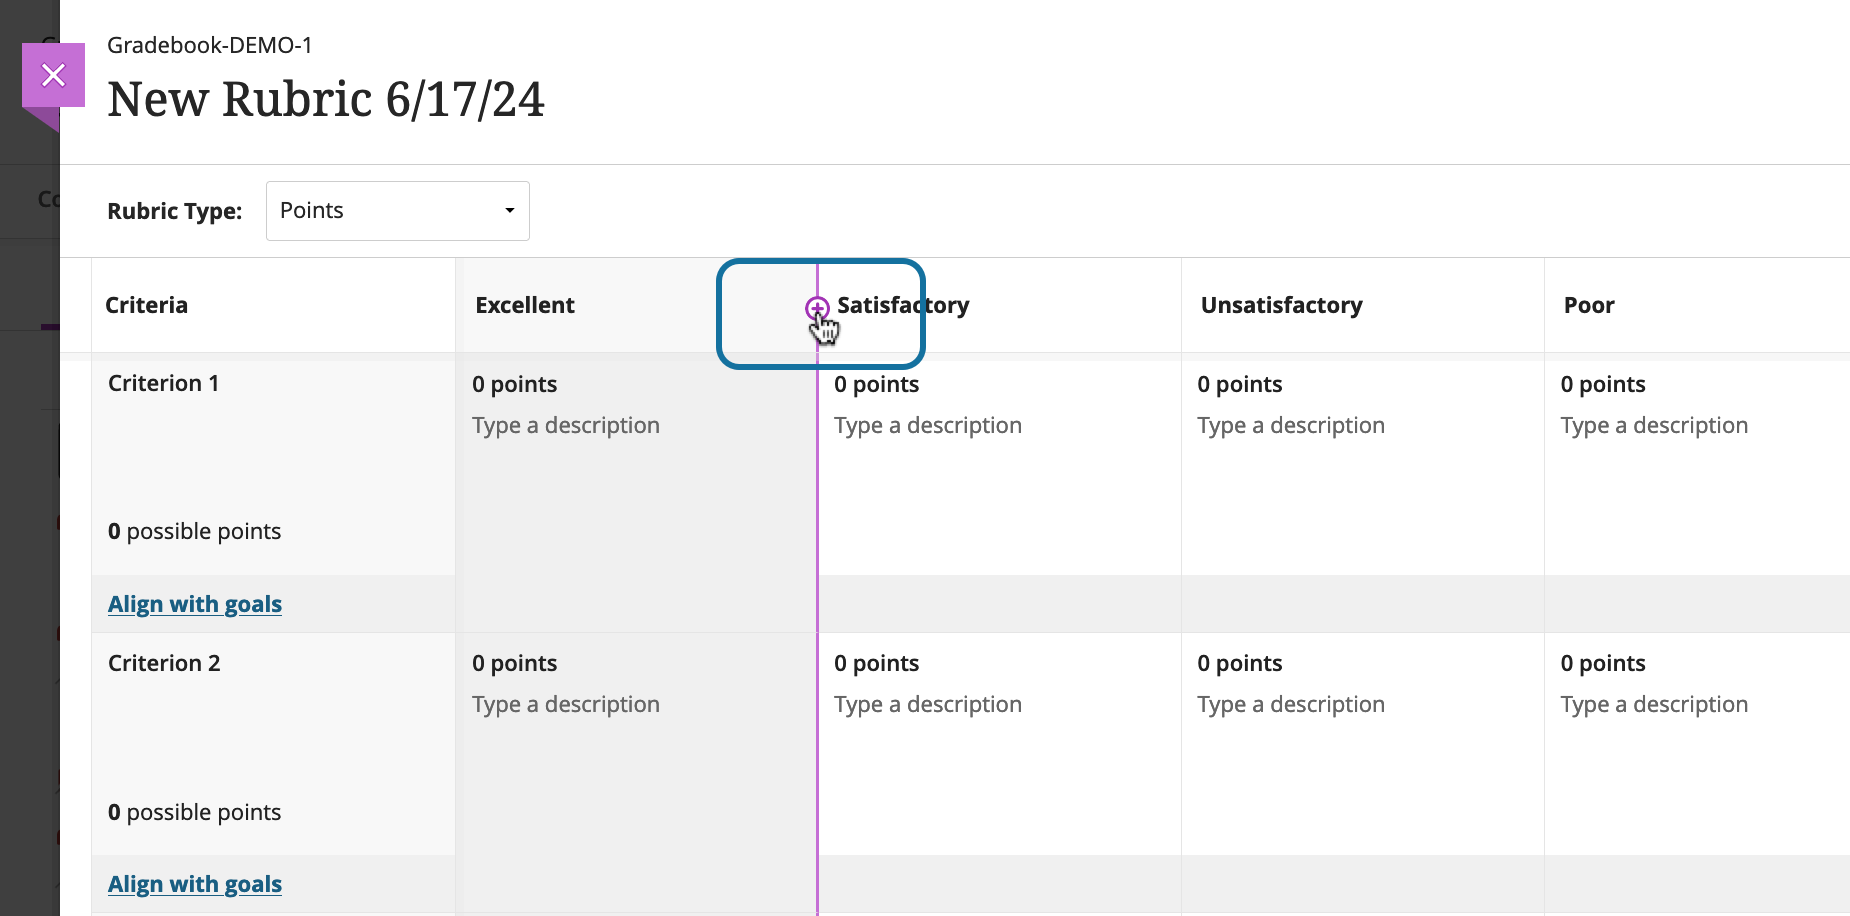
To add a row, hover between rows where you want the new row to appear and select the plus sign
 .
.
To add a column, hover between two columns and select the plus sign
 where you want to add a column.
Copying a Rubric
You can copy a rubric you have used in a Blackboard Original OR Blackboard Ultra course two ways:
Copy an assignment from another course that had a rubric associated with it, the rubric will copy over
Copy a specific rubric from a previous course
Note: Copied rubrics can be found in the Gradebook Settings
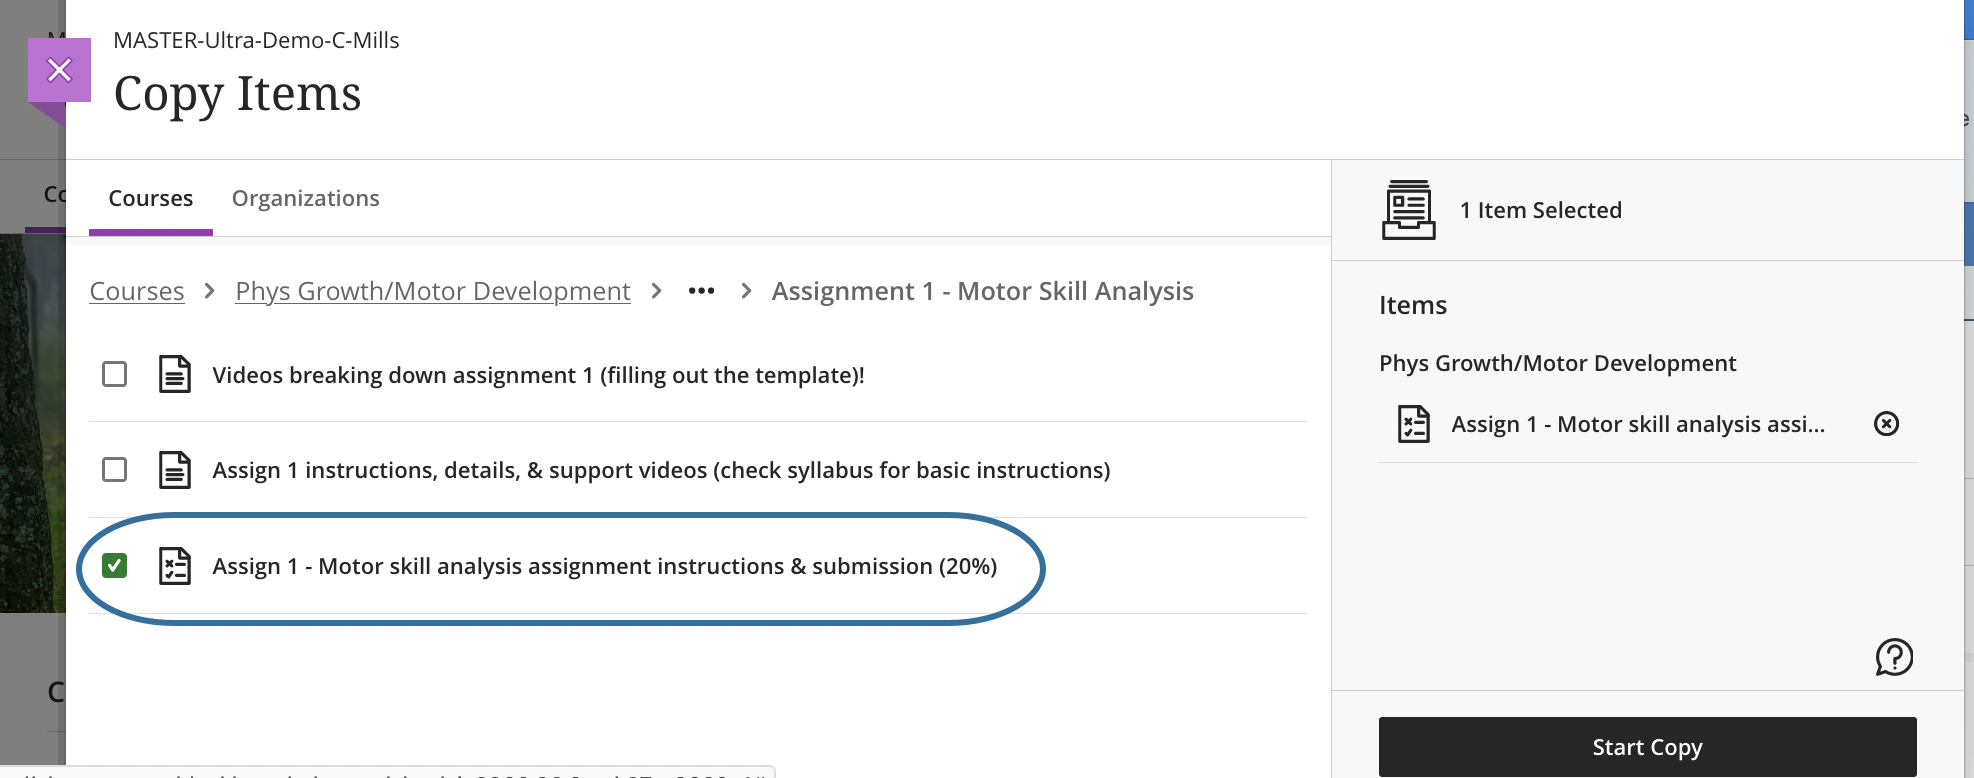
Copy an assessment with a rubric from a previous course
When you click on Copy Content (if you are in the main content area) or Copy Items (if you are copying from '…' on the top right), a new panel appears
Scroll through the list of Courses and click on the title of the course that contains the assignment you are looking for. Find your assignment and check the box beside it.
Click Start Copy
Check assignment settings & details to ensure there are no errors through the copy process
Copying a Rubric from a previous course
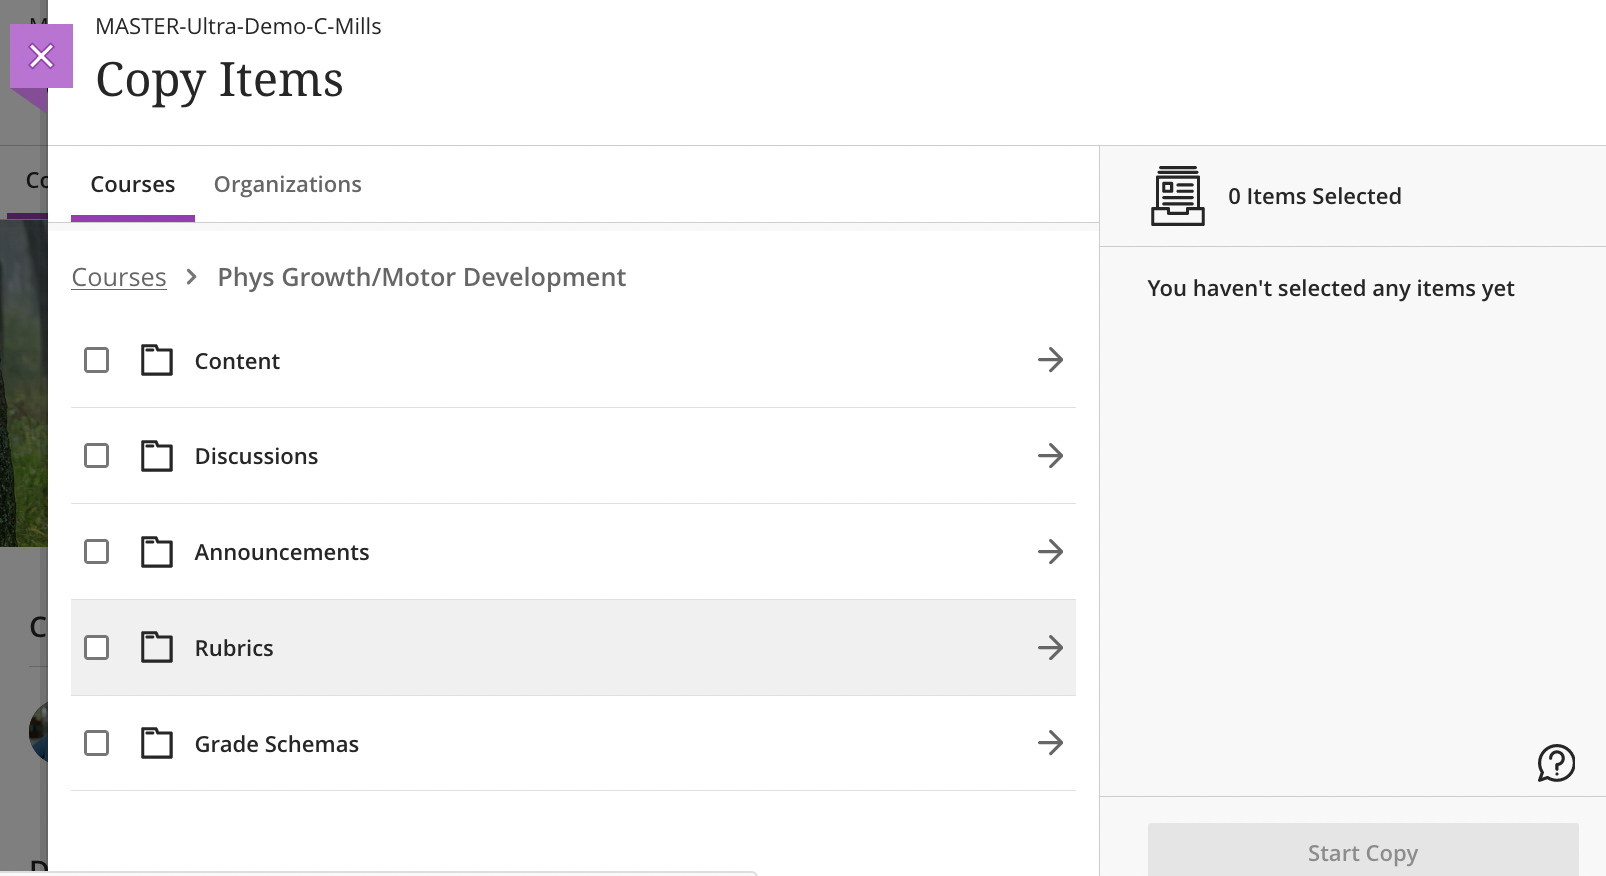
When you click on Copy Content/Copy Items a new panel appears
Scroll through the list of Courses and click on the title of the course that contains the rubric you are looking for.
Scroll until you find the folder labelled Rubrics.
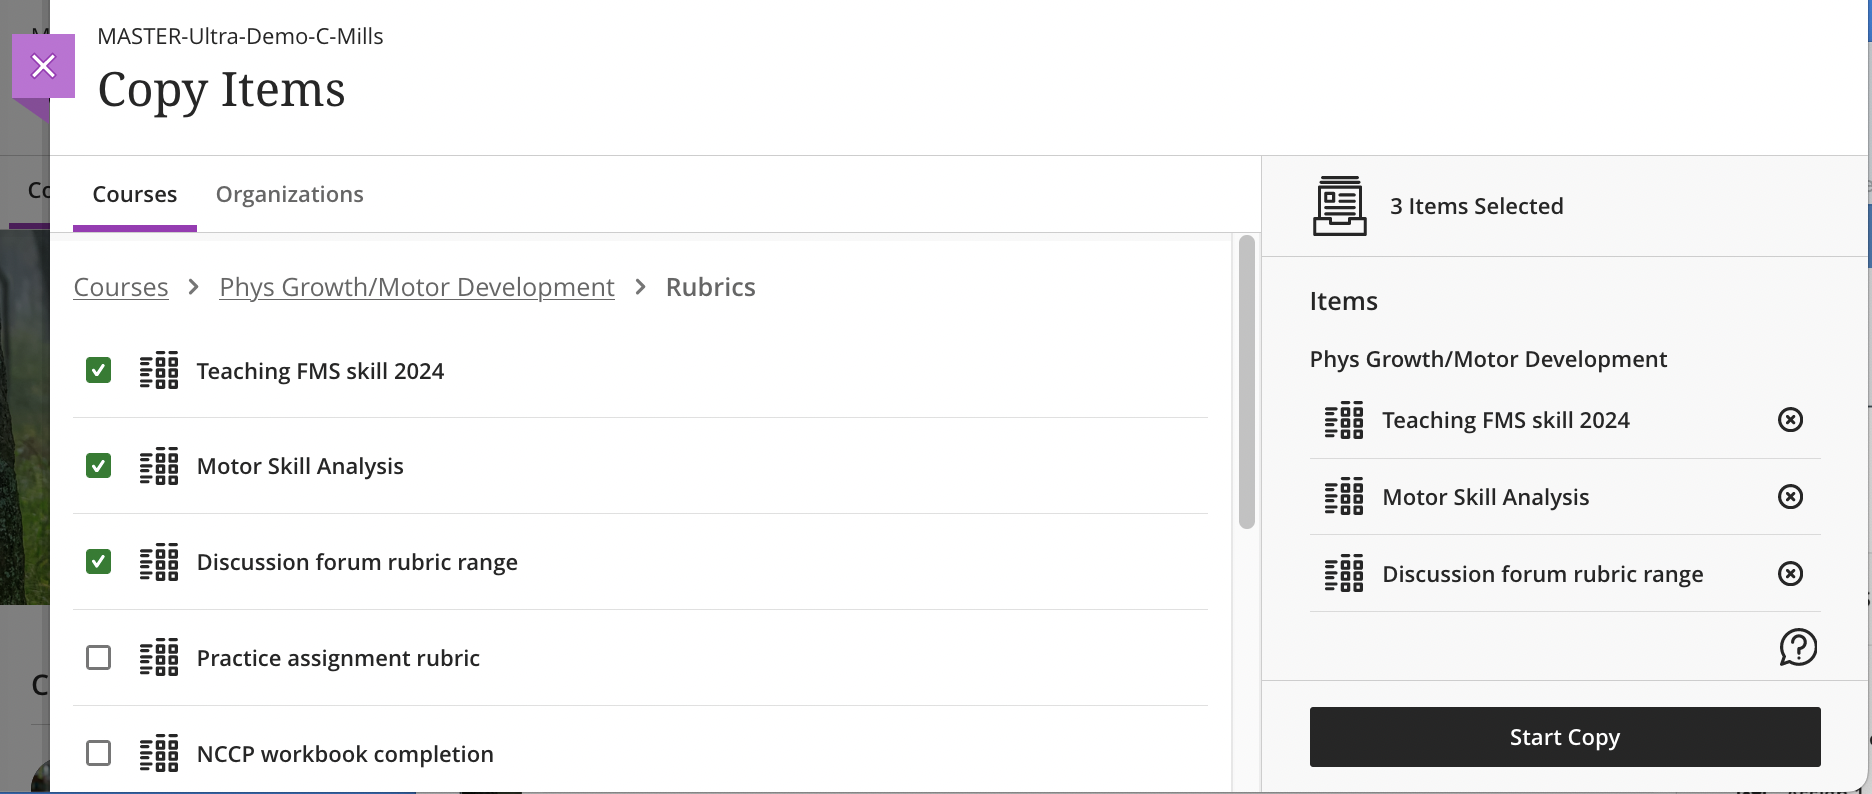
When you select the Rubrics folder, all of the rubrics in the course will appear. Select the rubric(s) you want and click Start Copy.
Finding your copied Rubric
Once copied, the rubric can be accessed in two places:
From the Gradebook settings (gear icon), scroll to Rubrics.
From the assessment where you want the rubric. Open the Assignment Settings panel. Scroll down to the Additional Tools area and click on Add grading rubric.
Types of Rubrics
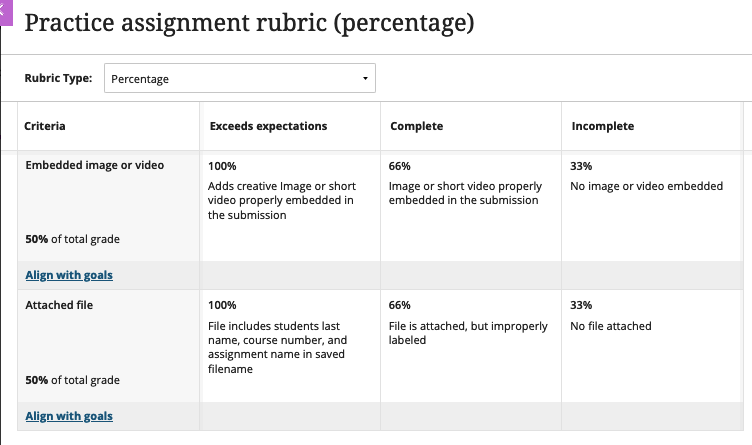
Percentage rubrics
For percentage rubrics,
each level of achievement level has a value written as a percentage
each criteria is given a value written as a percentage
The criteria total percentage must equal 100%. You may only use whole numbers. You may add rows set to 0% as long as your total percentage equals 100. Select Balance Criteria next to the message to auto-adjust the percentages or manually update the percentages as needed.
For the levels of achievement, one column must have a value of 100%. You may only use whole numbers.
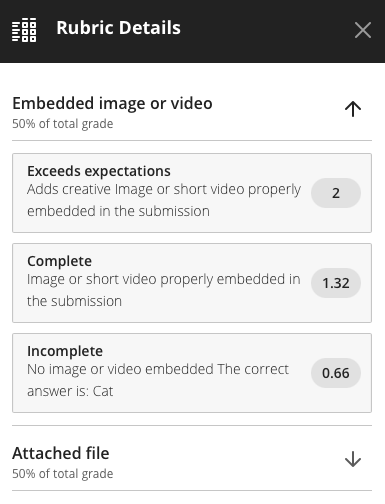
Note: When students view the rubric, they see ‘points’ for each level in relation to the total points the assessment is worth.
Instructor
Student
Percentage-range rubrics
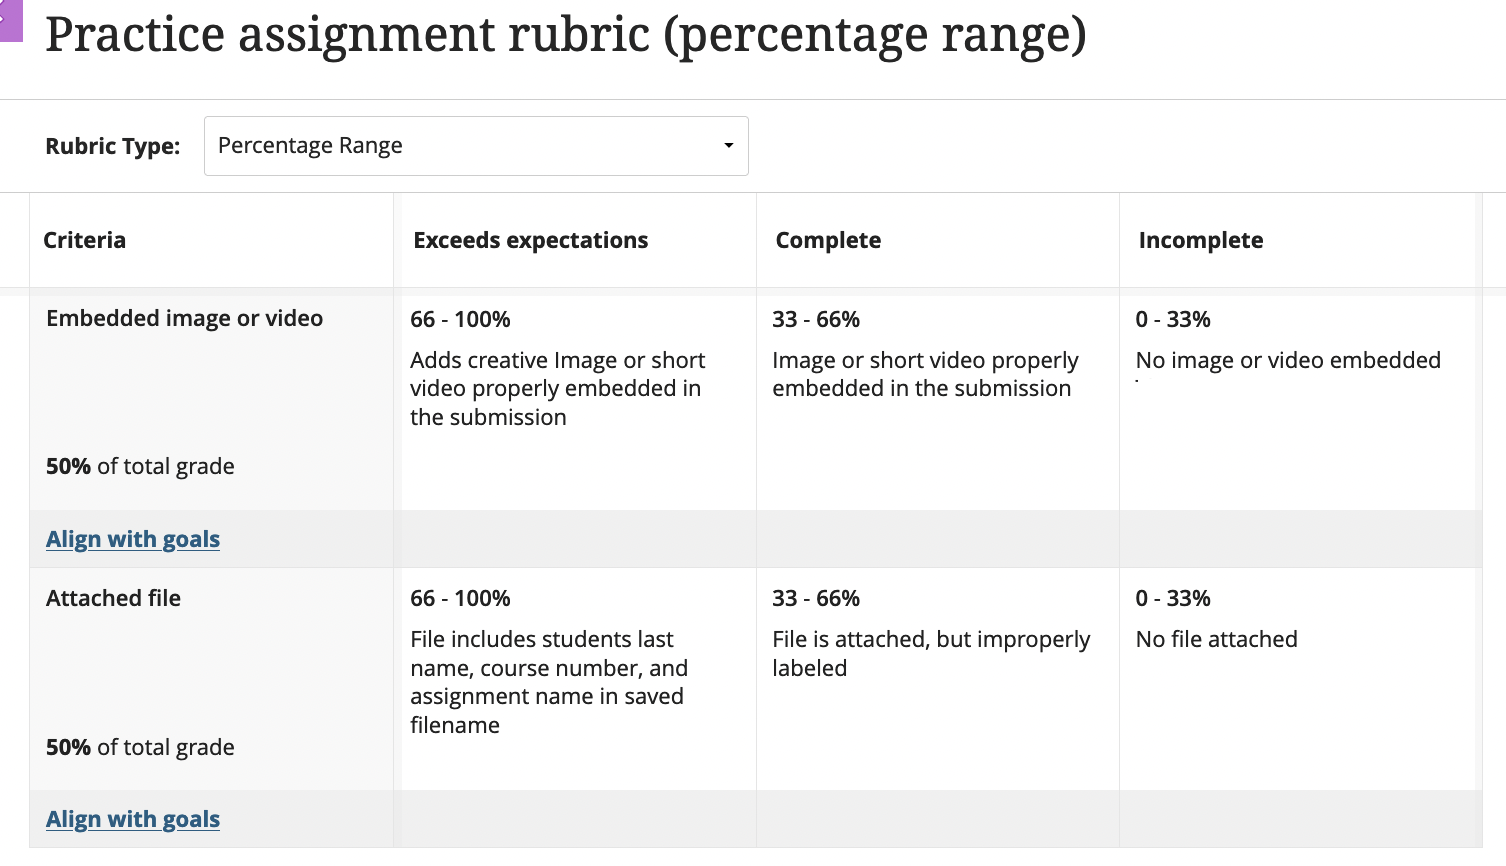
For percentage-range rubrics,
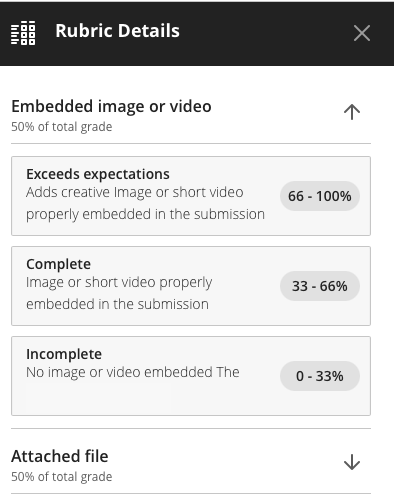
each level of achievement has a range of values.
each criteria is given a specific value.
When you grade, you select the appropriate percentage level for a particular level of achievement.
Instructor
Student
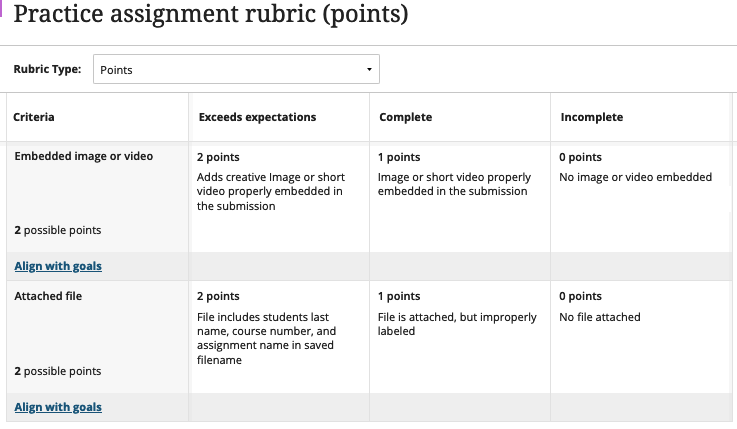
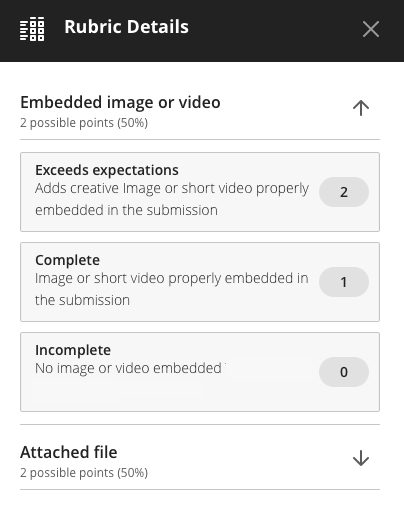
Points-based rubrics
For points-based rubrics, the maximum possible points should be less than or equal to 99,999.
When you add points to the level of achievement columns, the total possible points (shown in the criteria column) will populate
You may add rows set to 0 as long as your total points are less than or equal to 99,999.
Instructor
Student
Points-range rubrics
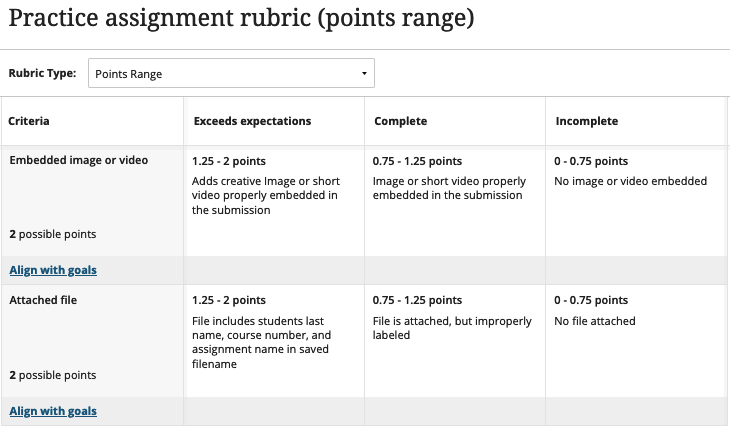
For points-range rubrics, the maximum possible points should be less than or equal to 99,999.
You may only use whole numbers.
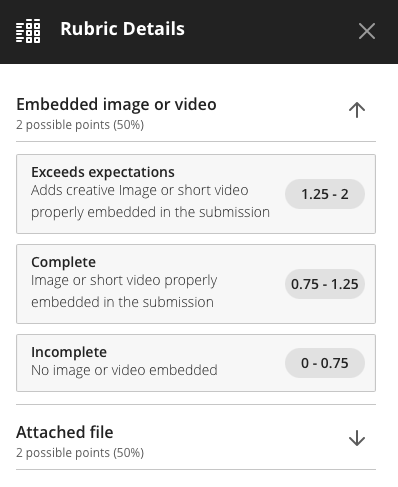
You will manually choose the range for each level of achievement
The highest point value in the level of achievement will populate into the criteria column
You may add rows set to 0 as long as your total points are less than or equal to 99,999.
The point range for each criterion must go from a lower range to a higher range.
Instructor
Student
No Points Rubric
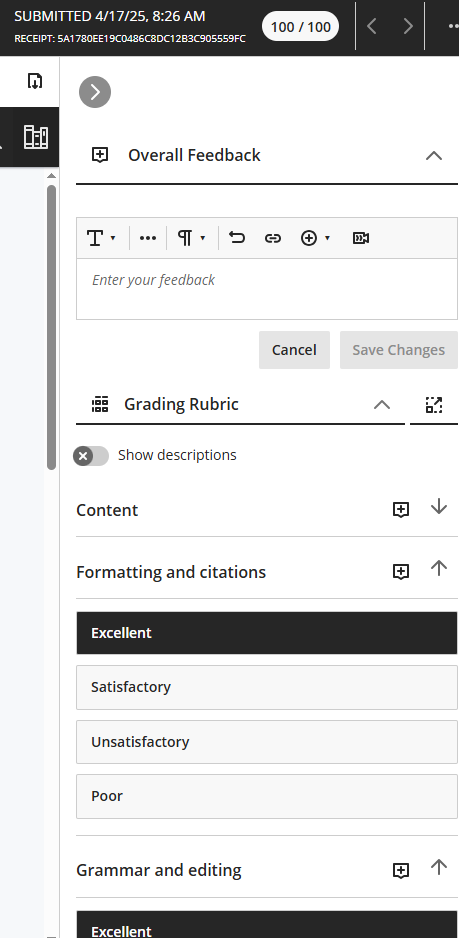
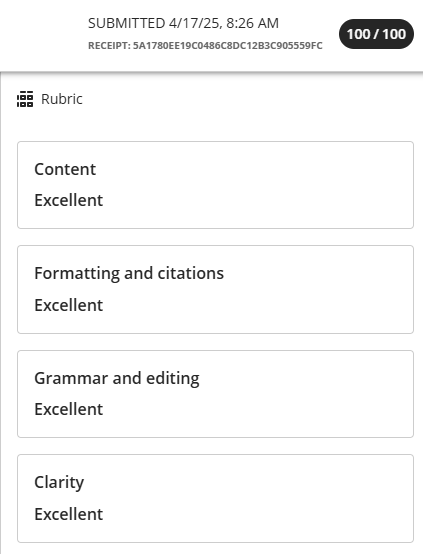
A no points rubric allows you to assess student work based on criteria and feedback, instead of numerical values.
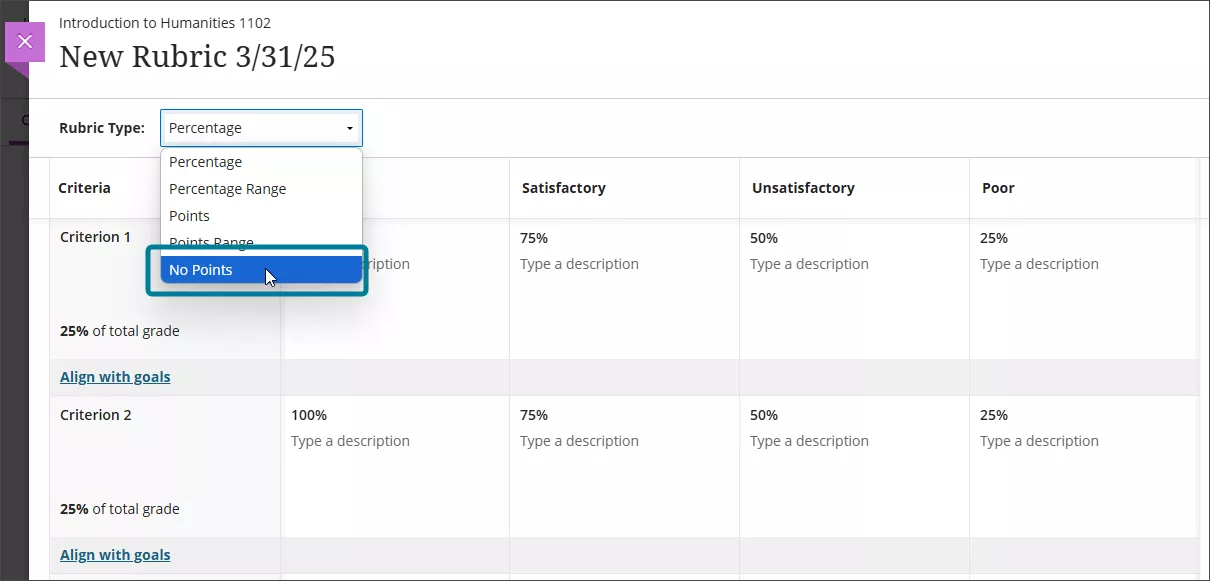
You need to provide a points based score via the grade pill as this will not get auto populated via the rubric.
Instructor
Student
Adding and removing rubrics
Adding a rubric
Select the Settings (gear icon) to open the Settings panel for the assignment, test, or discussion.

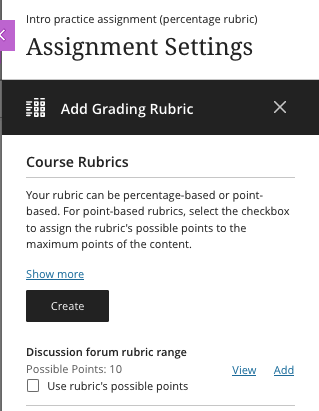
Scroll to Additional tools section and click on Add Grading Rubric to view existing rubrics. Rubrics appear in alphabetical order.
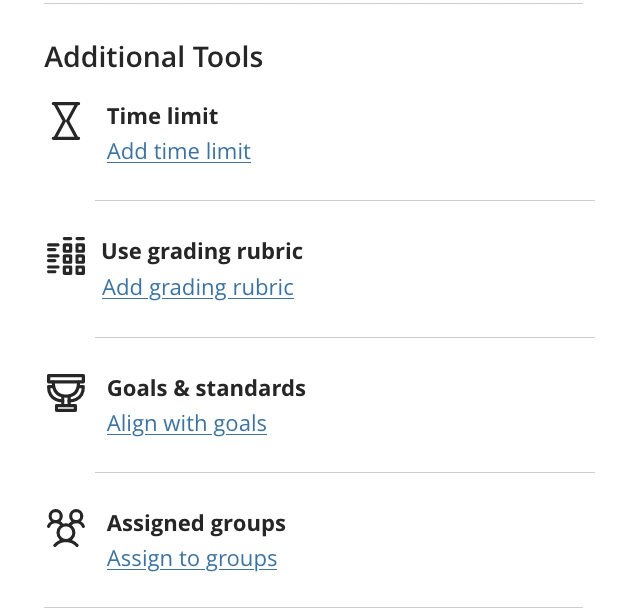
Click ‘View’ to edit the rubric and then click ‘Add’ to add the rubric to the assessment (optionally select 'Use rubric’s possible points' to adjust assessment points to match rubric). You may associate only one rubric to each assessment or discussion.
Remove a Rubric from an Assessment
In the Settings panel, hover over the associated rubric's title to access the Remove (garbage can) icon.
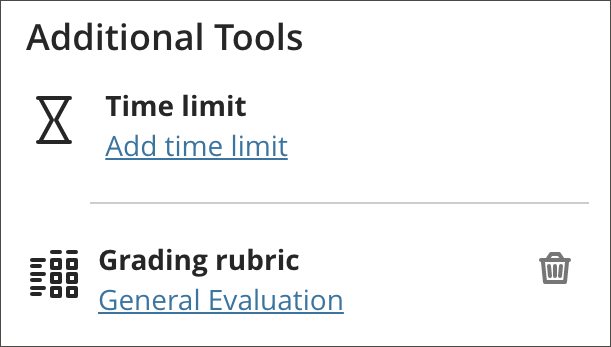
If you remove a rubric from an assessment, you've graded the grades will remain, but feedback and detailed breakdown will disappear (i.e. the grades are no longer associated with the rubric). Grades now appear as if you can entered them manually. You can not undo the rubric deletion.
Student view of rubrics
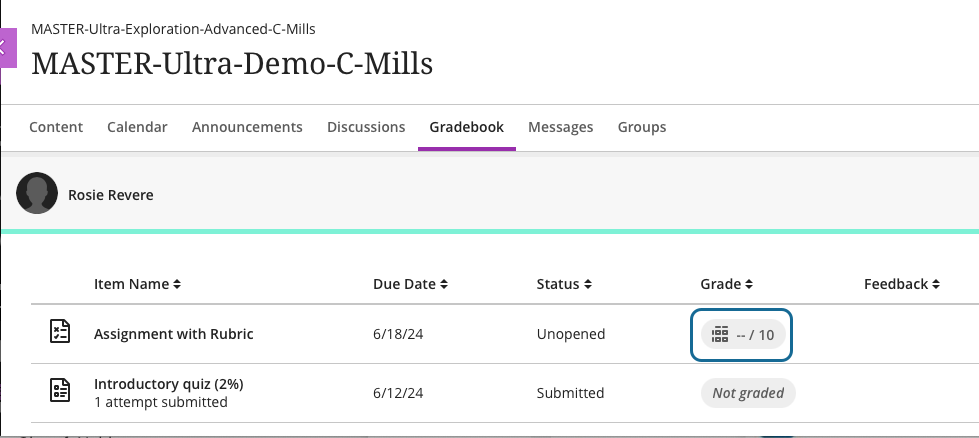
When you associate a rubric and view a student's assignment or test submission, the grade pill displays a rubric icon.
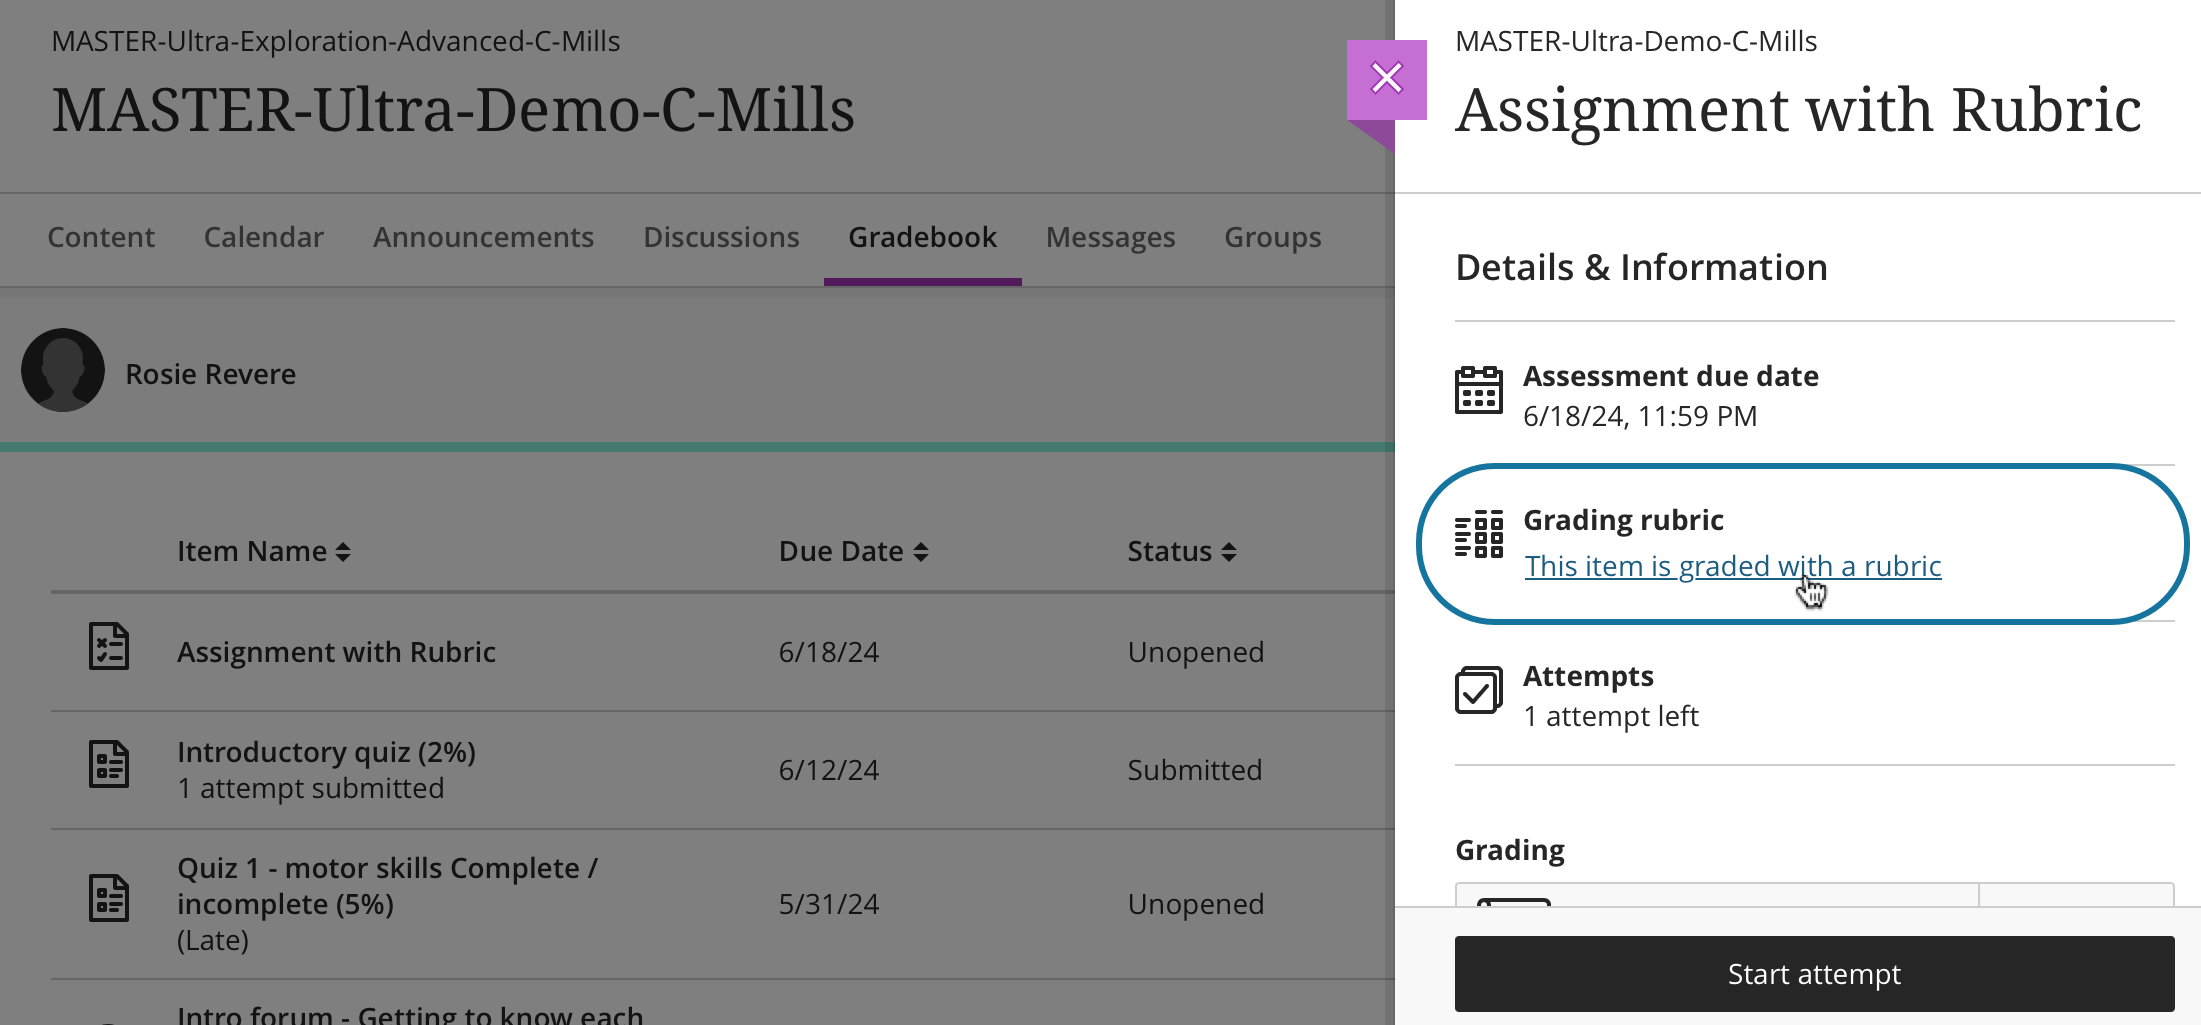
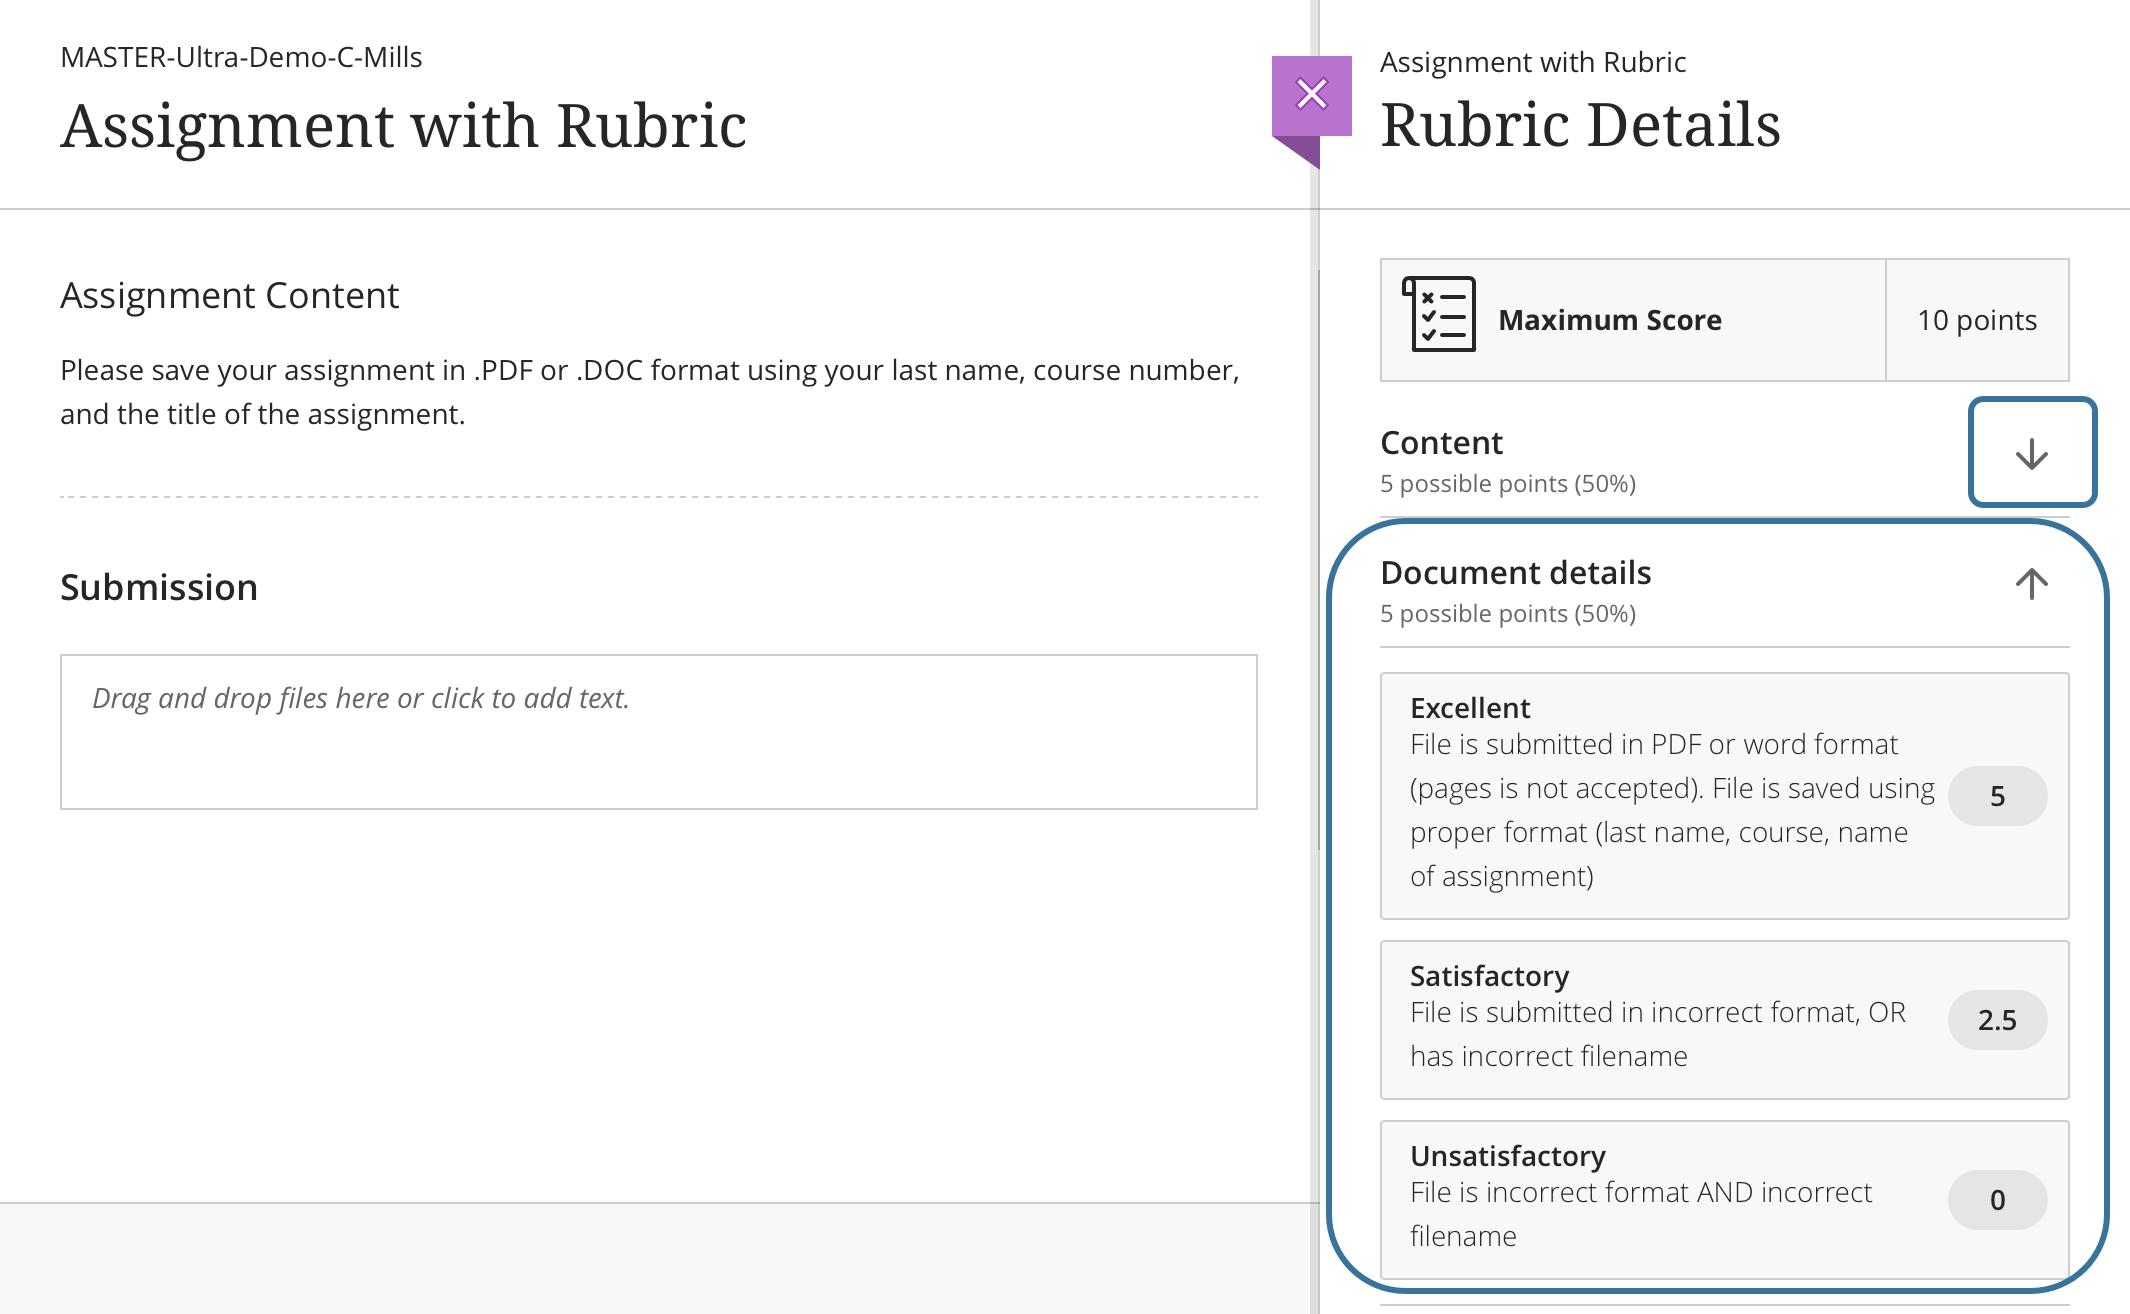
Students can view a rubric before they open an assessment by clicking on This item is graded with a rubric.
Students can also view the rubric alongside the instructions. In both cases, they can expand each rubric criterion to view rubric details using the arrow to the right of the criterion.
Video Guide to Rubrics
This video shows:
how each of the four rubric types appear to instructors (except no points rubric)
how each of the rubric types appear to the students
what it looks like to grade using the rubric
how student view their feedback on the rubric
