Adding a banner (course image)
You can add an image to be the thumbnail on the Courses page in the Global Base Navigation menu. It can also be used as the internal course banner (image) inside your Ultra course.
Copy a banner into your course
If you would like to copy a banner from another course, you can use the copy content process.
Select the three dots in the Course Content area and select Copy Items.
Select the arrow next to the course where the banner is located.
Select the folder Settings and check off the box next to the banner.
Select Start Copy.
If you already have a banner for your course and you try to copy a banner from another course, this will not replace the existing banner. The banner will only copy over if you do not have an existing one.
Add a new banner to your course
Choose a meaningful image for your course.
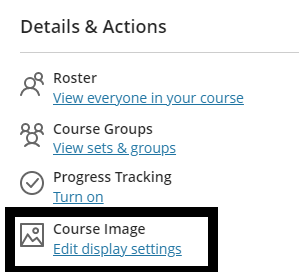
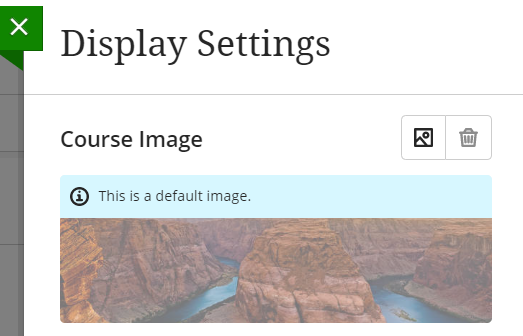
In your course, go to Course Image in the Details & Actions menu. The Course Image panel opens on the right.

3. Select on the image icon next to the trash can. Select the image you want to upload and select Open.

NOTE: Image must be at least 1200 x 240 pixels. Images with text don’t scale well.
Preview your picture to make sure you want to keep the image. If not, select the trash can icon to choose another image.
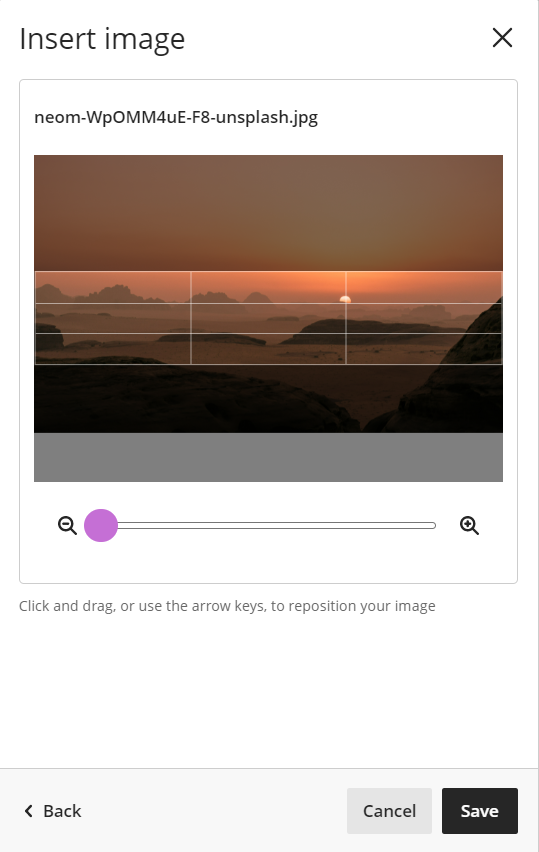
Reposition your image by selecting and dragging or use the arrow keys to reposition. Zoom in and out using the magnifying glasses. Select Save when you are done.

Enter alternative text for your image or mark it as decorative.
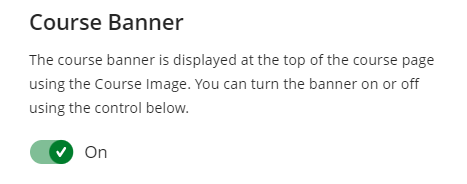
If you want your course image to display at the top of your course, switch the On toggle. A checkmark indicates that the Course Image is on.

Select Save to view your course banner.

Note: Select the pencil icon on an existing course image to change it.
