The course calendar is a great way to help students (and you) visualize what needs to be completed throughout the semester.
The global calendar in your Base Navigation shows all upcoming due date and meetings across all your courses. The Calendar in your course will only display dates related to that course only.
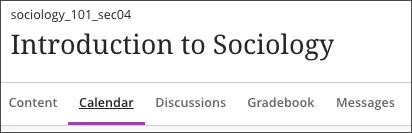
Course Calendar
The course Calendar can be accessed from the top navigation area.
Note: All assessments created in Blackboard with dates will automatically populate into the calendar.
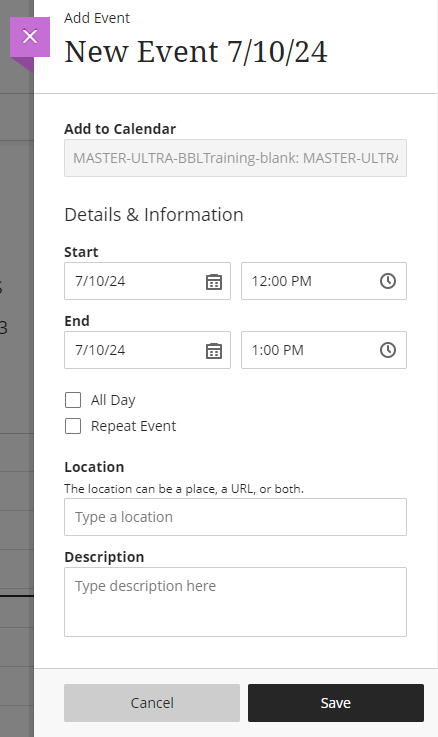
Add an Event
-
Navigate to Calendar
-
Click on the plus sign
-
Hover over the default event title and type a new title
-
Add a start and end date and time
-
Check off All Day and/or Repeat Event if applicable
-
Add a location
-
Add a description
-
Click Save
Add Office Hours
-
Navigate to Calendar
-
Click on the plus sign
-
Hover over the default title and type a new title
-
Add a start date and time period
-
Check off All Day if applicable
-
Choose how often you will have office hours, what day(s), and when the office hours will end
-
Add a location
-
Add a description
-
Click Save
Add a Course Schedule
You can quickly show the dates, times, and location of your class for your students on your main page and in the course calendar by creating a Course Schedule. Students will know exactly what time class starts/ends and your room number.
-
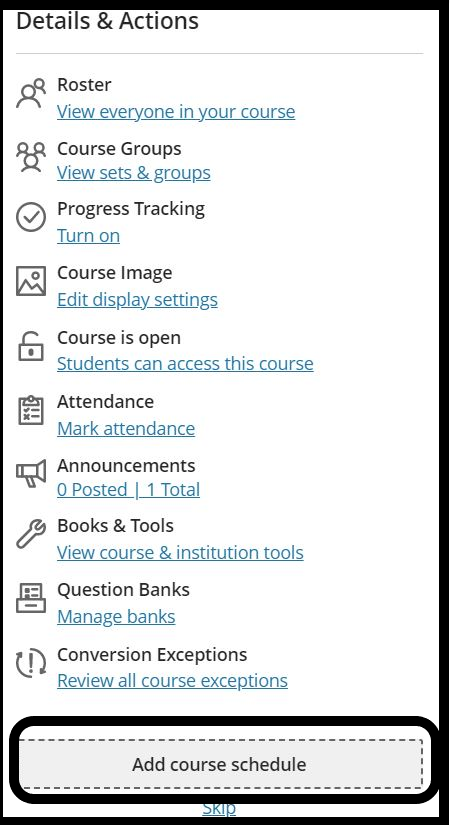
Add a Course Schedule either from the Calendar tool on the top navigation or from the Details & Actions menu. Click Add course schedule.
-
The Schedule panel will open on the right. Click the plus sign beside “Add the times this course or organization meets.”
-
The Schedule settings panel will open. You may edit the nickname field to make it more clear to students.
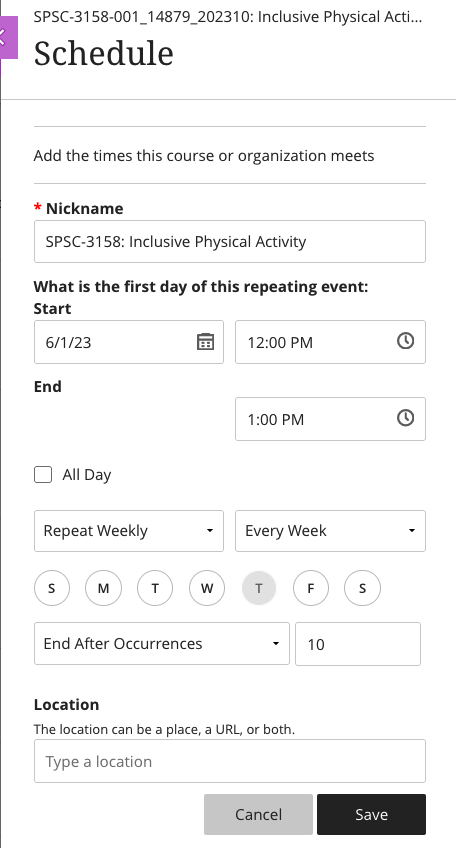
4. Select your Start date and times for the duration of your class.
5. Decide whether this pattern will repeat daily, weekly, or monthly.
6. Choose whether to end after x occurrences or on a certain date.
7. Add your class location (i.e., campus room number).
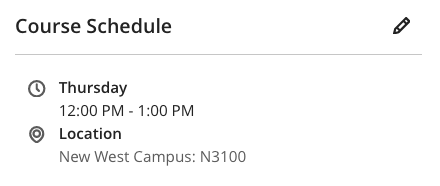
8. Click Save. Your Course Schedule will appear at the bottom of the Details & Actions menu. To edit the schedule, click on the pencil icon.
-
Your new course schedule will appear at the bottom of the Details & Actions navigation as well as in the Calendar Tool tab
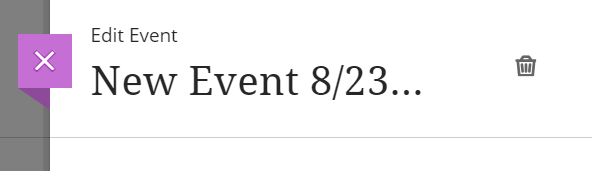
Edit or delete an event
-
Click on the event in the Calendar.
-
Click on the trash can icon next to the event name to delete or edit fields as necessary.
You can also edit the course schedule via the Details & Actions navigation by clicking on the pencil icon next to Course Schedule.