

Many instructors assign group work in their classes. Groups and group sets can be created and then assigned to forum discussions or assignments. This enables:
-
Small group discussion forums - only group members and the instructor can view and contribute to the forum.
-
Collaborative assignments - when one student submits, the assignment is submitted for everyone; the instructor can provide group feedback and individual feedback, as well as different grades for each group member when appropriate.
Creating a group does not create a working space for group members.
Navigating groups
From the Groups tab, you can:
-
Access Group sets.
-
Access Groups and the members assigned to each.
-
Manage group sets via the three dots (Send message, Edit, Export, and Delete).
-
Add new Group Sets.
You cannot delete a group that has a submission.
Creating a new Group Set
-
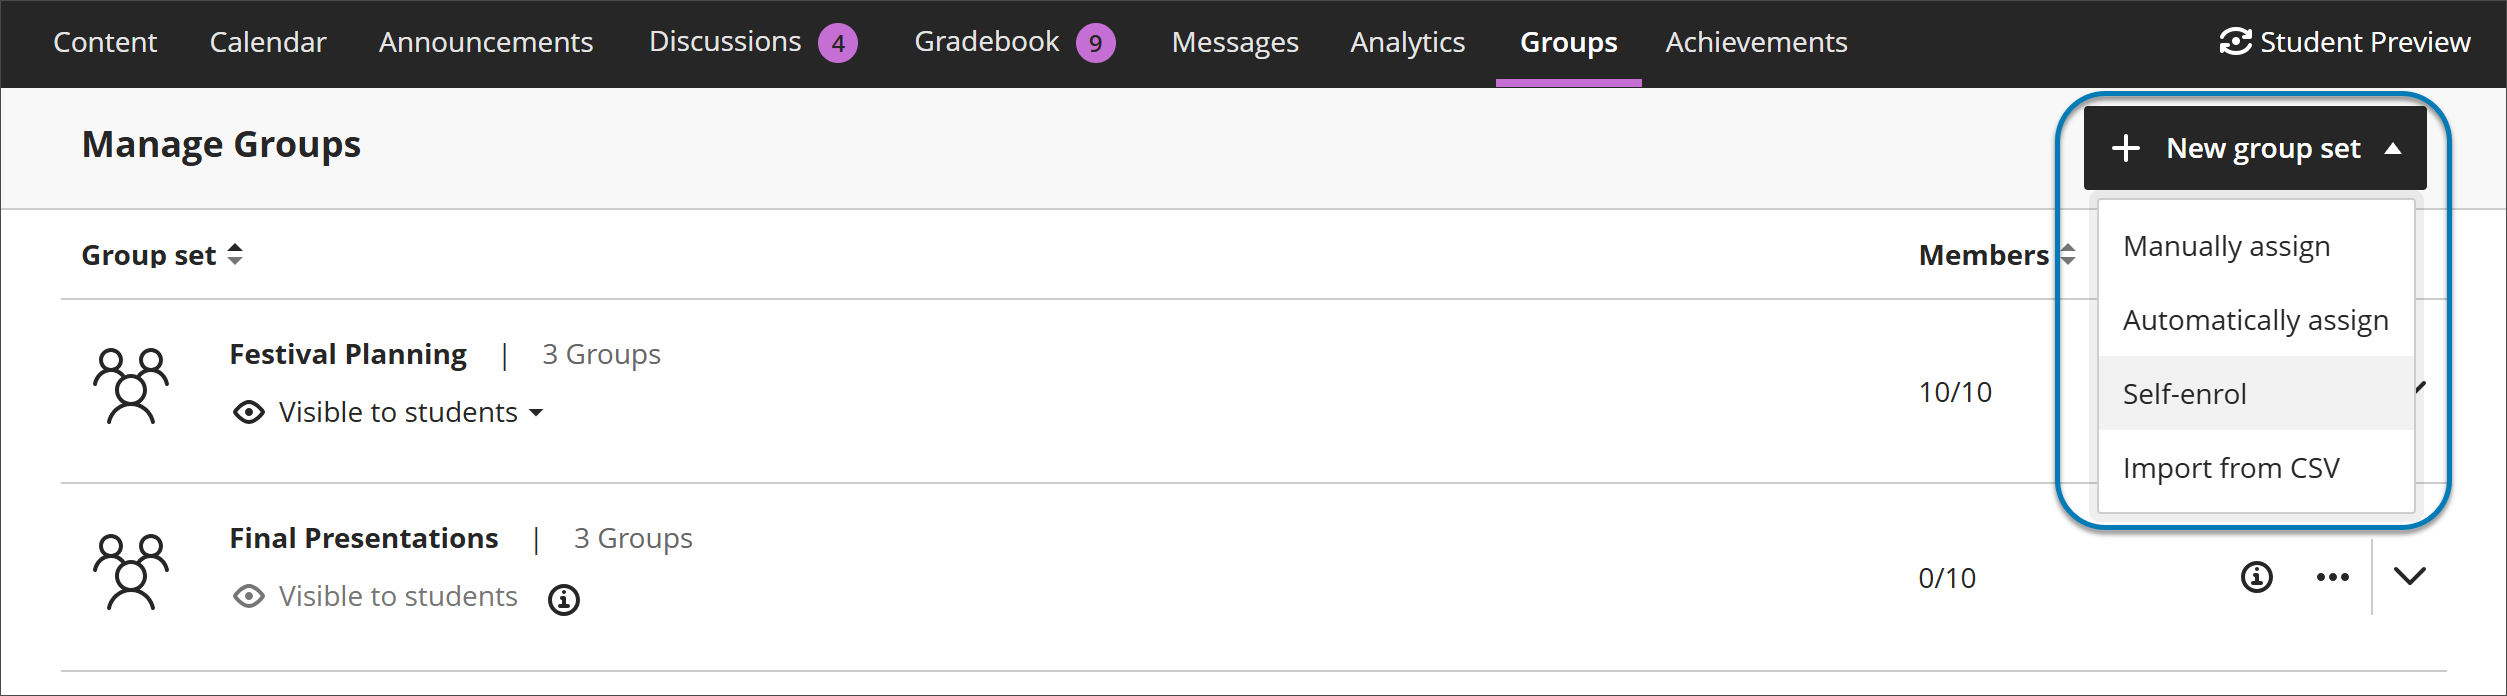
Navigate to the Groups tab in the upper horizontal menu and select New group set.
-
Choose how you will assign students:
-
Manually assign
-
Automatically assign
-
Self-enroll
Manually assign students to groups
-
Hover over Group Set MM/DD/YYYY to name the Group set.
-
Click Add a group set description to give your students some more details about the group work.
-
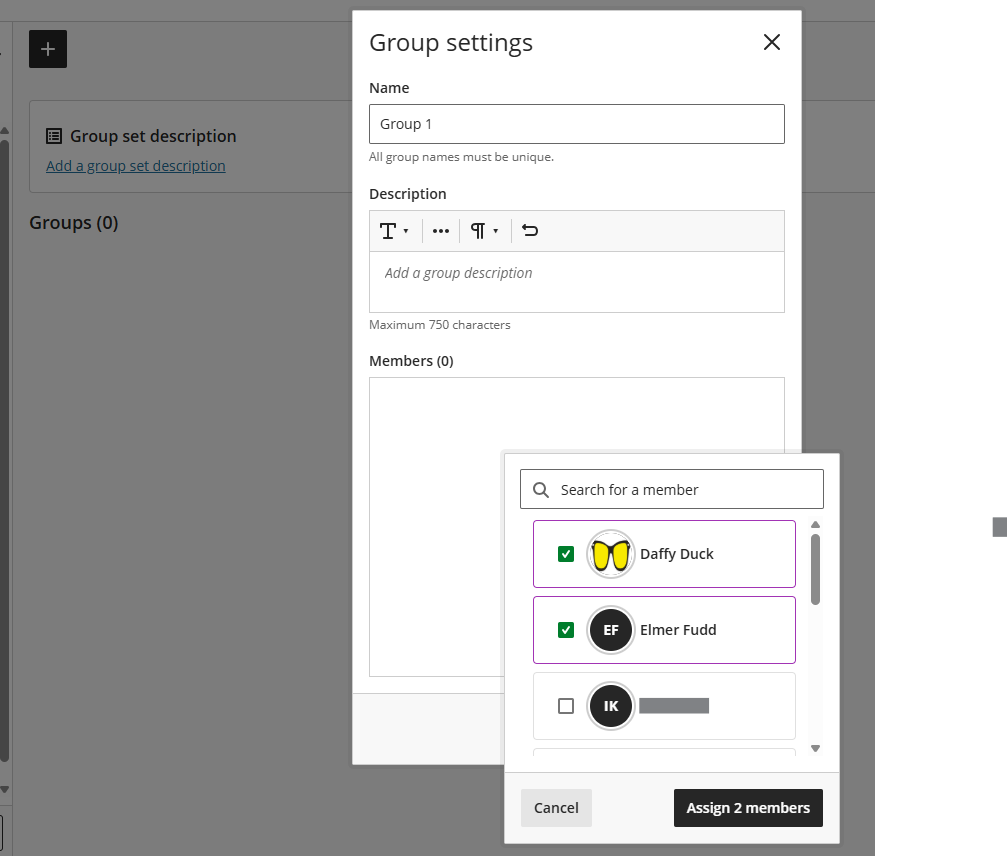
Click on the plus sign to create groups. Give the group a name, description, and add members.
-
Create additional groups by repeating step 3.
Randomly assign students to groups
-
In the Automatic Enrollment pop-up, enter the number of students you want to have in each group. Click Enroll members.
-
Hover over Group Set MM/DD/YYYY to name the Group set.
-
Click Add a group set description to give your students some more details about the group work.
-
Click on the three dots to the right of the pre-made groups to name the group, add a description, and change membership if necessary.
Note that you are not able to have groups with only one member.
Create self-enrollment groups
-
Add a group description.
-
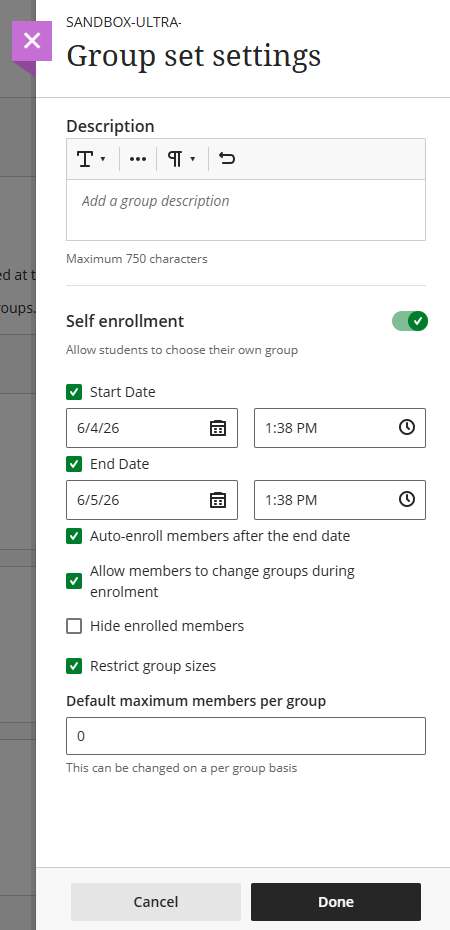
Set the following self-enroll settings, if applicable, and click Done.
-
Choose a start and end date for the self-enrollment.
-
Check Auto-enroll members after the end date.
-
Check Allow members to change groups during enrolment.
-
Check Hide enrolled members.
-
Check Restrict group sizes.
-
-
Hover over Group Set MM/DD/YYYY and enter a name.
-
Click on the three dots to names the groups and add descriptions.
You can override the maximum membership for a group. For example, you can add a newly enrolled student to a group.
Once you create a self-enroll group, students receive a course announcement and an activity stream notification about groups they need to join.
Group spaces
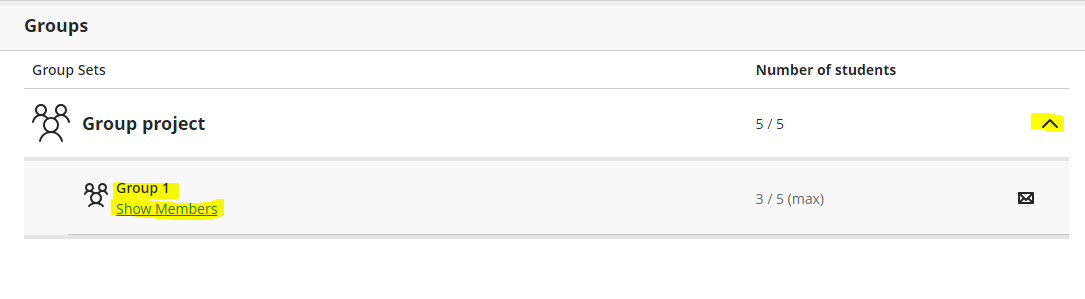
A Group space is where students and the instructor are able to view all assessments attached to a group and the members.
-
Navigate to the Groups tab.
-
Expand the Group set by clicking the downward arrow.
-
Click the group name.
Manage groups
After you create a group or a group set, you can add or delete individual groups, and manage student membership. You can also edit group names, add or edit group descriptions, and send messages.
Unassign members
-
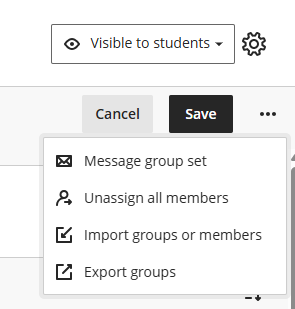
Click the three dots on the top right and select Unassign all members if you want to unassign the entire Group set. This is not available for self-enrollment group sets.
-
Click the unassign icon in a group to unassign all group members. This option is not available for self-enroll groups.
-
Unassign individual members of a group by selecting Expand details and clicking the unassign icon next to the student.
When you unassign members from a group, their grades move with them, but their work does not.
Change group set enrollment type
To change to:
-
Automatic enrollment: Click Automatic Enrollment on the bottom left and select the number of members per group.
-
Manually assignment: Click Add members in each group or select the students on the left and click Assign here to move them into groups. Alternatively, click Add members for a specific group.
-
Self-enrollment: Click the pencil icon in the Group set description box and toggle on Self-enrollment.
Existing groups will be deleted when switching to the Automatic Enrollment feature.
You are not able to move students between groups for Discussions after student contributions have been made.
Group messaging
Send message to Group Set: Click on the three dots of the Group Set and click Send Message.
Send message to Group: Click on the down arrow for the Group Set and click on the envelope icon for the group you wish to message. Students can also message their group from here.
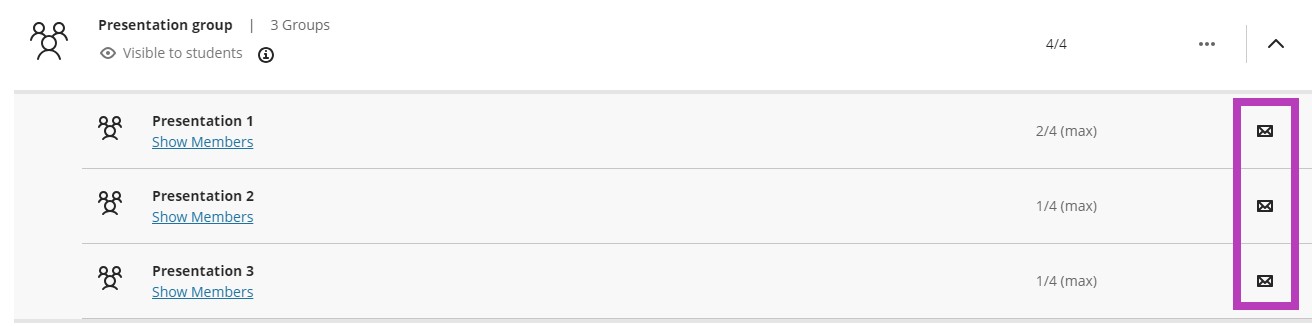
When you send a group message, all members in that group will see it. When a student responds to a group message, all members in that group will see the response.