Displaying Grades via the Grade Schema
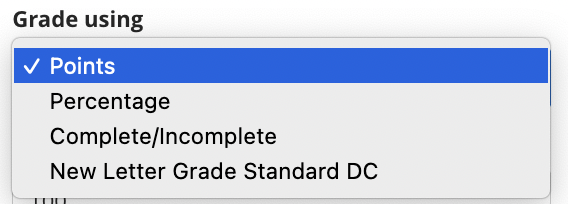
When you grade an item in your course, you can choose how the grade will be displayed for students. For each Gradable Item and Calculation, you can choose to display grades as (with examples):
Letter Grade Standard DC = B
Complete/Incomplete = ✅
Percentage = 76%
Points = 23 points
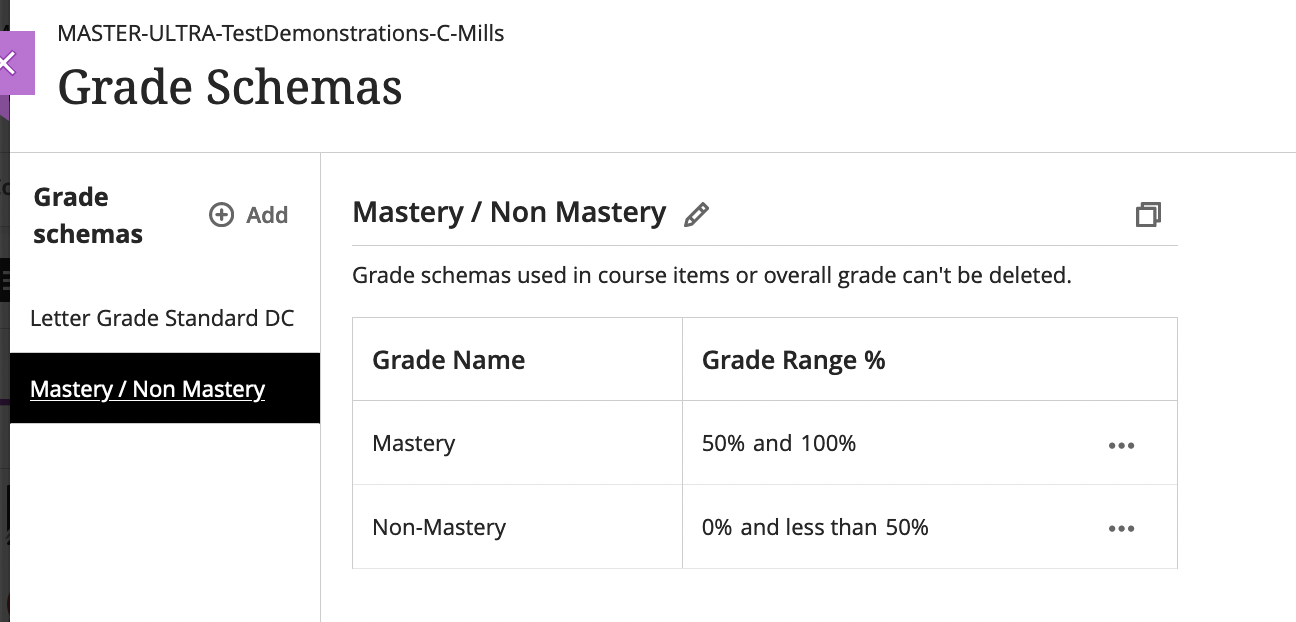
In some situations, you may want to add a new grade schema to address a specific need (for example: “Mastery/Non-Mastery”) or delete a schema you created.
Letter Grade Standard DC is a Grade Schema which takes the points scored on an item and compares it to the item's total points possible to derive a percentage and displays a letter.
Each course has the default Douglas College letter grading schema outlined in the Douglas College Grading Policy.
The schema does not round up or down. For example, a 89.75% is not an “A” (90%-100%). It does not round up to 90%.
You can choose to use a grade schema to display grades for:
an individual assessment
overall grade in the gradebook
Assign a grade schema to an assessment
In the content area of any graded assessment, click the gear icon.
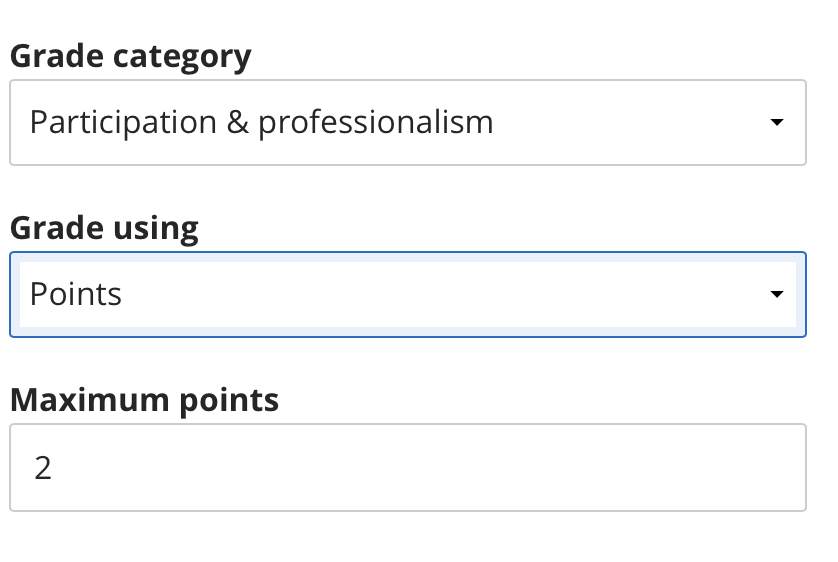
Click the drop-down menu under Grade using.
Choose your desired way to show grades.

Change how your grades will be displayed from the Grading and Participation section of Assessment Settings.

Select the way you would like to display grades
Create a new schema
A new grade schema can be helpful when you want to grade an assignment (provide feedback, etc.) and display a unique grade to it. (e.g., Mastery/Non-mastery).
In the Gradebook area, navigate to the gear icon.
Under Grade Schemas, click on Manage Grade Schemas.
Click on the Add button to create a new schema.
Assign it a meaningful name, then click Add.
By default there are two rows. Each row has a grade name and a grade range.

Add a new grade schema
You can add, edit, or delete rows in the grade schema. To add rows, position your cursor between the two rows, and click the circle with plus sign. Add a grade name and percentage.

Hover between rows to add a new row
Once you are done editing, click Save on the bottom right.
Note: Use Mastery/Non Mastery when you want to provide specific feedback and/or have students see quickly that they need to resubmit the assessment. Use Complete/Incomplete when you are less concerned about students doing any follow-up tasks (they will see nothing in their gradebook until it’s completed, and then see a checkmark when it’s done).
Edit a grade schema
In the Gradebok area, navigate to the gear icon.
Under Grade Schemas, click on Manage Grade Schemas.
Edit the grade schema title by clicking on the pencil. Schema titles have a 64-character limit. The name change will affect all places where it appears.
Click on the three dots (…) at the end of the row to edit the Grade Name or Grade Range %. You can also edit by clicking the area you would like to edit.

Note: As you edit the first number of the top row, you will notice the last number of the row below automatically updates. It is designed to not allow for gaps.
Delete a grade schema
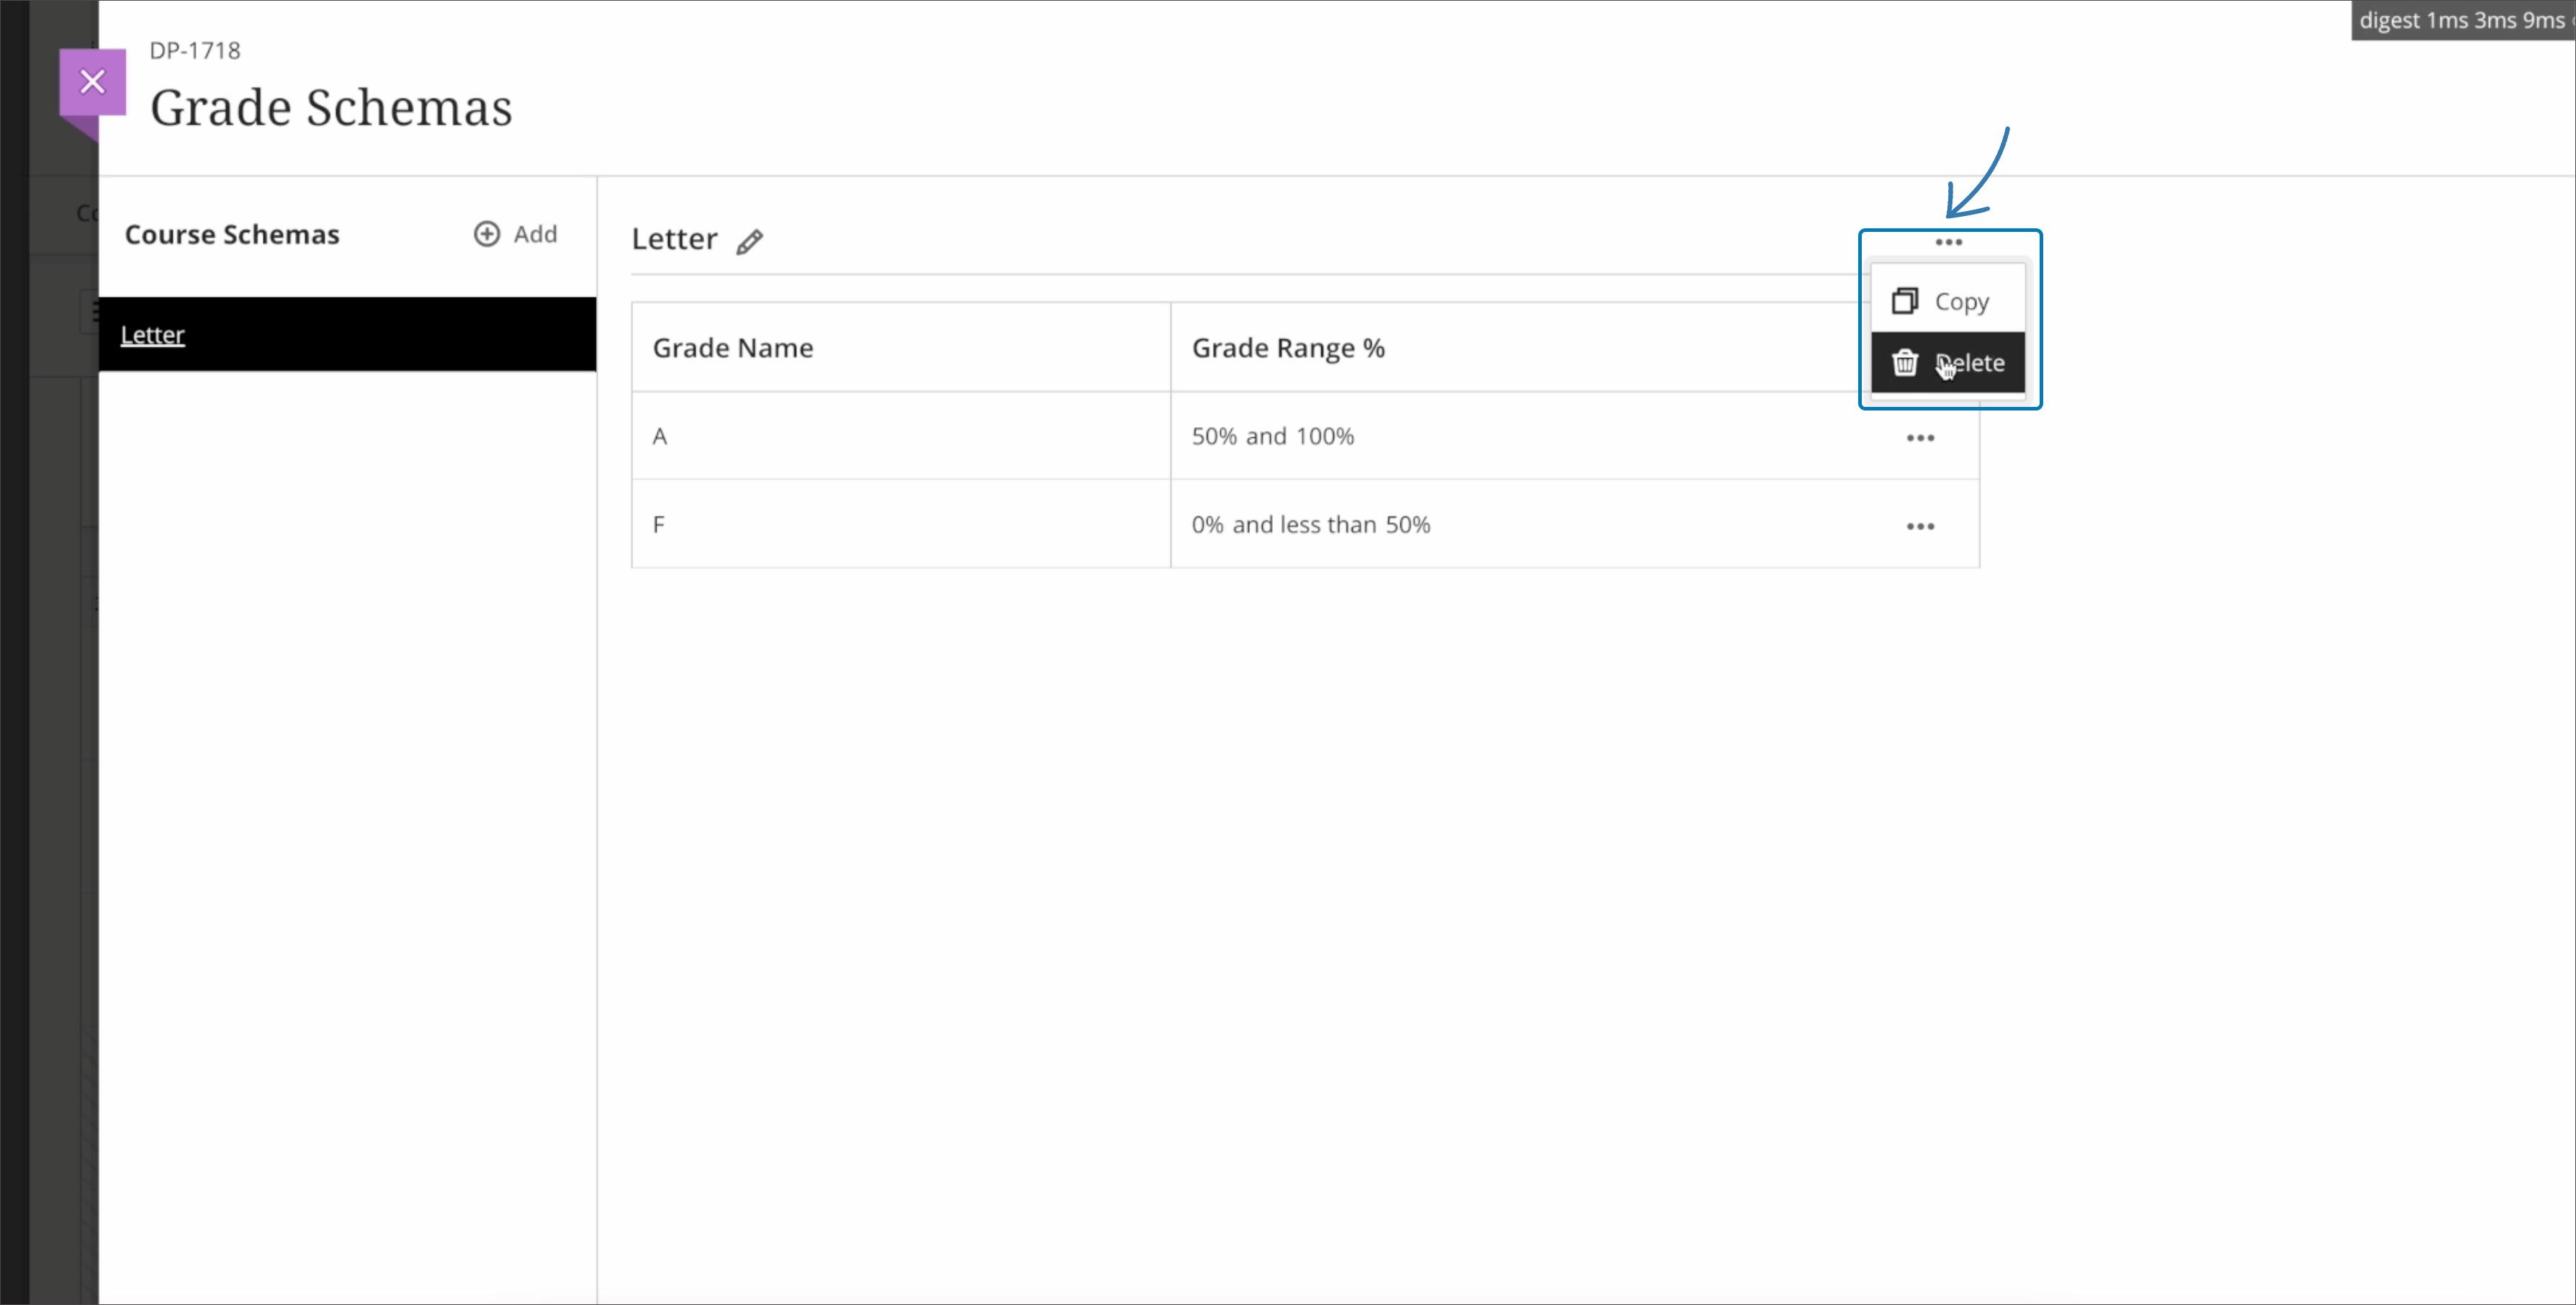
You can delete grade schemas that you have created by clicking on Gradebook > the Settings gear icon > Manage Grade Schemas > three dots (…) for the schema you wish to delete. However, if the schema is in use you will not be able to delete it.

If you copy assessments from other courses, they keep their grading schemas. If you copy an entire course, all grading schemas are copied, even if they are not aligned to gradable items.
