Video and audio recordings you have created can easily be uploaded using Kaltura media tools. You can also create new media using Kaltura tools.
Overview of Kaltura Tools
Douglas College uses a media repository (Kaltura) that allows users to upload, store, organize and share media for learning purposes. Instructors and students can:
-
Integrate lectures
-
Submit video assignments
-
Upload videos or record from a webcam
-
Publish, search and create clips from existing video content
-
Reuse videos across various courses
-
Create and deploy video quizzes
There are four main Kaltura tools:
-
Kaltura Media LTI: This is a tool that permits adding media to specific areas in your course.
-
You can add media to the general Course Content area, to Documents, Discussions, Assessments, and other areas that provide a text editor.
-
-
Kaltura My Media LTI: Instructors and student have their own private media spaces, regardless of the number of courses they're enrolled in.
-
Users can upload already-created media or media recorded directly from a webcam, or the screen.
-
The media can be integrated into course galleries, assignments, quizzes, tests, discussions, and more.
-
-
Kaltura Media Gallery LTI is a course-based space.
-
Instructors and students can submit videos to the Media Gallery.
-
All course members can search and view instructor-approved media submitted to that course.
-
-
Kaltura Video Quiz LTI: Quiz questions can be added to existing Kaltura videos. The video quiz can then be added to the course.
Embedding Kaltura Media into your Course Content area
-
Click on a plus sign
in your Course Content area where you want to add Kaltura media.
-
Click on Content Market.
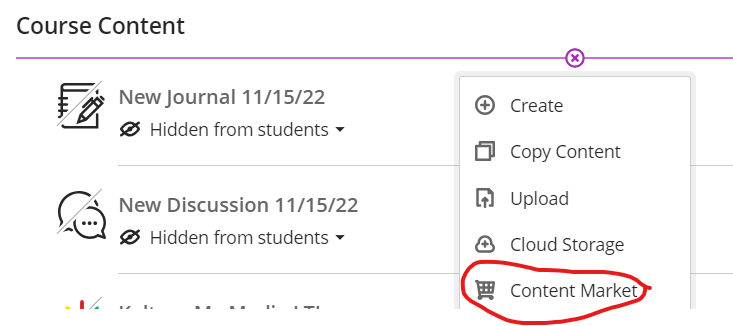
-
Click on Kaltura Media LTI.
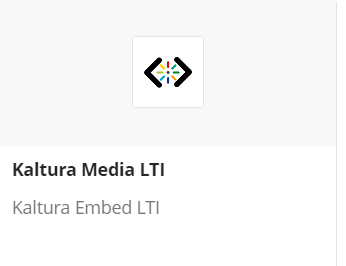
-
The layer opens on My Media. Note that you can also navigate to Media Gallery, or Media Gallery Playlists by clicking on the top tabs.
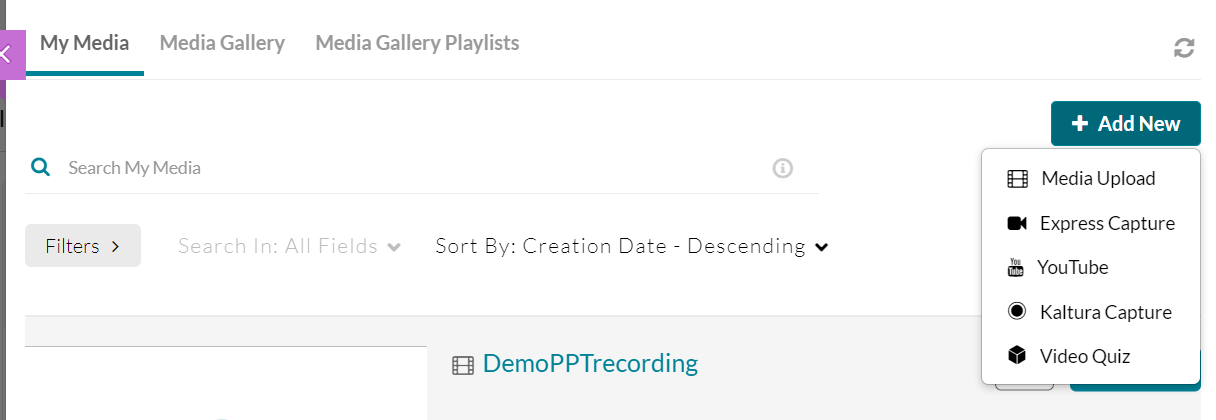
-
Find your video (you can add a new video, or scroll/search for a previously uploaded one).
-
Click on </>Embed next to the media you want to add.

-
Your selected media will appear in the Course Content location you started from.
DO NOT upload .MP4 content directly to your course. Videos (.MP4s) are generally very large files. Instead, please upload them to Kaltura to share with your students.
How to add a Kaltura media within a Document
-
Create a new Document and click on the Add Content button.
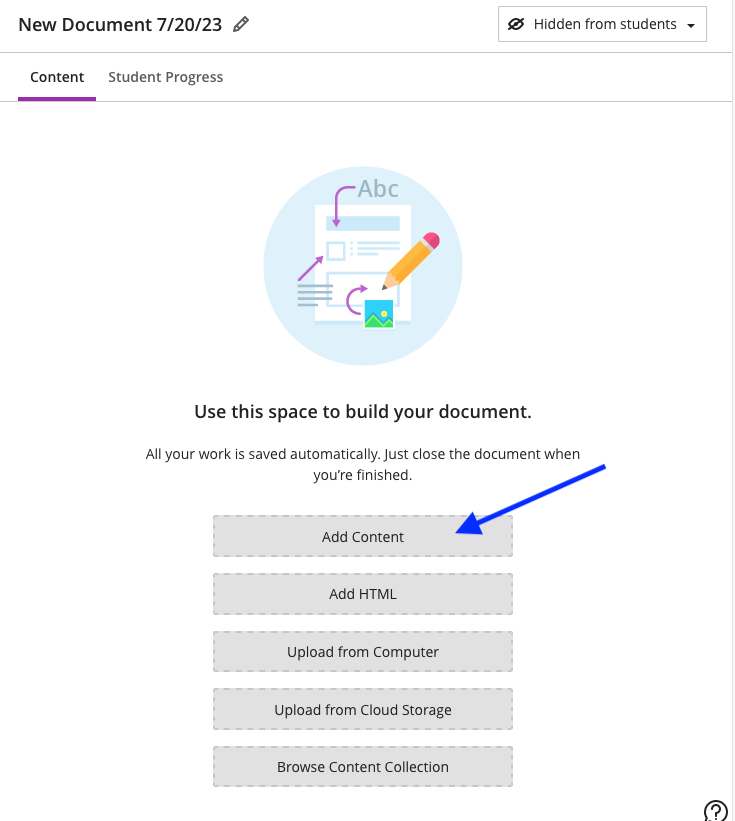
-
The content editor will appear.

-
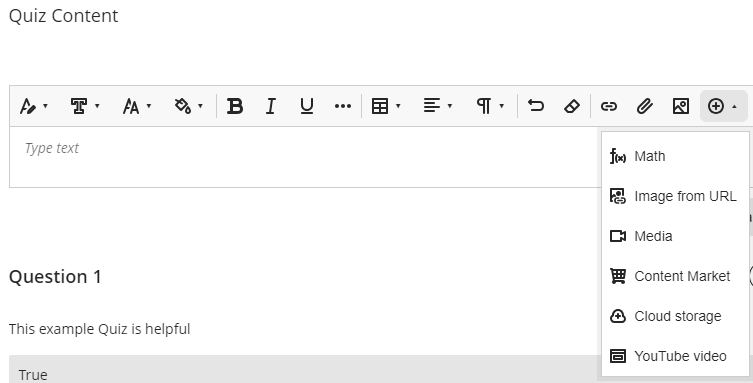
In the text editor that opens, click on Insert content (the

-
Click on Kaltura Media LTI. Your My Media layer will open.
-
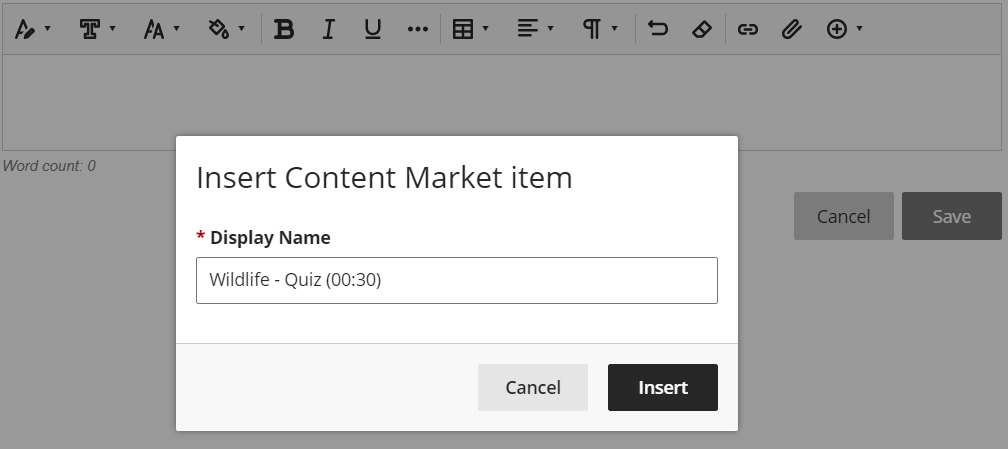
Click on </> Embed next to the media you want to add. Click on Insert in the Insert Content Market item window that appears.
-
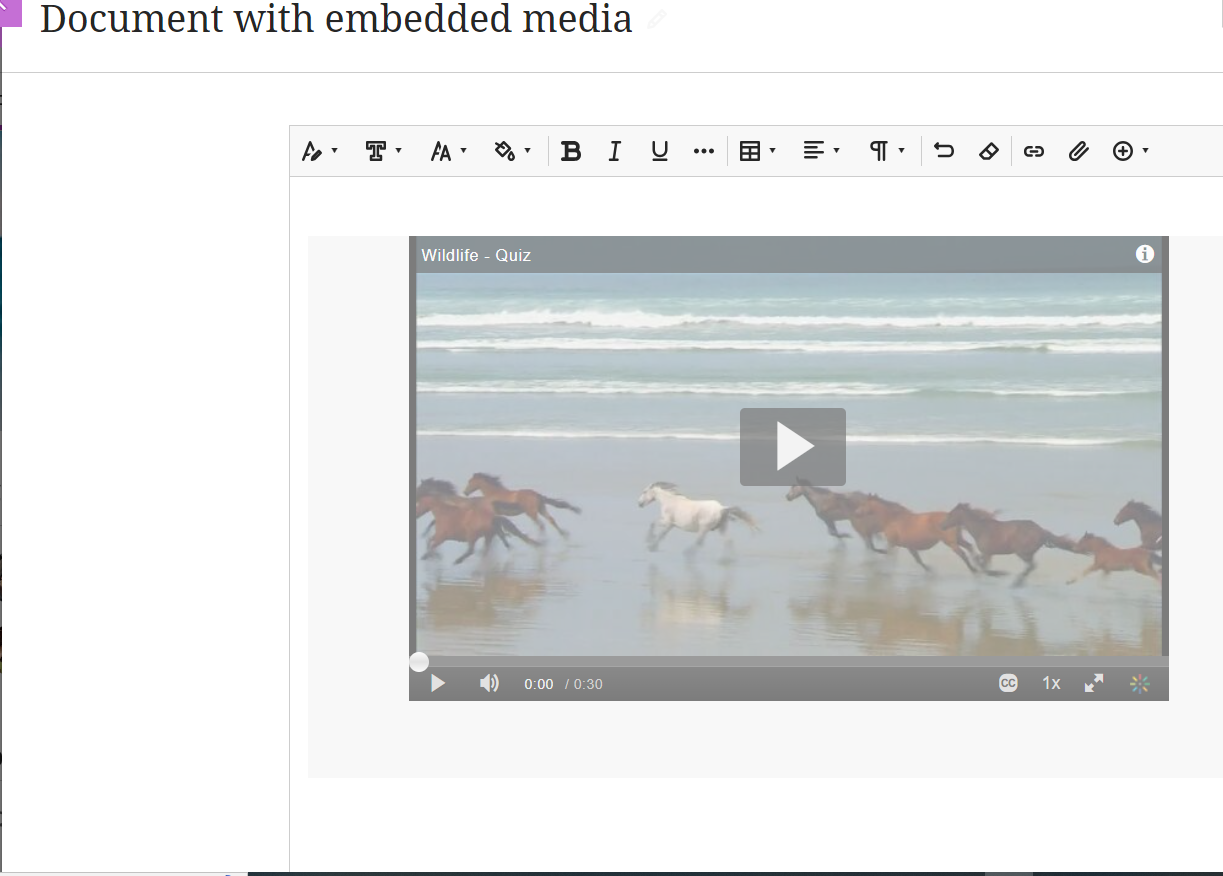
Your selected media will appear as a playable thumbnail in the Document.
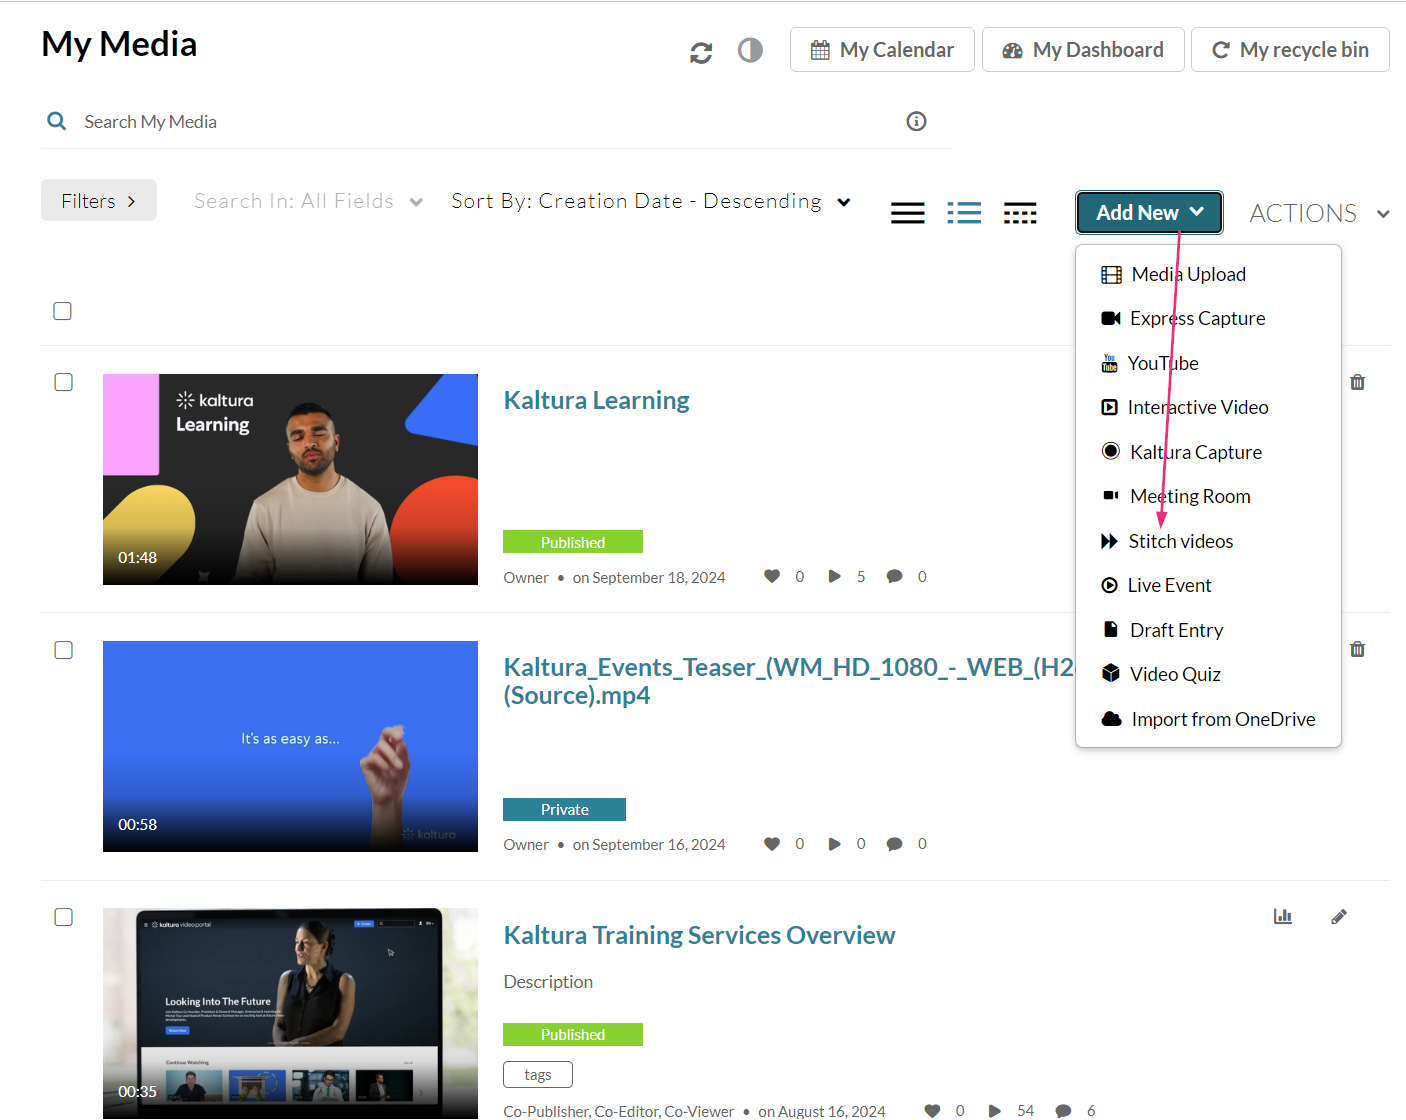
Merge Kaltura videos (Stitching)
To merge multiple Kaltura videos, navigate to Content Market > Kaltura My Media LTI > Add New > Stitch videos. Check the related resources below for more details.
Add recorded media to Assessments and Messages
-
Click on the
Add your narrated (voice-over) PowerPoints
Because PowerPoint files with narration make for very large files, your best course of action is to first save your files as videos (.MP4), then upload them to stream from Kaltura. Here’s how:
-
After creating your narrated PowerPoint, select File>Export>Create a video.
-
Select the video quality:
-
Ultra HD (4K) - Largest file size and ultra-high quality (3840 x 2160).
-
Full HD (1080p) - Large file size and full high quality (1920 x 1080).
-
HD (720p) - Medium file size and moderate quality (1280 x 720). * (To upload to Blackboard, HD quality is suggested.)
-
Standard (480p) - Smallest file size and lowest quality (852 x 480).
-
-
Decide if you want to:
-
Use Recorded Timings and Narrations
-
Don’t Use Recorded Timings and Narrations
-
-
In the Seconds spent on each slide box, select the default time you want to spend on each slide.
-
Select Create Video.
-
Enter a filename, then browse to the location you want to save your video.
-
In the Save As type box, select if you want to save the video as a MPEG-4 Video or Windows Media Video.
The MPEG-4 Video format is recommended for the best compatibility with video players.
-
Select Save.
-
It will take some time to generate the video. Check the progress bar at the bottom of the window to see when it’s complete.
-
Once your video has saved to your device, you can now add it to Kaltura and embed it in Blackboard using the Embed media in your Course Content.
Add Kaltura Media Gallery LTI
-
Click on the plus sign
-
Click on Content Market and then click on Kaltura Media Gallery LTI.
-
Your Media Gallery will open in a new layer. You can perform the following operations here:
-
Search this gallery
-
Sort By: criteria
-
Switch views
-
Add Media - click on the + Add Media button to open the Add Media layer. This allows you:
-
Search My Media
-
Click on ADD NEW to access Media Upload, Express Capture, YouTube, Kaltura Capture, and Video Quiz tools.
-
Select media by checking the box and clicking on the Publish button in the upper right corner.
-
The Media Galley layer will appear with your newly added media
-
-
Note: If you want students to publish their media to the Kaltura Media Gallery LTI for the class to access, make sure that it is set to Visible to students. When a student publishes their media, they are notified that, “All media was published successfully. Note that your media will not be listed until a moderator approves it” will appear. As an instructor, click on the Pending notice at the top of the layer to review and Approve or Reject the media.

Access Kaltura My Media
-
Click on a plus sign
-
Search My Media
-
Apply Filters, and Sort By: criteria
-
Switch views
-
Add New media, including: Media Upload, Express Capture, YouTube, Kaltura Capture, and Video Quiz
-
Perform additional Actions including: Caption & Enrich and Delete
-
-
If you want to add Kaltura My Media LTI to your Course Content page, click on the
Note: Publishing from a My Media selection is not recommended, as it is difficult to follow where it is being published. Instead, add your media to content areas by using the Kaltura Media LTI and Kaltura Media Gallery LTI.