
Discussions can be created to engage the entire class or small groups. They can be accessed from the Discussions tab in the upper horizontal menu, alongside content in your Content page (optionally), and through the Gradebook (if it is a graded discussion).
Ultra discussions do NOT use threads. All discussion posts will be part of the same large discussion. You can consider:
-
Creating multiple forums for different questions.
-
Creating small group forums (where you can assign specific groups OR students can self-enroll to discuss a specific topic).
Creating Discussions
-
Create a discussion in one of two locations:
-
Content page: Select the plus sign > Create > Discussion.
-
Discussions tab: Select New Discussion.
-
You can select Add Folder to organize discussions, dragging and dropping them inside the folder.
If you want students to able to create their own discussions, click gear icon, selecting Allow students to create discussion topics.
-
Hover over the default title to add your own title.
-
Add instructions in the text box. Add text, attach files, and images (including Unsplash). Select Save.
-
Choose the visibility for your discussion: Hidden from students, Visible to students, or Release Conditions.
-
Add a description to give extra context for the activity.
Unlike assignments and tests, when a graded discussion, which is visible to students, is in a hidden folder, it will still appear in the Discussions tab in the upper menu and in the Gradebook.
Adjusting Discussion settings
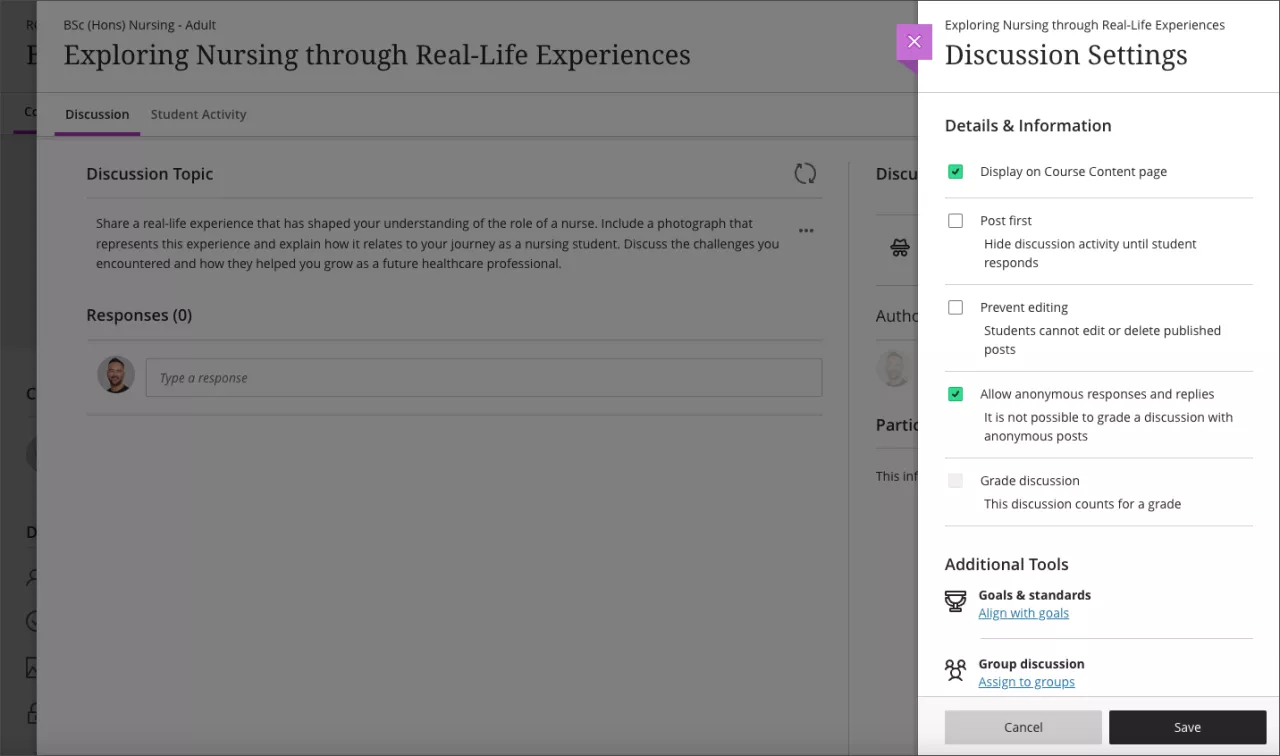
Click the gear icon to open the Discussion Settings panel, and select options for your discussion:
-
Display on the Course Content page: Include the discussion on the Content page.
-
Post First: Hide discussion activity until students create their first posting. This option must be selected before you assign a discussion to groups.
-
Prevent editing: Students cannot edit or delete published posts. However, if you allow deleting of posts and a post has a reply, when the original post is deleted by the user, the reply will remain.
-
Allow anonymous posts and replies: Allow students to post anonymously in ungraded discussions.
-
Grade discussion: Assign grades to the discussion. Selecting this will allow you to add a due date, grade category, and assign points, rubrics, etc.
-
Stop discussion activity after due date: If you have a graded discussion with a due date, you can prevent students from posting after a specified date.
-
Participation Requirement: Require students to have up to 5 Posts and/or Replies.
-
Note: You can add a second due date to discussions. For example, you may want to have a first due date for posting an initial response, then a second due date for replying to posts from other students.
Creating Group Discussions
Small group discussions can be used to engage groups of students on a particular topic. Each group will receive the same prompt/instructions. You can move between groups by selecting the dropdown menu.
-
First, create a new group set for your discussion in the upper horizontal menu under the Groups tab.
-
Click New group set.
-
Decide whether you will manually assign, automatically assign, self-enroll, or import students from a CSV file. If manually assigning students, add them to their respective groups.
-
Give your group set a name (e.g., Weekly Discussions).
-
Add a description (optional).
-
Click the dropdown menu beside the black Add Group button, choosing from either Create a Group or Create Multiple Groups (choosing the number of groups you wish created). Click Continue.
-
Click Save.
-
Be sure to make your groups visible to students. (They must be visible for you to access them when attaching groups to your discussions in the steps that follow.)
-
-
Create a new discussion in the Content area with the plus sign or click New Discussion in the Discussions tab.
-
Customize your discussion by adding a title and a prompt, adjusting the settings.
-
In the Settings (gear icon), under the heading Additional Tools, click the dropdown menu below Group discussion. Select your newly created group set.
-
Click Save.
Once student contributions have been made in group discussions, you will not able to move students between groups.
How do group discussions appear
-
Students can only access discussions they are part of in the list. This is indicated by a group icon below it with the group name.
-
For instructors, the number of groups assigned to a discussion is indicated below the discussion.
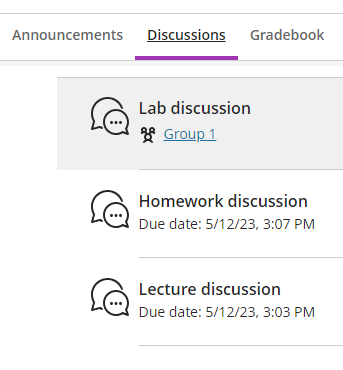
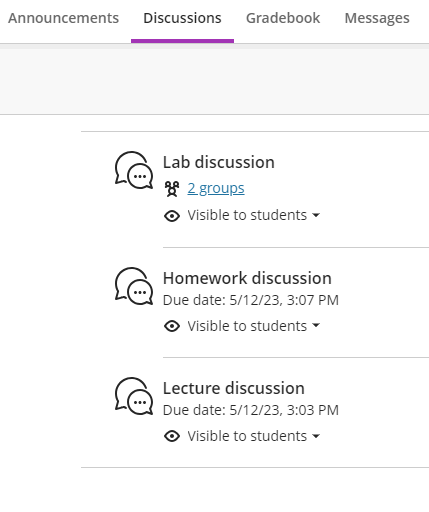
If you want to create a discussion for a single group, create a group set with only one group in it (while keeping the remaining students as unassigned). Only the students in the group can access their group discussion, while the unassigned students will not.
Discussions created by students
When you allow students to create discussions, their titles appear with the label Created by student on the main Discussions page. You can rearrange the student discussions so that they all appear together or move them to a folder.
When course members open a discussion, the author is listed in the side panel.
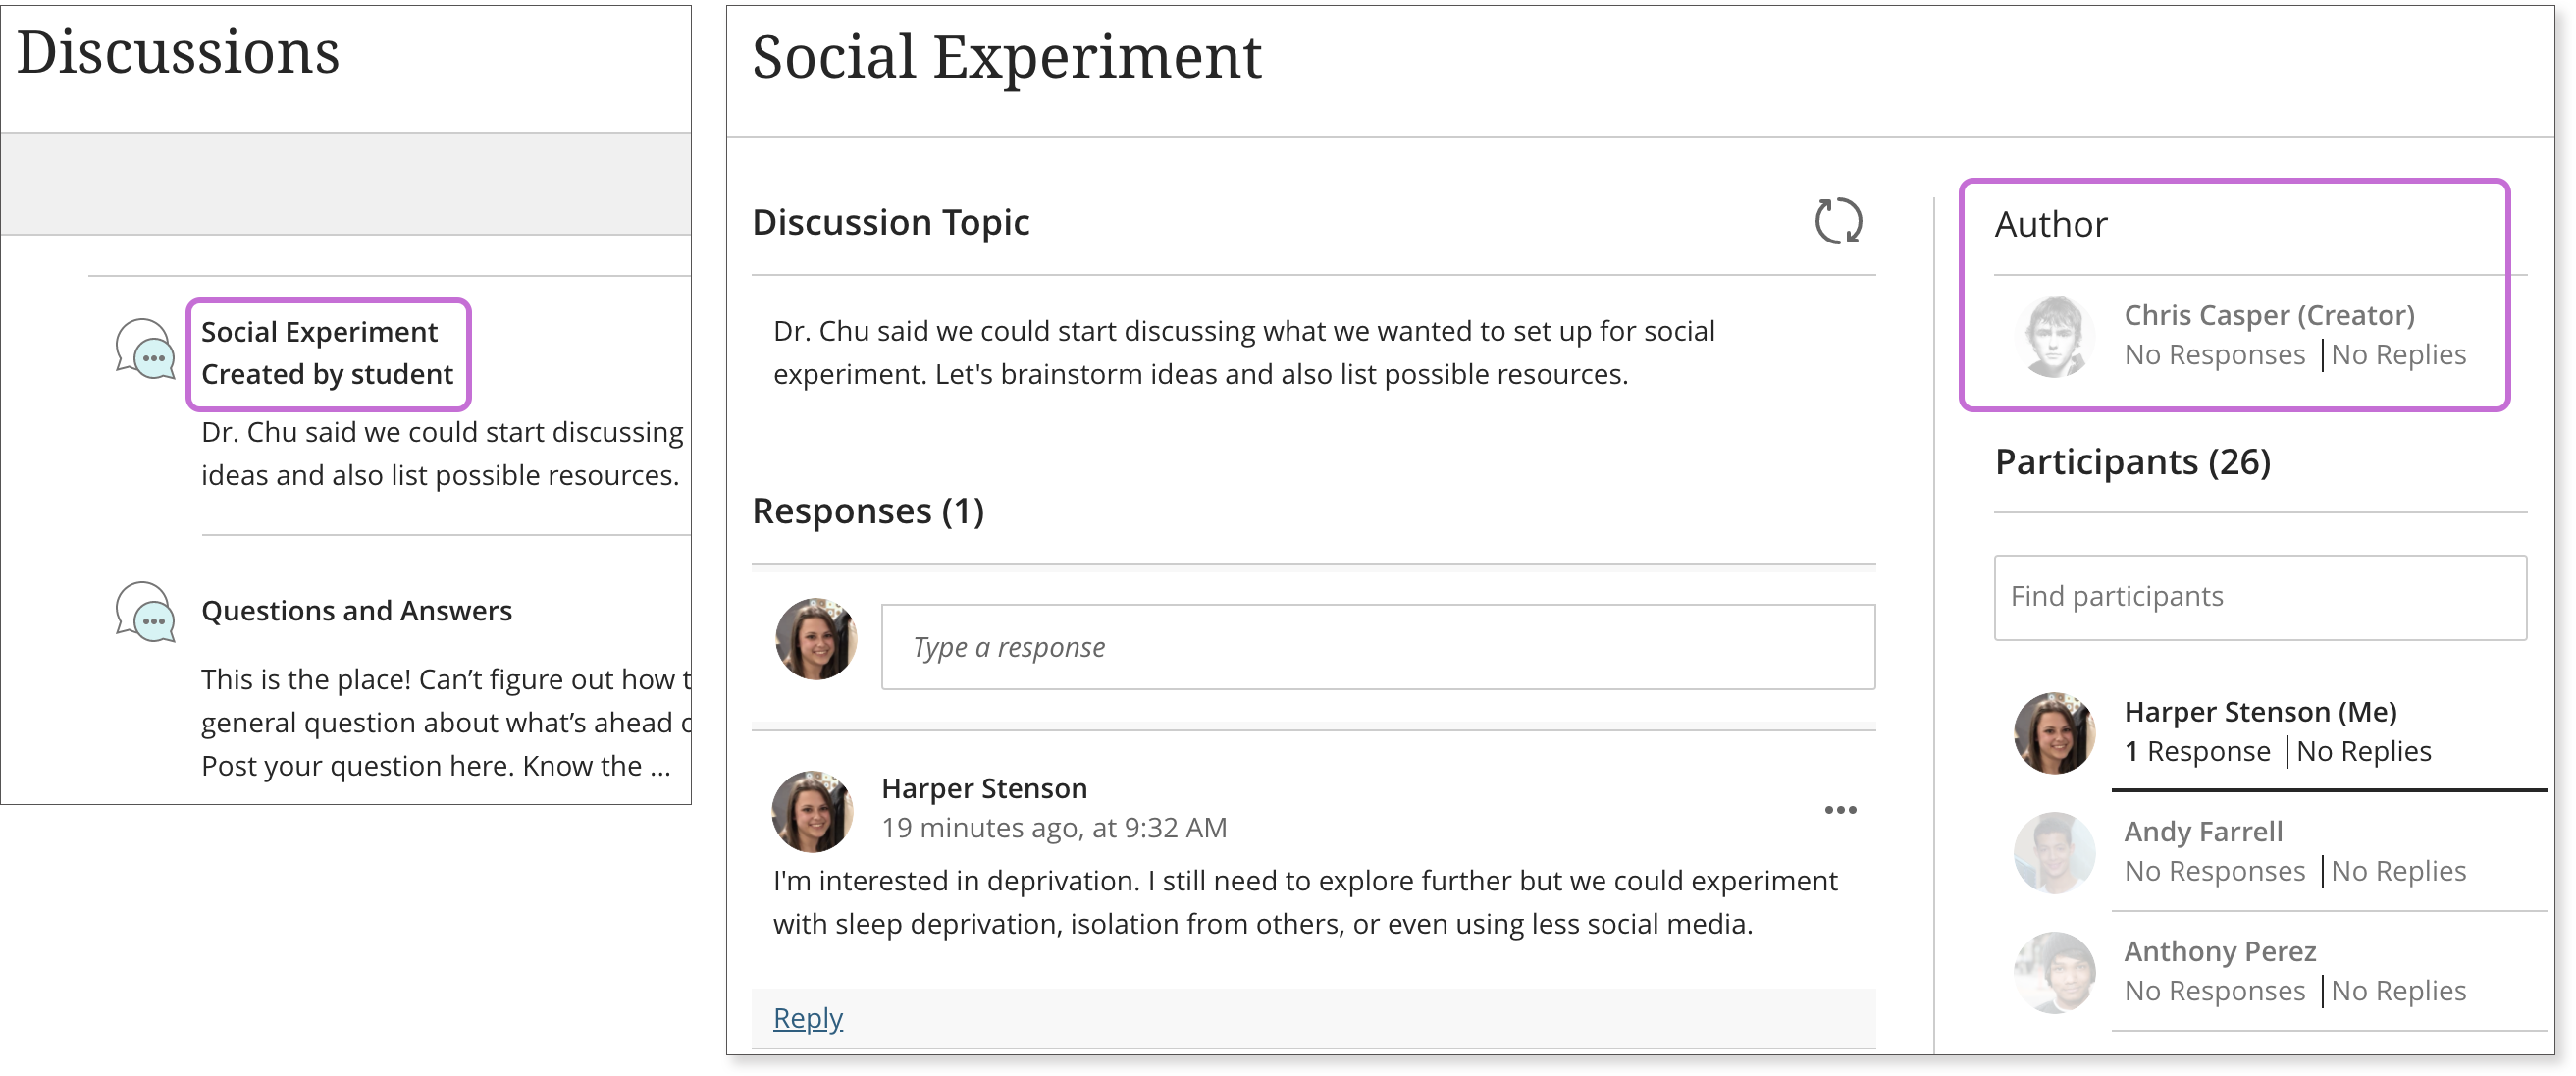
Once a student has created a discussion, you can then edit the discussion to make it a graded assessment.
Anonymous Discussions
You can choose to allow students to participate in anonymously in ungraded discussions. You have the option to turn off anonymous posts. However, the discussion will remain ungradable.
When using anonymous discussions, you must communicate with your students that their identity may be disclosed in the case of formal investigation into inappropriate conduct. If you believe that a student has behaved inappropriately in an anonymous post, please reach out to servicedesk@douglascollege with the course name, discussion name, specific post. Academic Technology Services will require approval from your Dean or Associate Dean before releasing the identity of this student.
In the Discussion Settings, check the box “Allow anonymous responses and replies”.
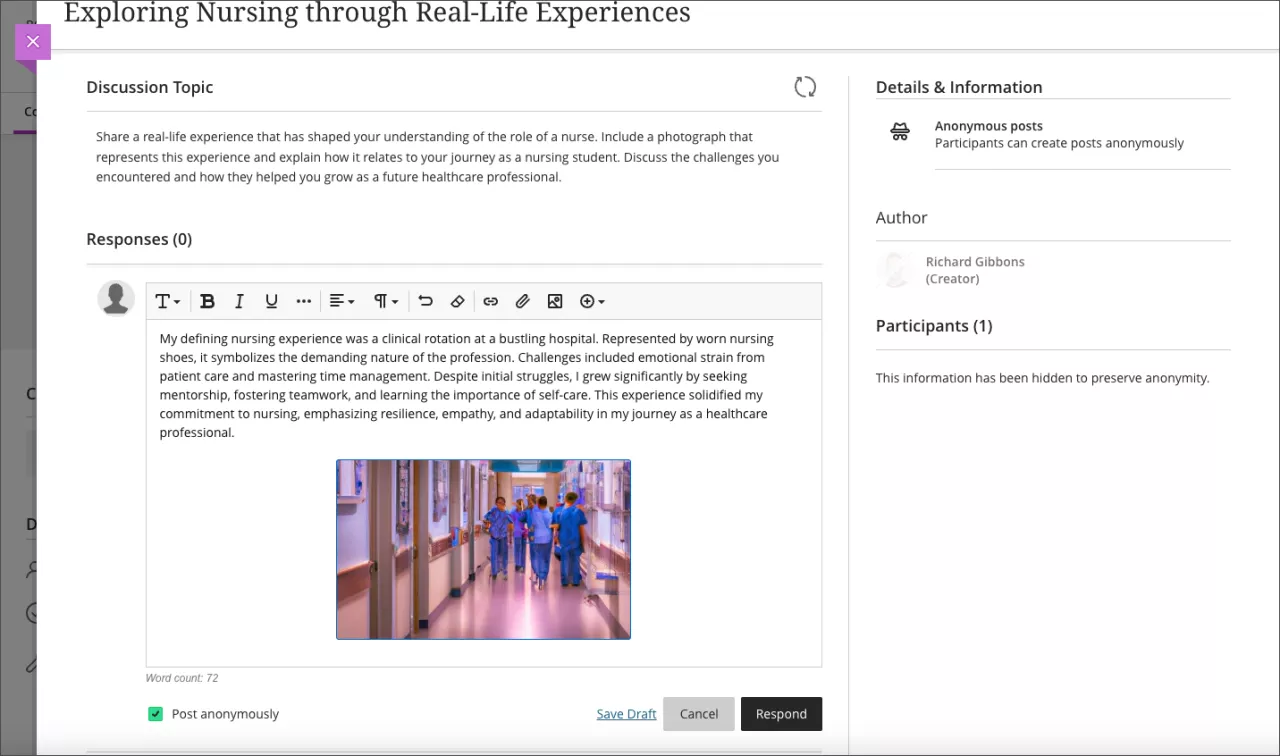
Once anonymous posts are allowed, students can click on the box “Post anonymously” below the discussion text box.
Follow Discussions
Both instructors and students can choose to follow Discussions.
-
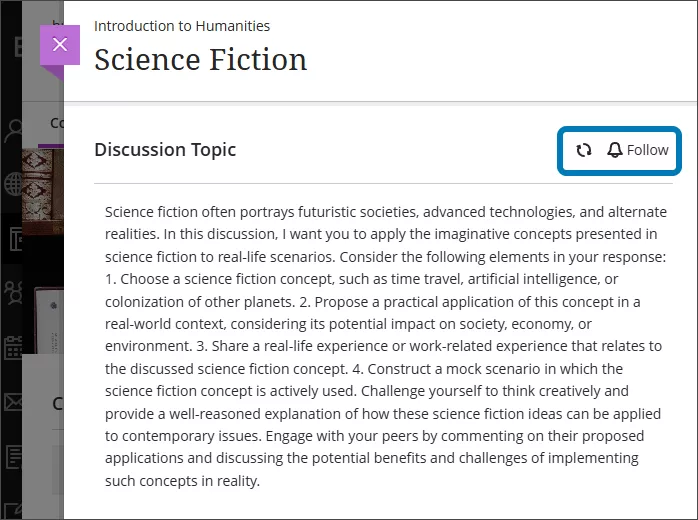
Open the Discussion you wish to follow.
-
Click on Follow next to the bell icon.
-
Edit your notification settings to ensure you are notified of the Discussion topic.
-
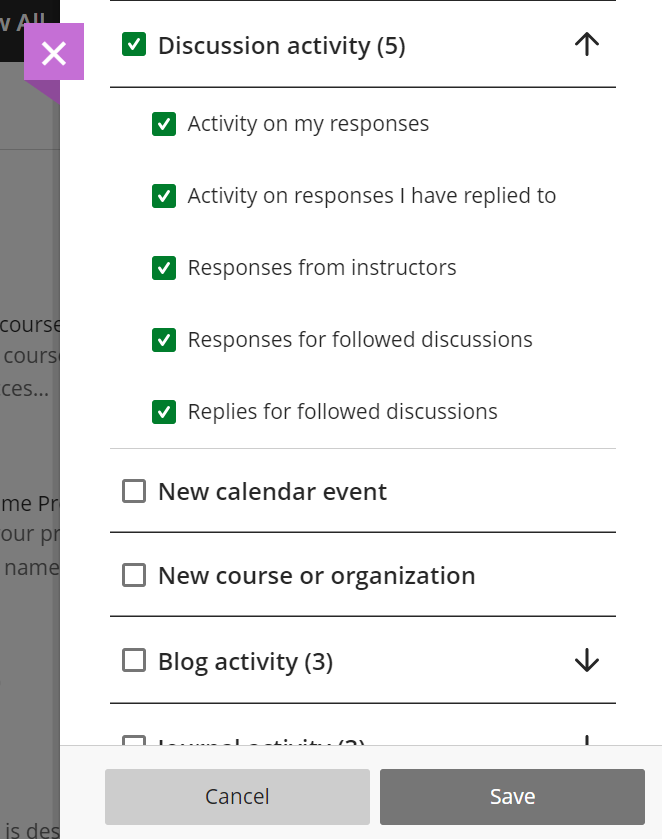
In the Blackboard Base Navigation, navigate to your profile name > Global Notification Settings > Stream/Email/Push notifications.
-
Under Discussion activity, Responses for follow discussions and Replies for follow discussions should be turned on. Click Save.