Grading individual assignments or tests
Navigating the grading area
Access the submissions:
From your Course Content >Assessment name > Submissions
From the course Gradebook > Gradable Items > Assessment name > Submissions
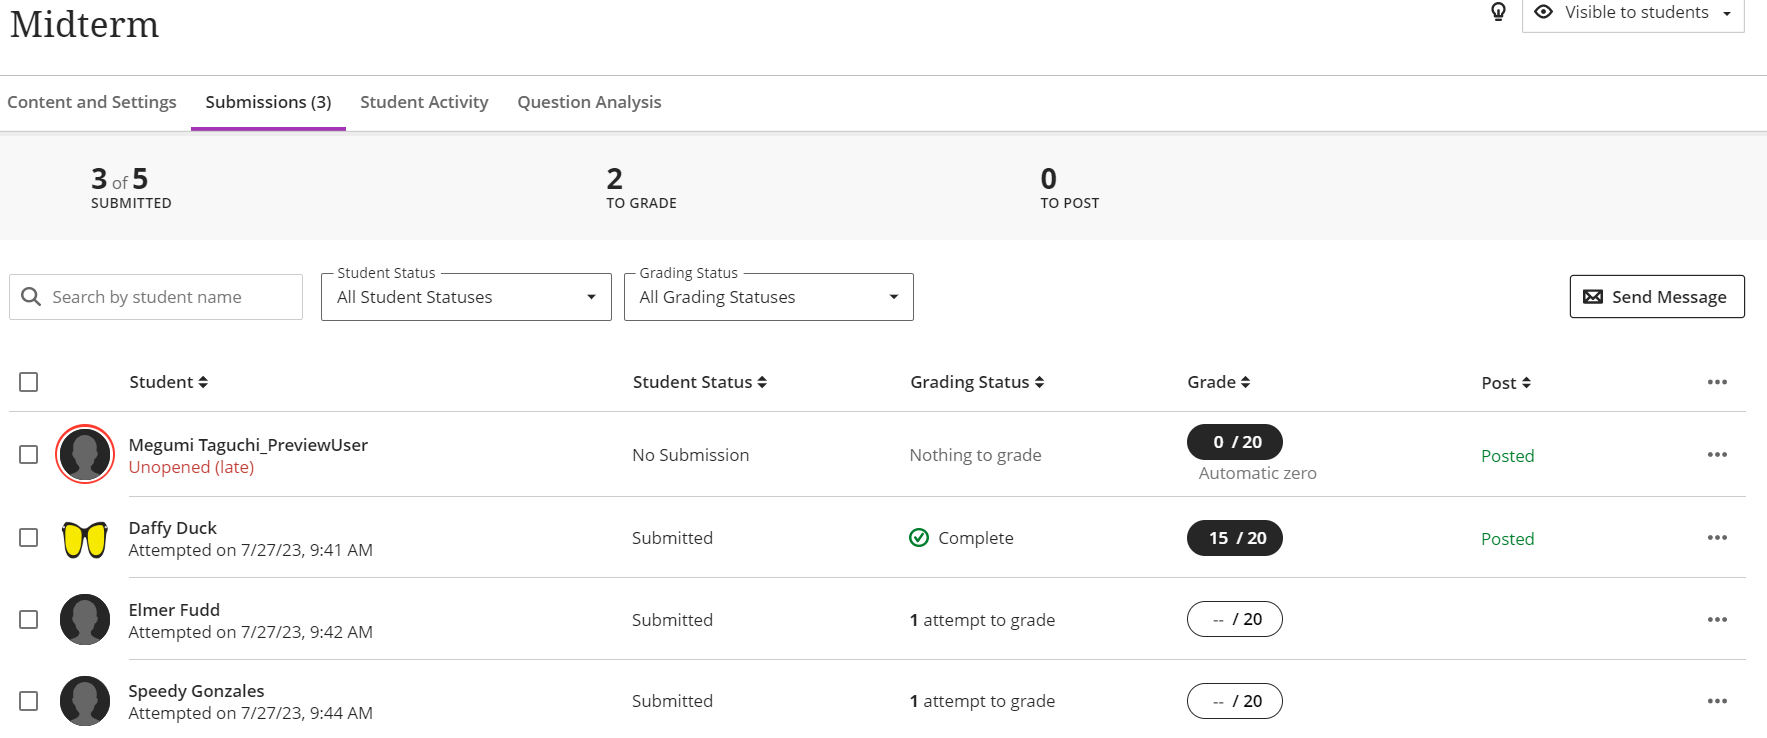
Select the row of a student who requires grading. It will say “X attempt to grade” in Grading Status.
At this time, the following grading platform is not available for peer review assessments and assessments that have parallel or delegated grading. For these types of assessments, please check the related links.
Access responses by student
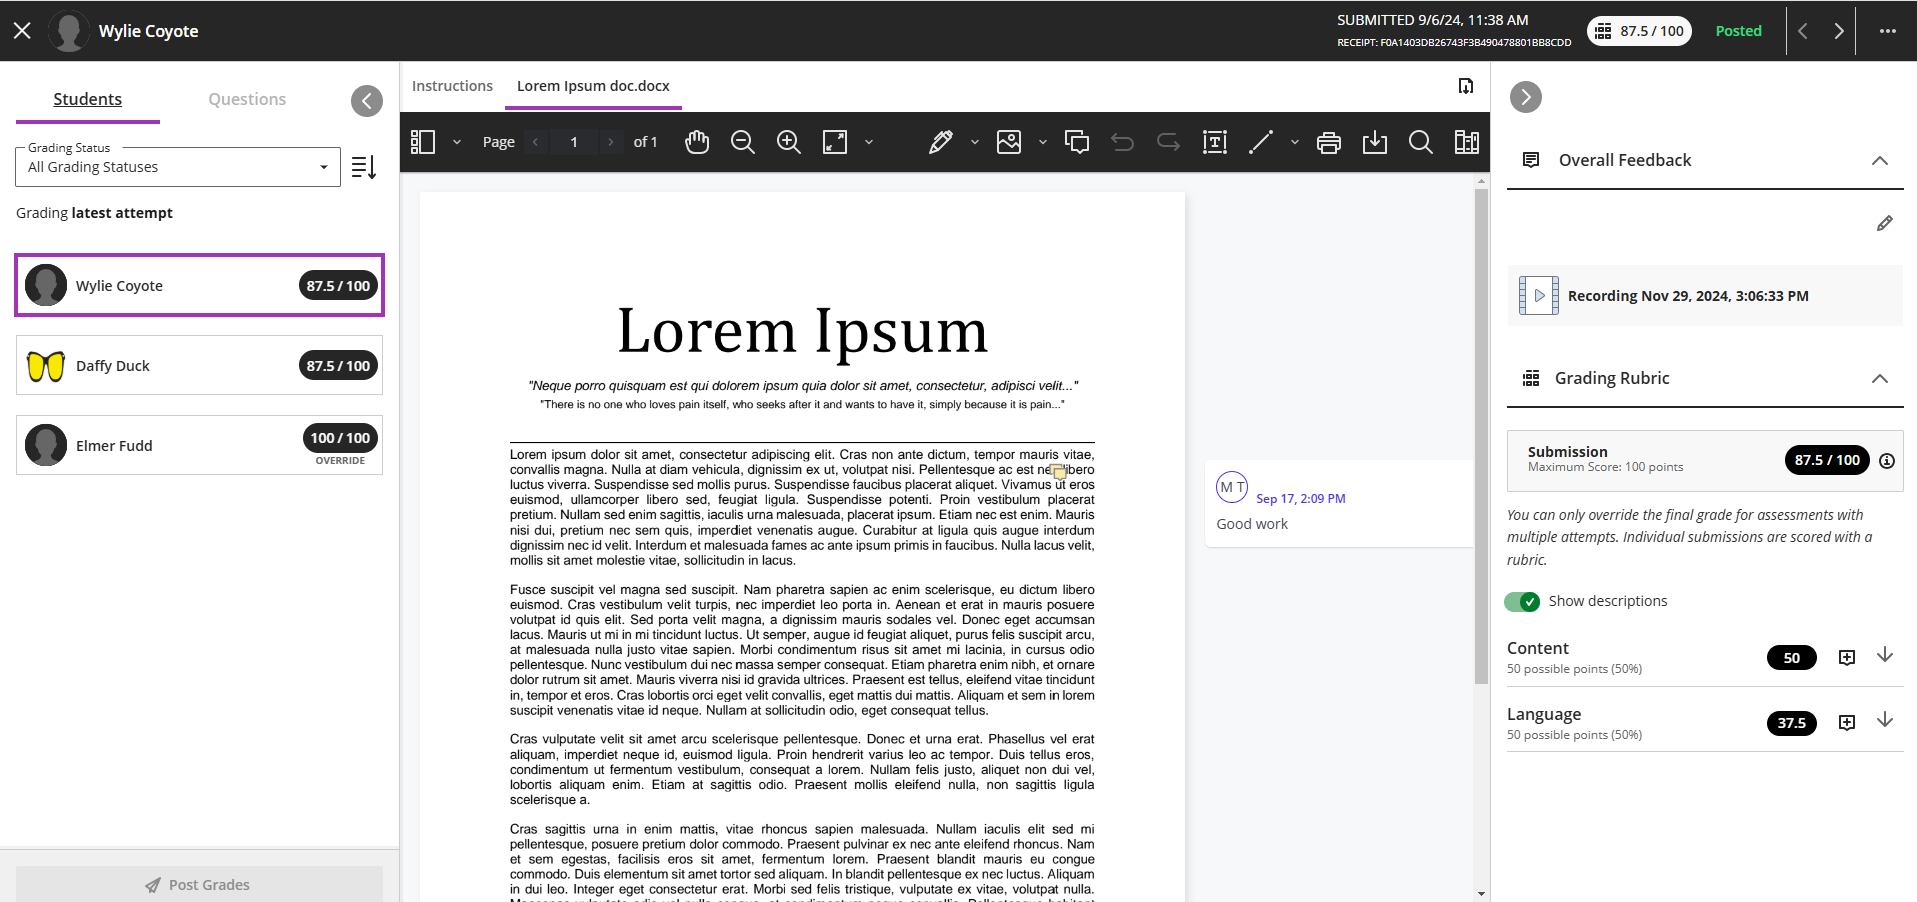
Select which student’s submission you want to grade on the left
The responses for the selected student and the submission receipt number in the middle.
The student name, student ID, when they submitted, and their grade are on the top
Sort students by submission date, last name, first name, and student ID next to the Grading Status drop down menu.
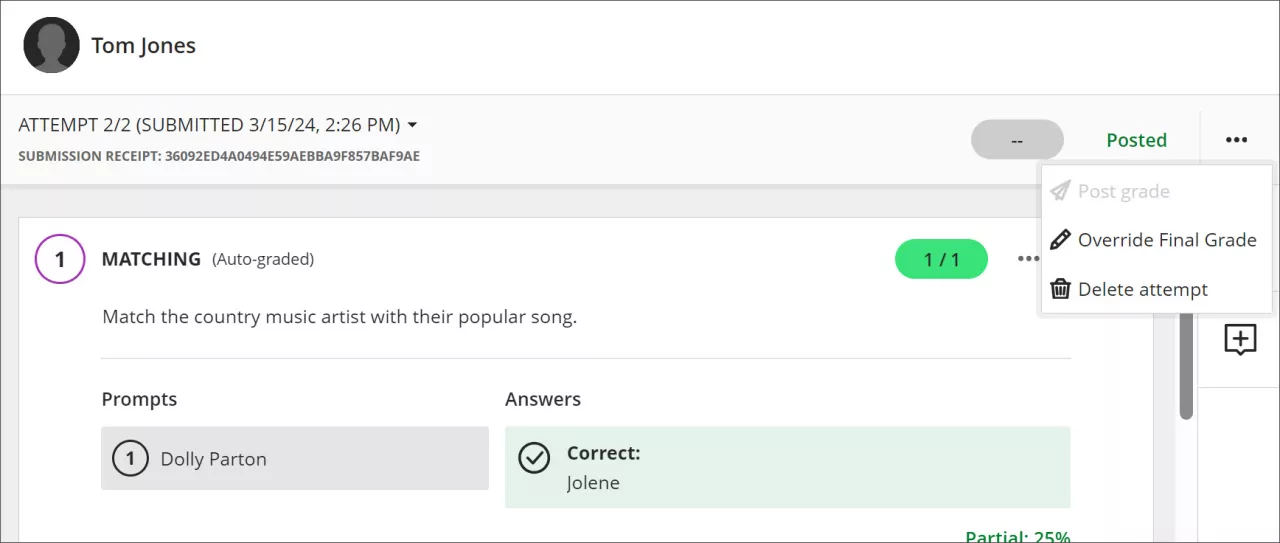
Delete a student’s attempt by selecting the 3 dots (…) on the top right and selecting Delete attempt. Doing so will delete any associated grades.
Use the < or > arrows to navigate between responses.
Exclude an attempt by selecting the three dots on the top right of the window and select Exclude Attempt. If you decide you want to include the attempt again, select the three dots again and select Undo exclude attempt.
For anonymous assessments, an anonymous submission number will help you distinguish between students and will be listed in lieu of student names on the left.
When excluding attempts for students, the excluded attempt is part of the attempt count for the assessment. For example, if you allow three attempts and excluded one student’s attempt, the student can only submit twice.
Access responses by question
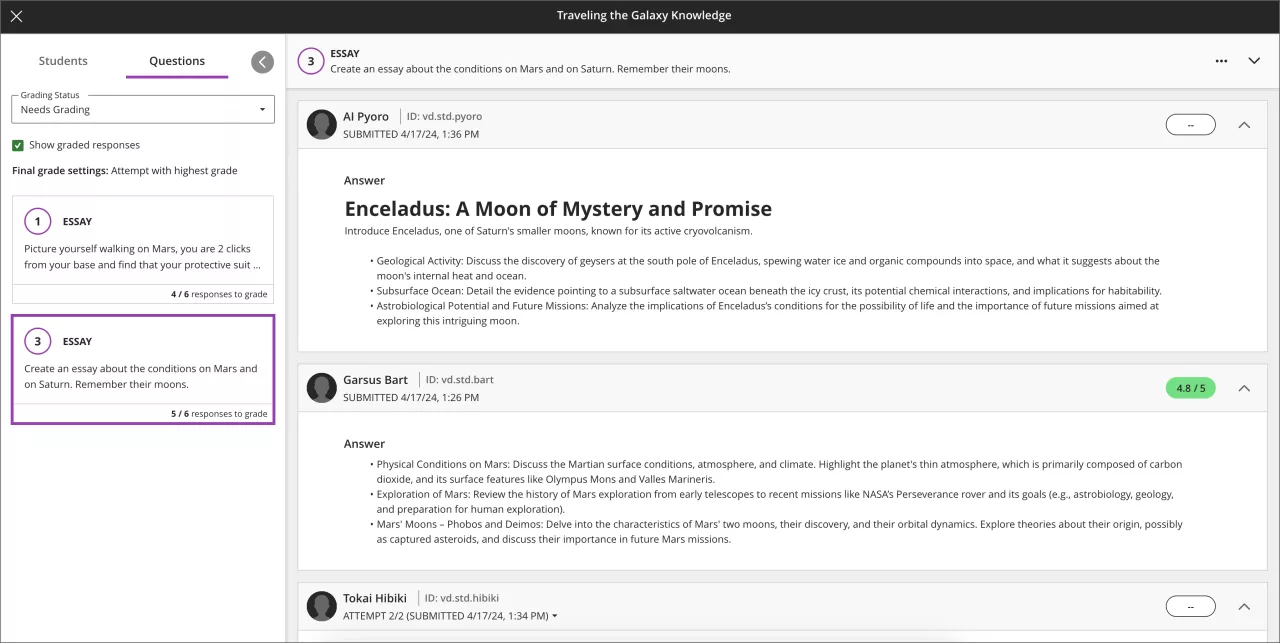
Choose the question you would like to grade on the left. You are able to see how many attempts you have graded so far (ie: 1/5 attempts graded).
Check the responses to that question in the middle.
Check the instructions for that particular question at the top.
Check off Show Graded Responses when using the Needs Grading filter to include graded responses.
Editing your assessment
While grading, you may realize that one of your questions has a wrong answer or a question may have been too difficult for your students. You can edit these questions.
Select the three dots (…) > Edit/Regrade.

Edit the response and select Save.
Check off Give full credit to everyone or make the question Extra Credit if you decide that the question doesn’t align with your teaching goals. Select Save.
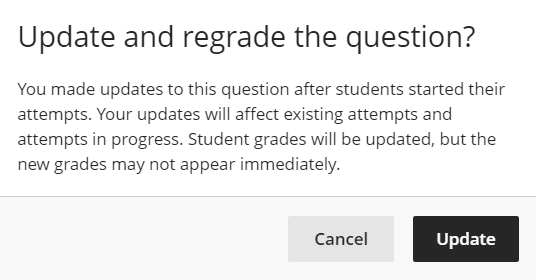
Select Update in the pop-up to confirm the changes.
Navigate between multiple attempts
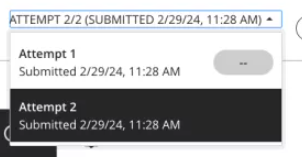
If you allowed for multiple attempts, you can toggle between attempts using the down arrow next to their last attempt.
Maximizing the response area
Maximize the response panel by collapsing left and right panels (feedback panel) by selecting the arrows.
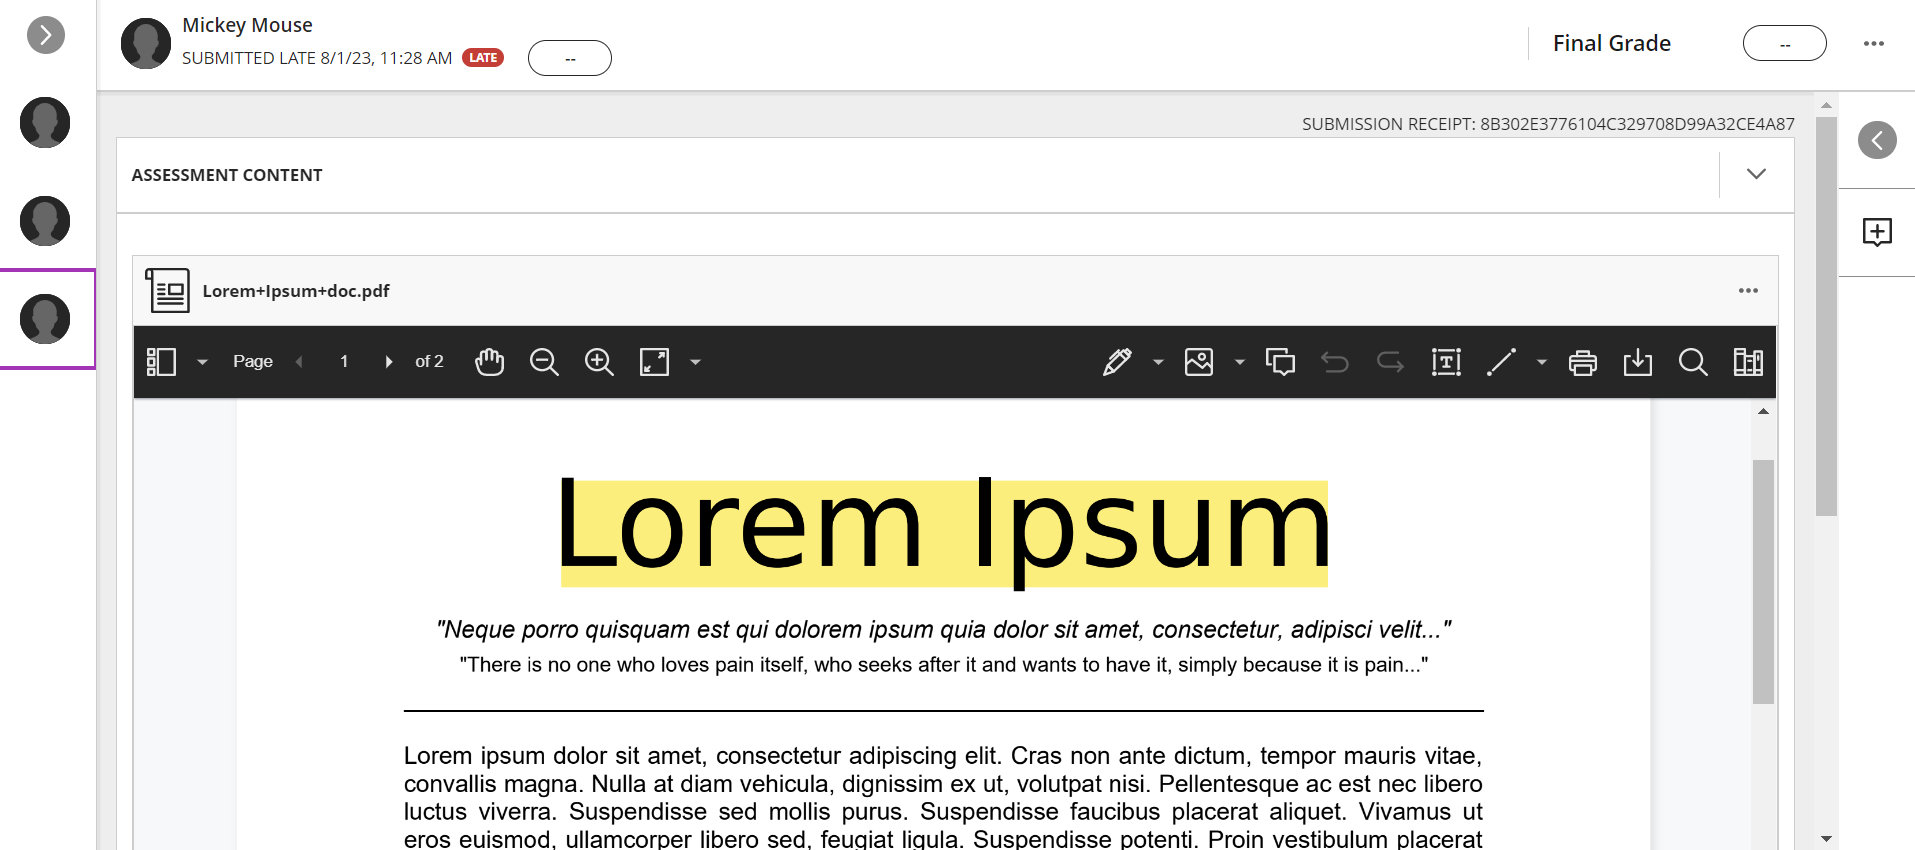
Further expand the page by selecting the Fit Page icon.

Grade the assessment
From the grading areas:
To mark each question individually, selecting the pill for each question and enter a score.

To give an overall score for a student, select on the three dots (…) in the top right corner and select Override Final Grade. If you assign grades here, an override label appears next to the grade. To remove an override grade, select on the three dots and select Remove Override.
Grades: Select on the name of the assessment. Enter grades in the oval grade pills for each student and enter.
Gradebook: You can also give scores in the Grades tab. Select on the cell for the student and assessment you want to grade. Press Enter or select outside the Gradebook.

Scores can be no more than five digits. You can include two additional digits after a decimal point.
Posting Grades (making grades & feedback visible to students)
By default, grades are not auto posted. Once an assessment is graded, instructors will have an option to manually ‘post’ grades individually or for all individuals in the course. This option gives control to the instructor to post grades at the right time.
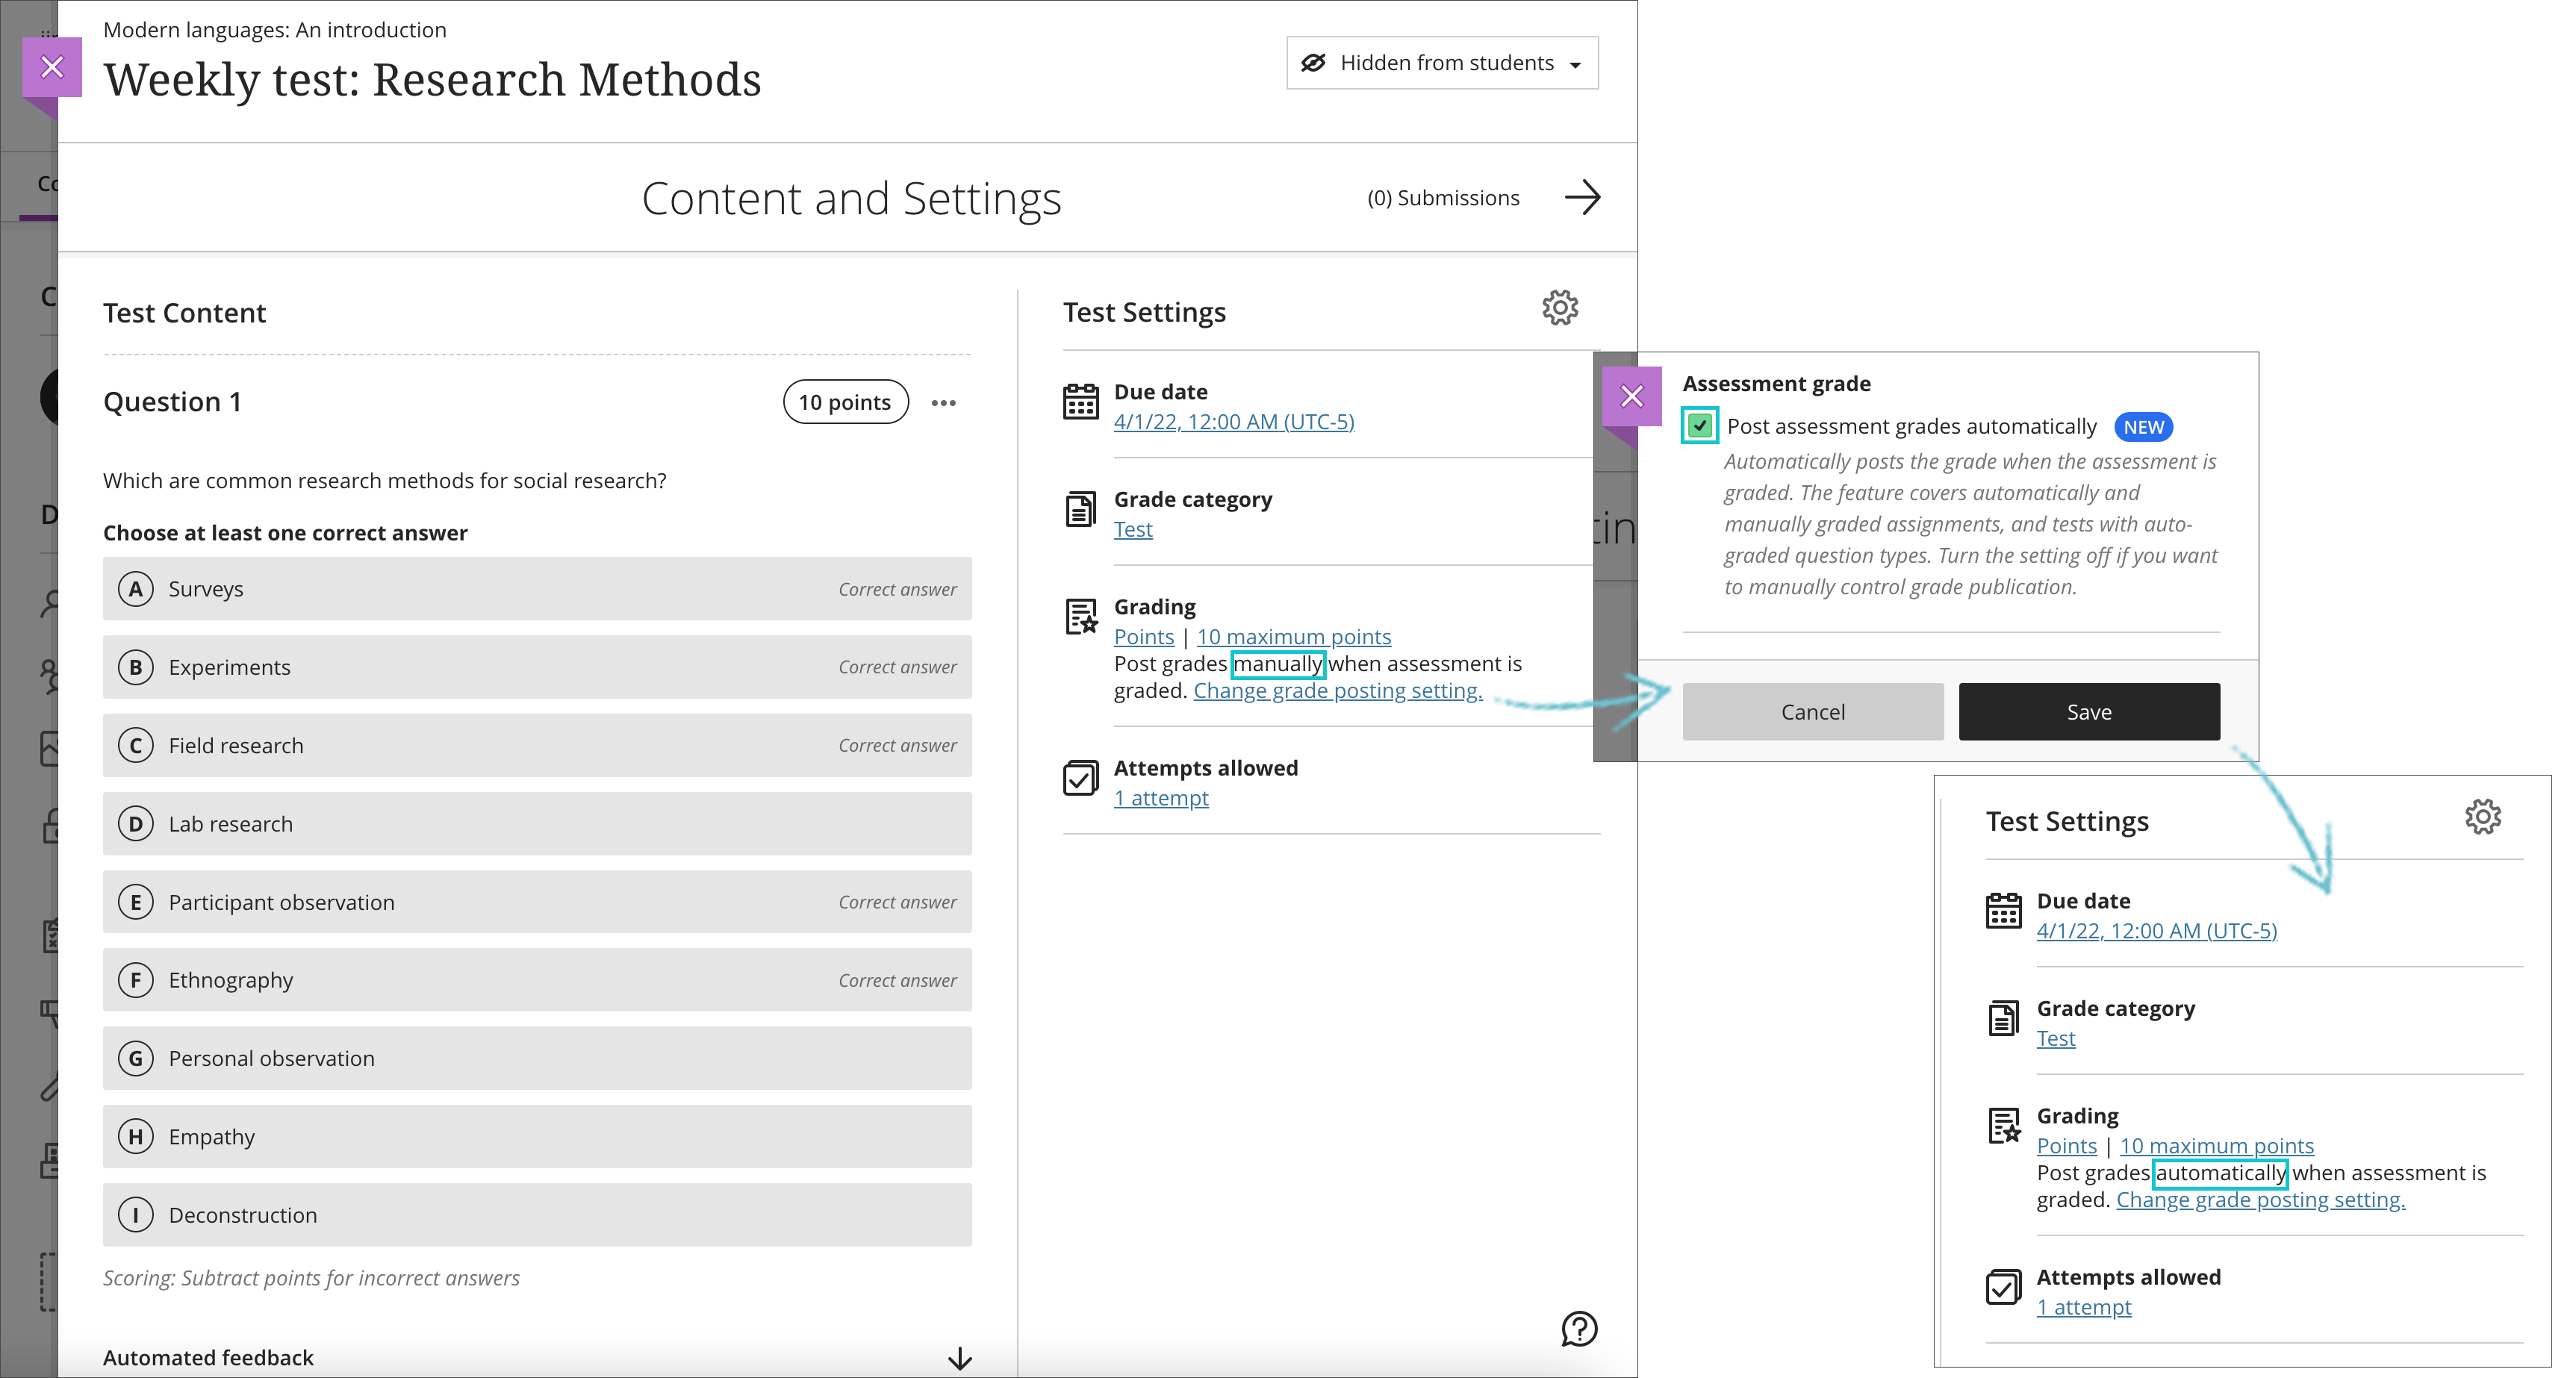
When “Post assessment grades automatically” is selected, an assessment grade appears to the student as soon as the attempt is graded.
Warning: If you have Automatic Zeros (in Gradebook settings) turned ON and an assessment has a due date, grades will get posted automatically even if you did not turn on Post assessment grades automatically.
View and change the setting
Navigate to Gradebook > Gradable Items, select on the three dots in the assessment row, and select Edit.
Select on the gear icon, and scroll down to Assessment grade
Select or deselect Post assessment grades automatically
If "Post assessment grades automatically" setting on the assessment settings panel is selected, then grades will be posted automatically.
When this setting is de-selected, the instructor will need to manually post grades. Students will see ‘not graded’ in the grade pill until the instructor posts results.
When the instructor selects the option to auto-post, the Post Grades button will not appear.
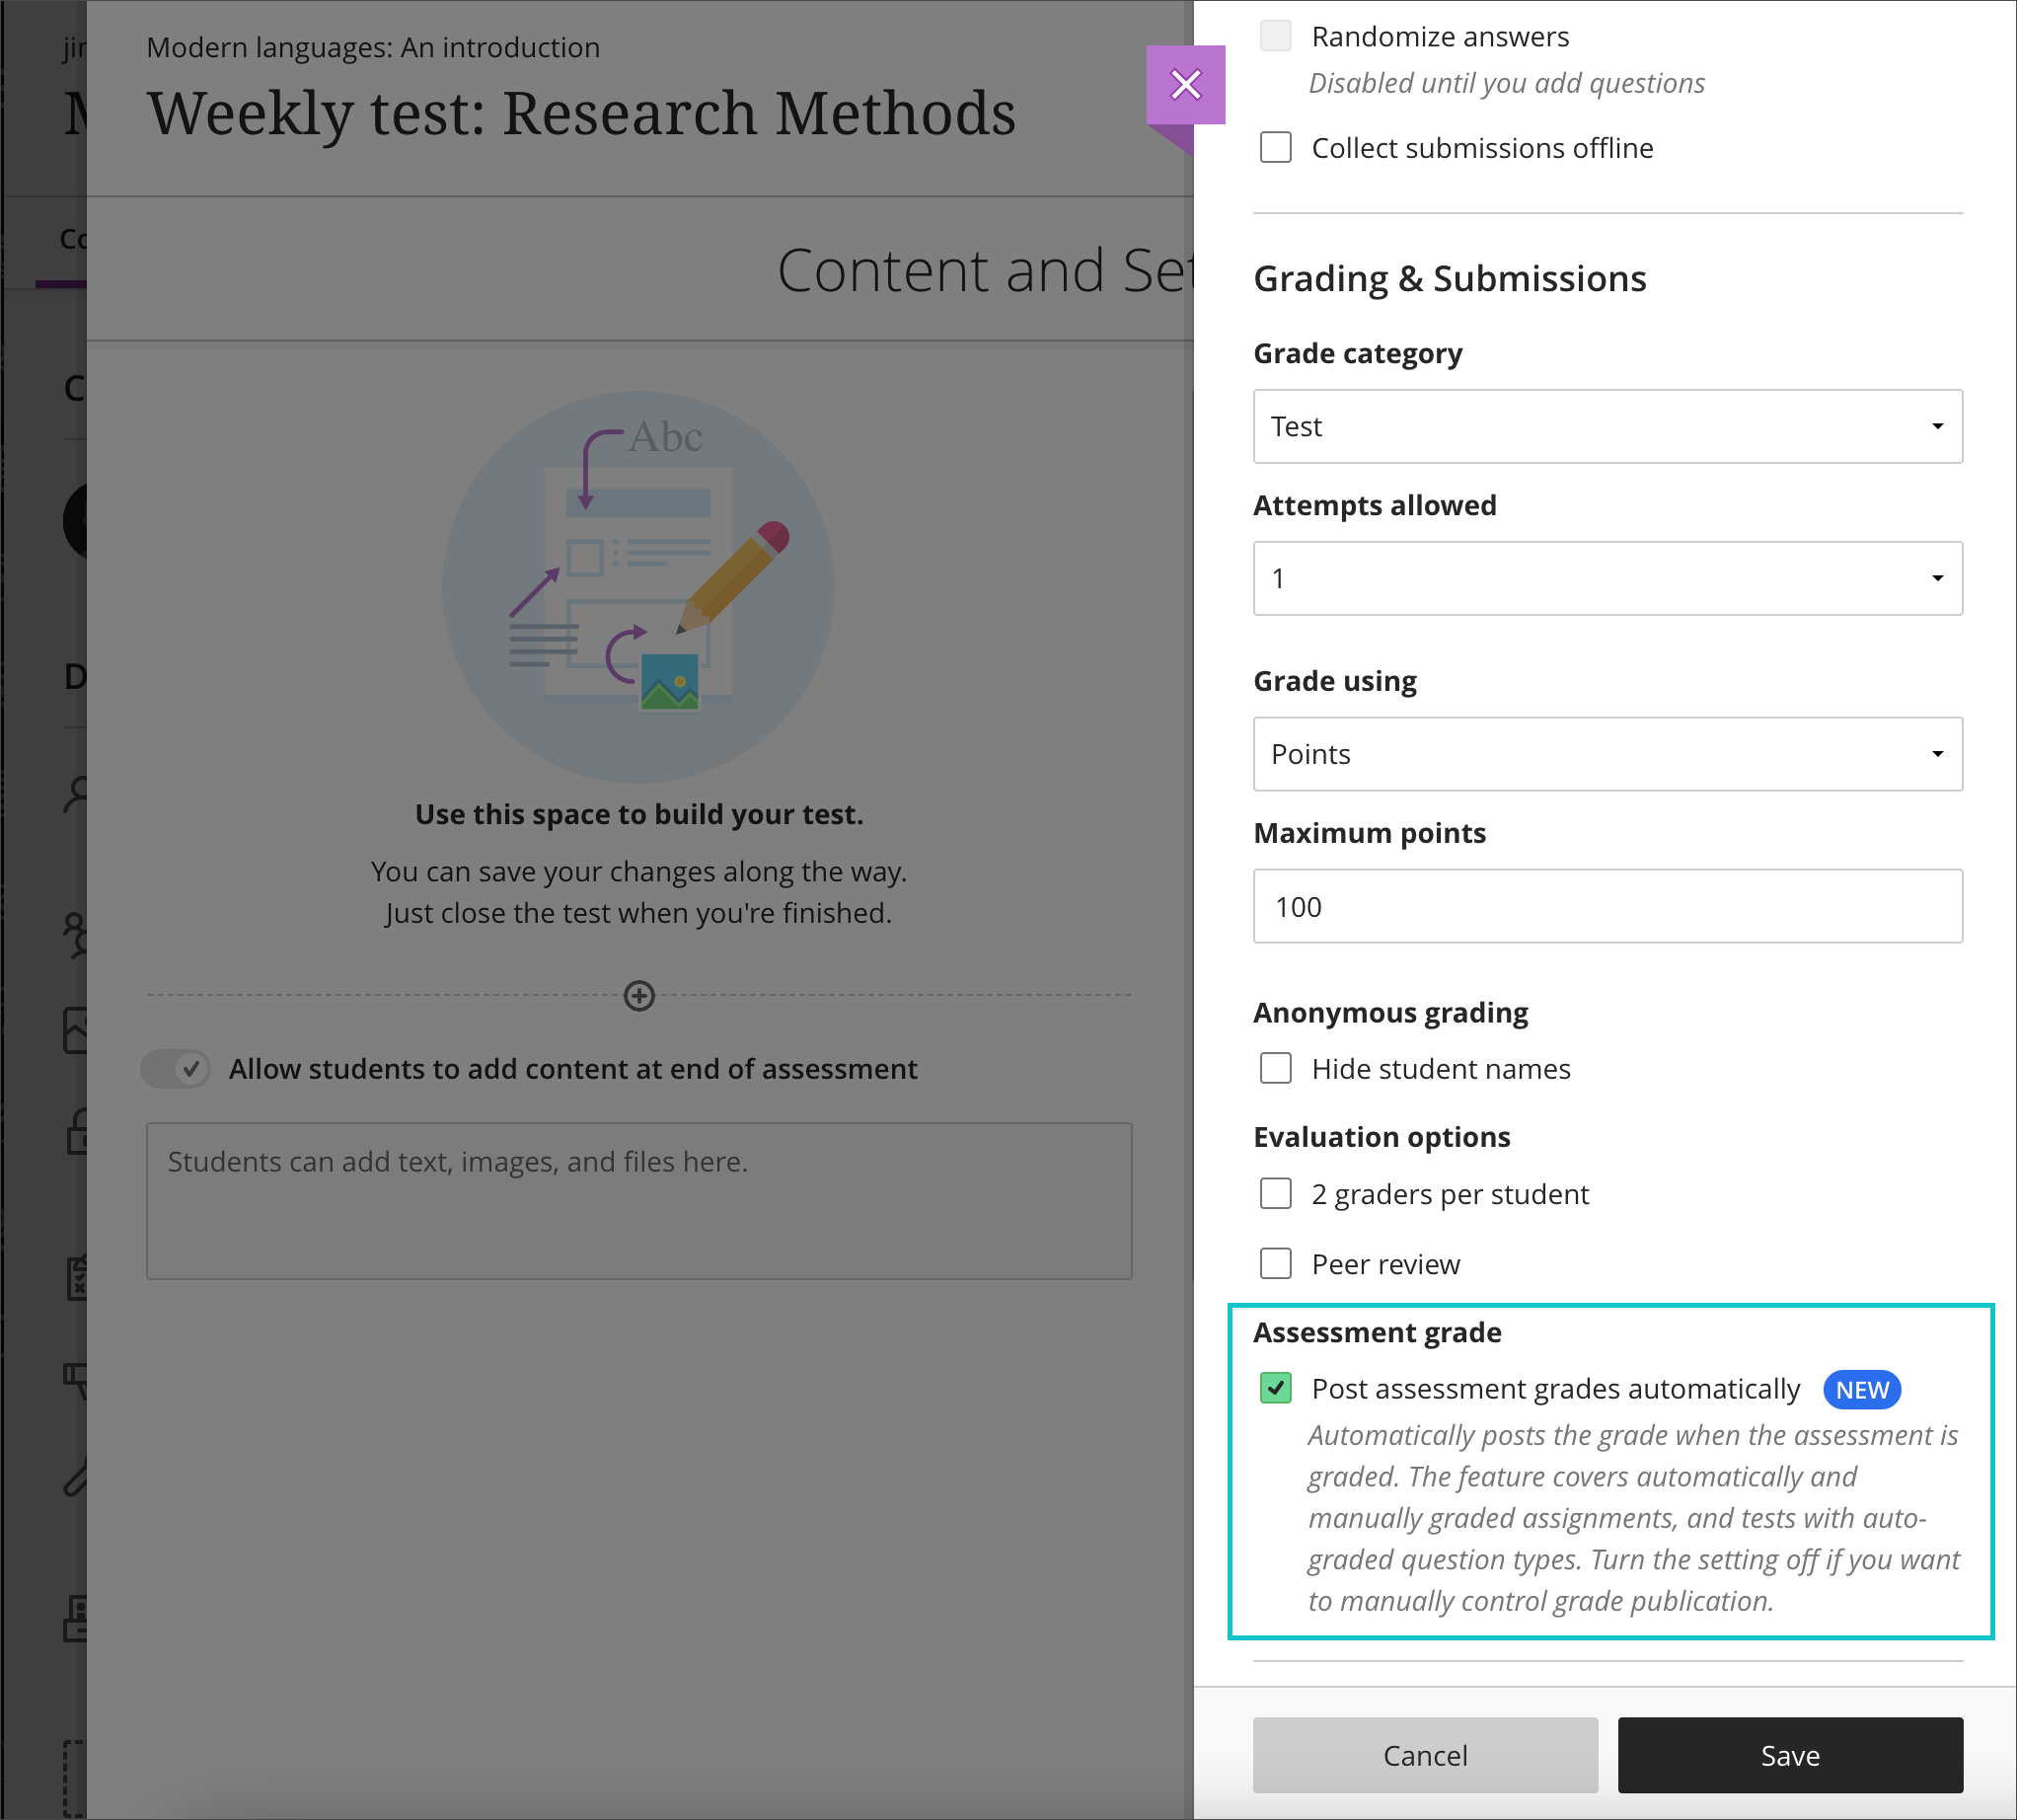
Instructors can access the automatic grade posting status indicator on the assessment preview panel.
Posting Grades
If you did not opt to post grades automatically after grading, you will need to post your students' grades in order for them to access them.
Post all grades:
Gradable Items in the Gradebook: Select Post X grades on the row of the assessment.
Grades tab in the Gradebook: Select on the assessment name on the top row and select Post to post all grades.
Submissions area of the assessment: In the submission or grades area of an assessment, select Post all grades on the top right. This will look different depending if it is an individual test or assignment, vs a group assessment.

Posting all grades in the Grades are for a group assignment.
Post individual grades
Gradable Items in the Gradebook: Select on the assessment name and select Post 1 grade for the specific student.
Grades in the Gradebook: Select on the cell that corresponds to the assessment and student and select Post.
Submissions area of the assessment: In the submission or grades area of an assessment, select Post Grade for the specific student.

Posting 1 grade for a specific student in the submissions area.
You can also see a what needs grading and posting via the Overview tab in the Gradebook.
Related pages
Parallel grading in a Ultra assignment
Peer review in Blackboard Ultra
Blackboard Help Resources:
https://help.blackboard.com/Learn/Instructor/Ultra/Grade
https://www.youtube.com/watch?v=zgKHJX3Omlk
