The Gradebook can be accessed from the top menu within your Ultra course or from the global navigation on the left-hand side of the learning management system.
By default, every gradable item you create in your course appears in the Gradebook. You can grade coursework, manage items, and post grades from the Gradebook.
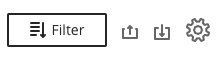
Gradebook icons


-
Search for submissions (using a submission receipt number).
-
Download the full Gradebook or download selected rows. Import your downloaded file into an application such as Microsoft Excel for statistical analysis. You can upload the edited file, making sure not add any additional columns.
-
Click on the gear icon to open the Gradebook Settings panel. This allows you to make changes to settings including Grade schemas, Student Performance, Automatic Zeroes, Overall Grade, Grade Categories, and Rubrics.
-
The purple flag icon indicates that a student has an accommodation.
-
The purple message bubble indicates a student has feedback.
Gradebook Views
You can grade coursework, manage items, post grades and check student status from four views. Switch between views by clicking on the top left icons. The default view will be the one you last accessed.
-
Overview highlights assessments that require grading and posting.
-
Gradable Items view shows all of your gradable items in a list.
-
Grades view shows all of your gradable items in a grid.
-
Students view allows you to click on a student and see all of their gradable items in a list. Selecting a student name will give you a list of all of the assessments, status, and grades.
Navigating the Gradable Items view
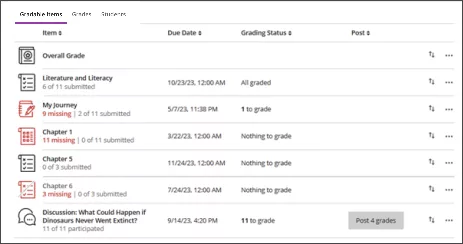
From the Gradable Items view you can:
-
Sort items in each column using the up and down arrows.
-
Click the three dots (…) to edit or delete the assessment.
-
Access student submissions by clicking on an assessment name:
-
Grading: Click on a student's name to enter the grading dashboard.
-
Override Grade: Click in the grading pill to enter an override grade. Note that if you have test questions or a rubric, it is best not to apply override grades.
-
Posting Grades: If there are grades ready for you to post, click Post 1 grade next to the student name or Post all grades on the top.
-
Download submissions by clicking on the three dots (…) to the right of a student’s name.
-
Navigating the Grades view
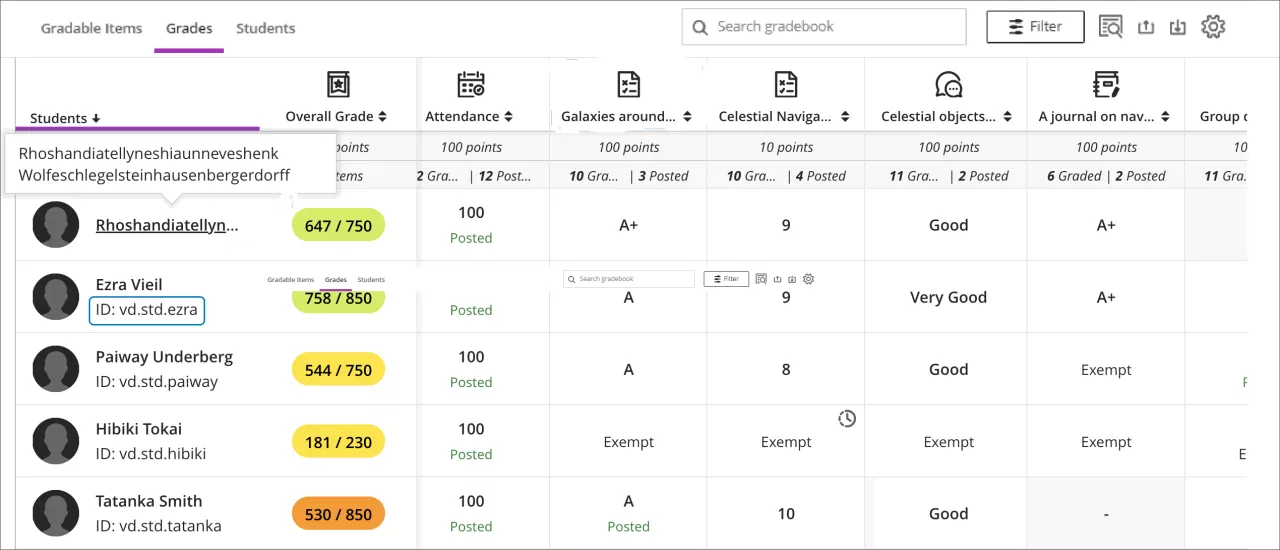
In the Grades view, a table appears with a column of student names on the left and gradable items across the top. In each cell you will see one of the following:
-
Blank cell appears if there is nothing that student can submit, for example if the gradable item is assigned to a group, and the student is not part of the group.
-
A dash indicates there is no submission.
-
“New Submission” appears if the student has submitted a gradable item. When you click on ‘New Submission, a drop down menu appears give you a choice to view item.
-
A grade: If there is a score, letter grade, percentage or checkmark, the assessment has been graded, but the grade has not been posted. Click on the cell to view the attempt OR post the grade.
-
Posted: The assessment has been graded, and the grade has been posted.
-
Exempt: The student has been exempted from that assessment.
-
A clock icon indicates that the student has an exception.
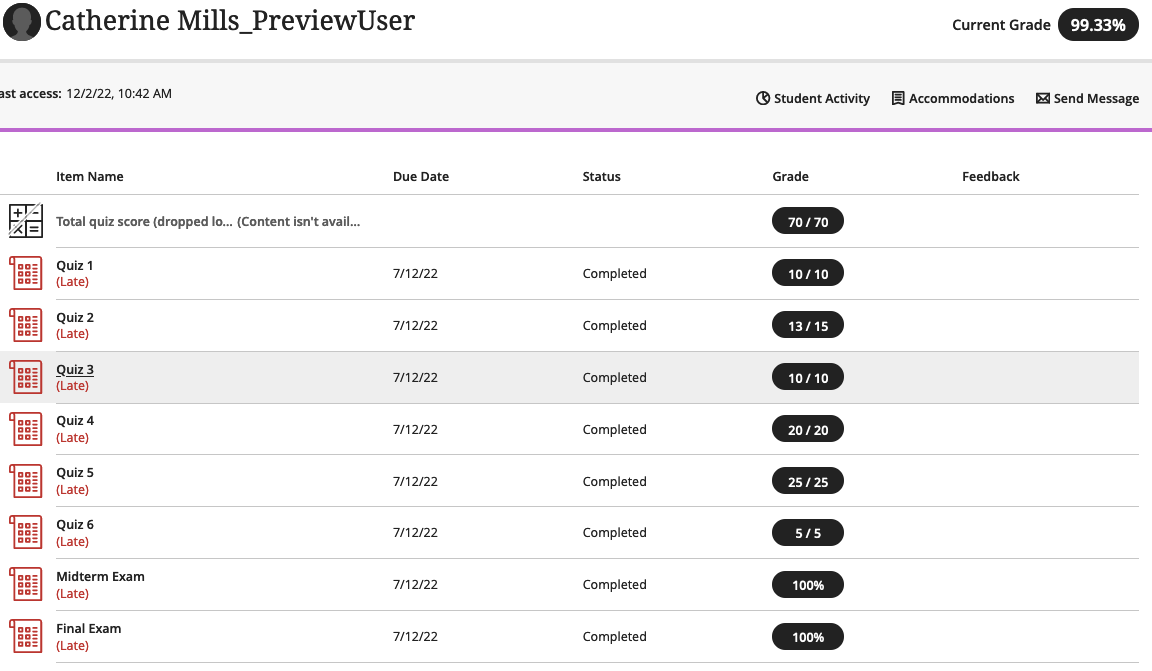
Students View
The Students view will show a list of your students along with columns for Student ID, Username, and Last Access. You can also sort each column, search by keyword, and access Accommodations and message the student via the three dots (…) to the right of the student’s name.

-
Click on a student name to view individual student information.
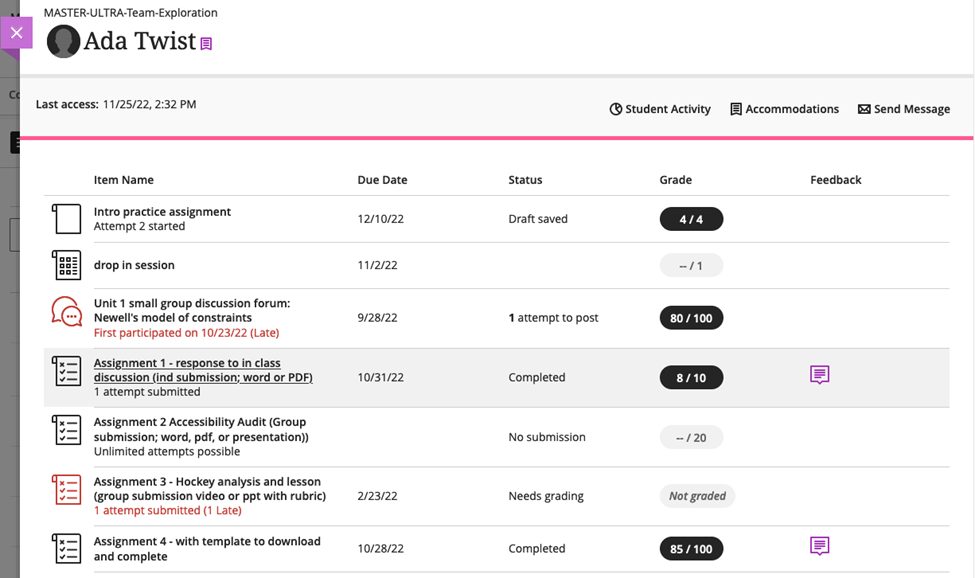
-
At the top, you can check the student’s last access to the course, their username, Student Activity, Accommodations, and also send a message.
-
In the main area, you can view the following:
-
Item name - click on the assessment title to access the student’s submission
-
Due date - shows posted due date for the content
-
Status - shows whether the submission has been completed or graded.
-
Grade - view grade, or click on grade to view submission, override the grade, etc.
-
Feedback - a purple text bubble appears if feedback has been provided
-
-
Click on the three dots (…) on a row to add or edit exceptions or exemptions for that student.
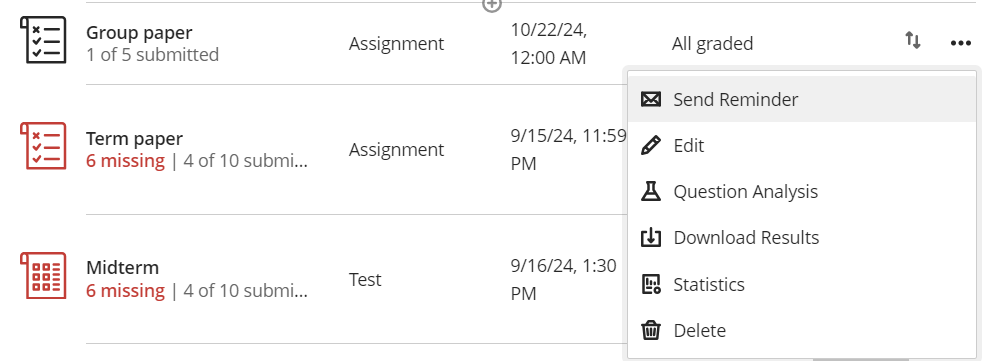
Assessment options
Access several options for each assessment in your course via the Gradebook. Note that not all options will be available for all assessment types.
How to access the options:
-
Gradable Items: Click on the three dots (…) next to an assessment to find the options.
-
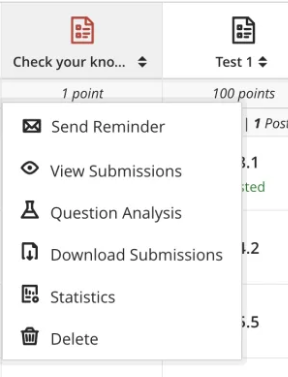
Grades: Click on the icon of an assessment to find the options.
|
|
Grades view |
-
Send Reminder: Non-submitters will receive a blind carbon copy (BCC) message stating that the assignment has not been received. Students will not know who else has not submitted.
-
View/Edit or Delete the gradable item.
-
Question analysis shows blackboard generated statistics on results.
-
Download Results can be downloaded as an .xls or .csv file.
-
Download Submissions will create a zip file with all student submissions.
-
Statistics: View grade statistics, status, and grade distribution.
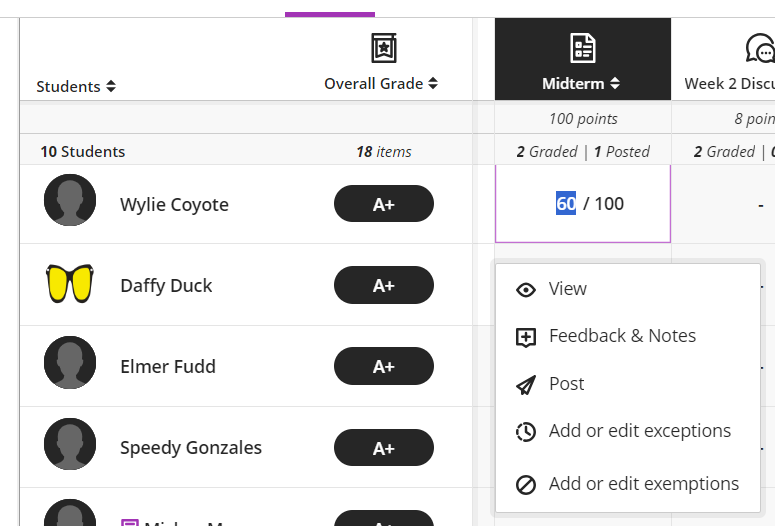
Submission options
Perform basic assessment actions for individual or group submissions in your course via the Gradebook. Note that not all options will be available for all assessment types.
-
Gradable Items: Click on the assessment name and then the three dots (…) to the right of the student’s name.
-
Grades: Click on the the cell that corresponds to the student’s assessment.

|
|
-
Feedback: Add feedback for overridden tests, assignment grades, and automatic zeros.
-
Post: Once a grade has been given, you need to post the grade to make it visible (unless you have set grades to be posted automatically).
-
Add or edit exceptions: Adjust the assessment due date, show on/hide after, and number of attempts for select students or groups.
-
Add or edit exemptions: Exempt select students from the assessment.
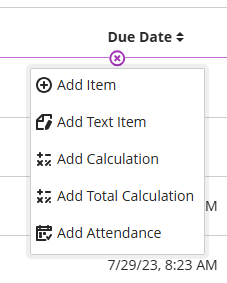
Add items, text columns, calculations, and Attendance to the Gradebook
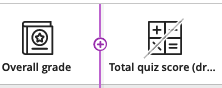
Hover where you would like to add an Item, Calculation, Total Calculation, or Attendance in either the Gradable Items or Grades view.
|
|
-
Item: Add a manual item for coursework, such as a participation grade. This won’t appear in the Course Content area and will have limited settings.
Note: instructors will not see the description outside of ‘edit’ mode, students will see it when they click on the item title -
Text-based column: Add a custom text-based column in the Gradebook. You can add up to 32 characters including alphabet, numbers, and special characters.
-
Calculation: Add a row for a calculation, such as an average assignments grade.
-
Total Calculation: Add a column for a points-based or weighted calculation, which is set up like the Overall Grade.
-
Attendance: Add a row for the tool Attendance. You do not need to keep track of attendance via the Gradebook. Mark attendance via the Attendance tool from Details & Actions in the Content area.
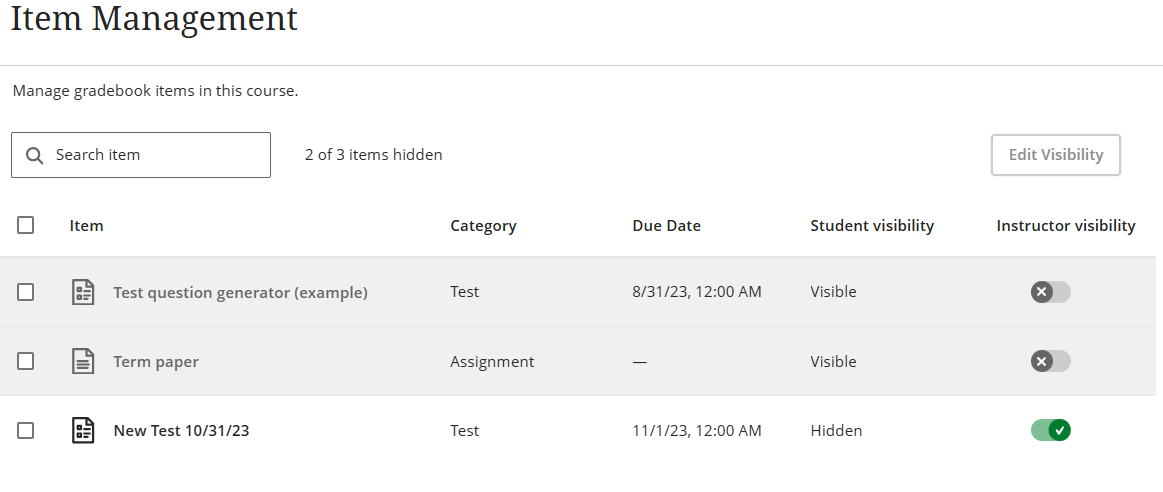
Hide Gradebook items
-
Navigate to the Gradebook settings (gear icon)
-
Under Item Management, click on Manage gradebook items
-
Check off all the items you wish to hide and click Edit Visibility in the top right OR toggle the visibility of the items off by clicking on the green check mark on a specific row.
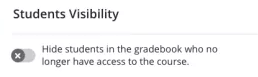
Hide unenrolled students (Students Visibility)
Instructors have the option to hide unenrolled students from the Gradebook. Instructors may want to do this when they have students who have dropped the course at some point during the semester, but still appear in the Gradebook.
Hiding unenrolled students via the Students Visibility feature will affect these areas: Grades page, Students page, Calculation student list, Gradable items student list, Submission tab for an assessment, and Student Activity tab for assessments.
-
Navigate to Gradebook > Gear icon > Students Visibility.
-
Toggle this feature off. The toggle will turn grey with an x.
Note: You can also hide/unhide unenrolled students via the Course Settings on the top right corner of the Course page. Filtering Gradebook data
Instructors and TAs can filter their Gradebook view by multiple variables like users, groups, items, and categories. This allows multiple filters to be used on demand. Besides seeing the filters in the gradebook, you can move back and forth among the students’ submissions that are included in the selected filters.
-
Click on Gradebook and then Grades.
-
Select the filter icon on the right side of the gradebook.
-
Choose the parameters for your filter.
-
Enter first or last name for student(s).
-
Enter group name(s).
-
Enter gradable item(s).
-
Select specific category / categories.
-
-
Click Apply.
Filtering by sections in a merged (CLX) course
Multiple course sections can be merged into one Blackboard course shell. Without splitting the shell, reviewing the Ultra Gradebook can be a bit cumbersome. To focus on grades from one section in the Gradebook, you can create a group for each section:
-
Designate a group set: navigate to > Course Groups in the left Details & Actions menu. You can create a New Group Set, Import Group Set, or Edit an existing Group Set.
-
Follow the steps above for filtering for Group sets.
It’s a good idea to give the group set a name such as “Lab section 1”, which will help both the instructor and students know they are reviewing the correct lab information.
At this time, there is no way to save filters within Blackboard. However, you can Bookmark the page, which will save the filters. Use the bookmark to access the filters again in the future
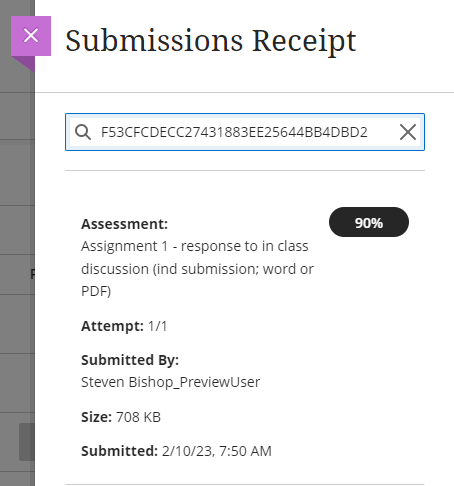
Accessing assignment submission receipts
For each assignment or test attempt a student makes, the instructor can search for a receipt confirmation number. Using this receipt confirmation number, the instructor can find the assessment name, assessment grade, number of attempts, size of file submission, and submission date/time stamp.
Search for the receipt number for a particular student:
-
Navigate to the Gradebook > Students view > Student name > and Assessment name.
-
The submission receipt number is located above the student submission in the grading platform.

Identify the assessment that matches a receipt number:
-
Navigate to the Gradebook > click on the submission receipt number icon (a page with a magnifying glass).
-
Enter receipt number into the Search box.
-
Information about the submission will display, including the attempt number, the student’s name, the size, and the date and time it was submitted.